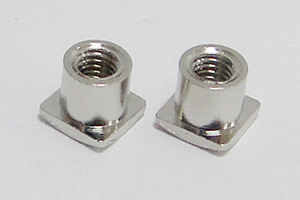
After CNC machining, metal parts often look raw and dull. They might have visible tool marks, sharp burrs, or uneven textures. These small flaws can ruin the look and the fit of your part. Polishing is the vital final step that fixes these issues. It turns a rough metal block into a smooth, professional prototype. Whether you need a mirror finish for a phone case or a low-friction surface for a gear, picking the right method is key. This guide will help you understand the best ways to polish your CNC metal prototypes.
Why Should You Polish Your Prototypes?
Polishing is about more than just a “shiny” look. It directly changes how your part works and how long it lasts.
What Are the Main Benefits?
- Better Looks: A clean finish makes your prototype look like a final product. In user tests, polished prototypes often see a 35% jump in positive feedback.
- Smoother Motion: Moving parts, like gears, need low friction. Polishing can boost the lifespan of these parts by up to 40%.
- Rust Protection: Smooth surfaces have fewer tiny cracks. This stops moisture from hiding, which prevents corrosion in aluminum or steel.
- Higher Precision: For medical parts, a rough surface can mess up measurements. Polishing ensures your part stays within a ±0.01mm tolerance.
What Are the Top Polishing Methods?
There are five main ways to polish a metal prototype. Your choice depends on the metal type and how complex the shape is.
Mechanical Hand Polishing
This is a manual process using tools like sandpaper, oilstones, and wool wheels. It is the best choice for custom parts with irregular edges. We start with coarse 120-grit paper and move up to fine 1000-grit. For optical parts, we can reach an ultra-fine Ra 0.008μm finish.
Fast Chemical Polishing
This method uses a liquid bath to dissolve surface bumps. It is very efficient for large batches. Since it is a liquid, it can reach inside hollow tubes or deep curves that tools cannot touch. It can speed up your workflow by 50% compared to hand work.
Precise Electrochemical Polishing
This uses an electric current and a special liquid to smooth the metal. It is the go-to choice for a mirror-like finish on stainless steel or copper. It is very consistent because the machine controls the process.
Specialized Aluminum Polishing
We use two specific baths for aluminum prototypes:
- Alkaline Polishing: This is eco-friendly. It uses safer chemicals to clean cast aluminum parts.
- Acidic Polishing: This is faster and creates a brighter shine. It is perfect for decorative trim or signage.
How to Choose the Best Method?
Finding the right fit involves looking at your material and your budget. The table below breaks it down for you.
| Method | Best Material | Final Roughness (Ra) | Best Shape | Cost per Part |
| Mechanical | All Metals | 0.008 – 0.2μm | Complex/Custom | High (Labor) |
| Chemical | Steel, Copper | 0.1 – 1.0μm | Hollow/Complex | Low |
| Electrochemical | Stainless Steel | 0.02 – 0.1μm | Simple/Mirror | Medium |
| Alkaline | Aluminum | 0.2 – 0.8μm | Cast Parts | Medium |
| Acidic | Aluminum | 0.1 – 0.5μm | Bright Trim | Low |
What Are the Expert Polishing Tips?
To get the best results, you need a plan. Small mistakes early on can lead to a ruined finish later.
- Deburr First: Always remove sharp edges with a deburring tool before you start polishing. This prevents metal flakes from scratching your smooth surface.
- Run a Test: Never polish your only part first. Use a scrap piece of the same metal to check the chemical strength or timing.
- Check the Heat: For chemical baths, keep the temperature steady. Even a 2°C change can cause an uneven finish.
- Try a Hybrid Approach: For the highest quality, use a “mix and match” strategy. Use mechanical polishing to remove tool marks first, then finish with electrochemical polishing for a perfect shine.
Conclusion
Polishing is the final touch that makes your CNC metal prototype successful. It improves the look, reduces wear, and protects against rust. By picking the right method—whether it is manual mechanical polishing or automated electrochemical polishing—you ensure your project meets its goals.
FAQ
How long does it take to polish a prototype?
Hand polishing usually takes 30 to 60 minutes for small parts. Chemical baths are much faster and can finish a whole batch in 10 to 30 minutes.
Can I polish a part with tiny holes?
Yes. Chemical polishing is the best choice here. The liquid flows into every hole to ensure a smooth finish everywhere.
What is the difference between Ra 0.008μm and Ra 0.8μm?
Ra 0.008μm is a perfect mirror, used for high-end lenses. Ra 0.8μm is smooth to the touch but looks matte, like a car bracket.
Discuss Your Projects with Yigu Rapid Prototyping
Need a high-quality finish for your next project? Our team at Yigu Technology specializes in precision CNC machining and professional surface finishing. We help you pick the best materials and polishing paths to save time and money. Contact us today to get a quote and bring your design to life with a perfect finish.