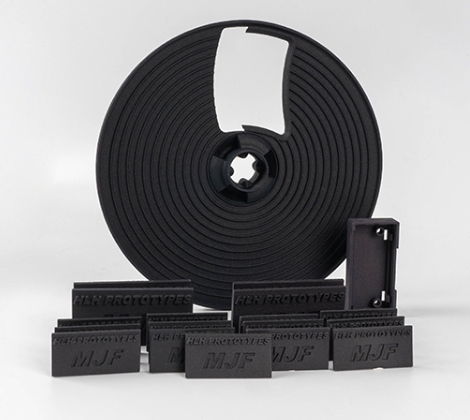
Introduction
When you need small batches of plastic parts for product development—whether it is a robot shell, a medical device component, or a consumer electronics enclosure—the plastic vacuum replica prototype model process stands out as a practical solution. Unlike traditional injection molding that requires expensive molds and long waiting times, this technology delivers high-quality plastic parts quickly and affordably. But how exactly does it work? What are its real limitations? And when should you choose it over other methods? This guide walks you through every step, backed by data and real project examples, to help you decide with confidence.
How Does the Plastic Vacuum Replica Process Work?
The process follows a clear, linear workflow that turns a digital design into physical plastic parts. Each phase builds on the previous one, so paying attention to details early saves headaches later.
What Goes into Creating the Master Prototype?
The master prototype is your original template. Every replica copies its shape and surface quality. If the master has scratches or rough spots, every single replica will show them.
Common manufacturing methods for masters include CNC machining for rigid, precise parts like robot gears. Another option is SLA 3D printing for complex shapes with fine details, such as medical device housings with small vents or logos. The choice depends on your part’s geometry and the surface finish you need.
Real project example: A team making a smartphone-sized robot shell used SLA printing for their master. The printer achieved a smooth surface with 0.05mm layer height. They spent an extra hour sanding the edges lightly—this small step ensured all 20 replicas later had clean, even edges without defects.
Key requirement: The master must be defect-free. Check it under good light. Run your finger over surfaces to feel for bumps. Any imperfection you miss gets multiplied across every replica.
How Do You Make a Silicone Mold That Captures Details?
Once the master is ready, you build a silicone mold around it. Silicone works perfectly because it is flexible, chemically stable, and picks up tiny features like textures or engraved text.
Process steps:
- Place the master inside a containment box
- Pour liquid silicone over it inside a vacuum chamber to remove air bubbles
- Let the silicone cure—usually 4 to 8 hours at room temperature, or 1 to 2 hours with gentle heat (50°C max)
Important fact: A standard silicone mold produces 15 to 20 replicas before it starts losing detail. For special cases like transparent parts or complex internal structures, mold life drops to 10 to 12 replicas. Plan your batch size accordingly.
What Happens During Vacuum Injection and Curing?
This is where your parts become real. You inject material into the silicone mold and cure it to form solid plastic replicas.
Material selection: Most projects use polyurethane resin. It is versatile and can mimic different plastic properties—rigid for structural parts, elastic for soft-touch surfaces, transparent for see-through windows, or colored for aesthetic samples.
Injection process details:
- Place the silicone mold inside a vacuum environment (this prevents air bubbles)
- Inject the polyurethane resin slowly and steadily
- Cure at controlled temperature—typically 60°C to 80°C for 30 to 60 minutes
Quality control check: After curing, remove the part from the mold. Inspect surfaces for smoothness. Measure critical dimensions to ensure they match the master prototype within acceptable tolerance.
Why Choose Plastic Vacuum Replica Over Other Methods?
Understanding the advantages helps you pick the right tool for your project. The table below compares vacuum replica with traditional injection molding across key factors.
| Factor | Plastic Vacuum Replica | Traditional Injection Molding |
|---|---|---|
| Mold Cost | Low (($500) to ($2,000) per mold) | High (($10,000) to ($50,000+) per mold) |
| Production Time | Fast (10 to 15 days for 50 parts) | Slow (4 to 8 weeks for mold making + 1 to 2 weeks for parts) |
| Batch Size | Ideal for small batches (1 to 50 parts) | Best for large batches (1,000+ parts) |
| Precision | High (standard tolerance: ±0.15mm per 100mm; max: ±0.05mm) | Very high (±0.02mm per 100mm) but often overkill for prototypes |
| Material Flexibility | Wide (rigid, elastic, transparent, colored polyurethane) | Limited (needs resin compatible with high-temperature molding) |
What Makes It a Smart Choice for Product Teams?
Low cost and fast delivery matter most when you are iterating. A startup testing a new robot’s plastic gripper paid $800 for 20 parts using vacuum replica. Getting an injection mold would have cost $15,000 and taken two months. The difference let them test, fail, and redesign three times within the same budget.
High precision with realistic surfaces means your replicas look and feel like final products. A consumer electronics company made vacuum replicas of a wireless speaker’s plastic case for focus group testing. Participants could not tell the replicas apart from injection-molded samples—giving the team confidence to proceed with their design.
Material diversity solves multiple needs with one process. Need a flexible part like a robot’s rubberized foot? Use elastic polyurethane. Need a transparent window for a medical device? Switch to clear resin. No need to change manufacturing methods or find new suppliers.
Where Do Companies Use Vacuum Replica in Real Projects?
The process works across industries. Here are three common use cases with specific examples.
How Does Functional Testing Save Money?
Before committing to mass production, teams test if parts work as intended. Finding problems early avoids expensive mold changes later.
Case study: An automotive company developing a new electric vehicle dashboard control panel made 10 vacuum replicas of the plastic panel. They installed actual electronic components—buttons, screens, circuit boards. During assembly, they discovered a 2mm gap between the screen and the panel frame. Fixing this in the digital model before making the injection mold saved them $20,000 in rework costs.
How Do Designers Use Replicas for Aesthetic Research?
Choosing the right color and texture often requires seeing physical samples, not just computer renders.
Case study: A robotics brand wanted to launch a robot vacuum with a premium look. They made 5 replicas in different finishes—matte black, matte white, glossy navy, glossy silver, and glossy gray. They showed these to 100 potential customers in a shopping mall. 65% preferred the matte white version. Using replicas instead of making five different injection molds saved the company $30,000 and helped them pick the winning design confidently.
When Does Low-Volume Production Make Sense?
Sometimes you need a small batch of parts for limited runs or replacements. Injection molding is overkill for these situations.
Case study: A medical device maker needed 30 plastic covers for a specialized ultrasound probe. The probes were used in 10 hospitals for a clinical trial. Injection molding would have cost $12,000 for a single mold plus per-part costs. Vacuum replica cost $1,800 total and delivered all 30 parts in 12 days. The trial started on time, and the budget stayed intact.
What Technical Challenges Might You Face?
No process is perfect. Knowing common problems and their solutions keeps your project on track.
How Do You Extend Limited Silicone Mold Life?
Problem: Silicone molds only last 10 to 20 replicas. For parts with fine details like a robot’s gear housing with tiny teeth, wear happens even faster.
Solution: Upgrade your materials and process. Use high-temperature-resistant silicone instead of standard grade—this extends life by about 30%. Also cure the silicone at 70°C (instead of room temperature). Heat makes the mold harder and more durable. A robotics company used this approach and got 26 good replicas from one mold, up from their usual 20.
How Do You Handle Wall Thickness Limits?
Problem: The minimum wall thickness for vacuum replicas is 0.5mm. Parts designed thinner than this crack or warp during curing. The optimal range is 1.5mm to 2.5mm for consistent results.
Solution: Check your design early. Use 3D modeling software like SolidWorks or Fusion 360 to measure wall thickness before making the master. A drone team designing a thin sensor cover initially modeled it at 0.3mm thick. They increased it to 1.5mm after checking the guidelines. All replicas held up perfectly during vibration testing.
How Do You Maintain Precision Throughout?
Problem: Temperature or pressure changes during injection can shift dimensions. A part meant to be 100mm long might come out 100.2mm long, causing assembly issues.
Solution: Control process parameters tightly. Keep injection temperature steady at 75°C (±2°C) . Maintain vacuum pressure at 0.08MPa. Use a digital controller to monitor values in real time—don’t rely on manual gauges. A medical device manufacturer did this and reduced tolerance errors from ±0.1mm to ±0.07mm, meeting strict industry standards for surgical tools.
Where Is Vacuum Replica Technology Headed?
The process continues evolving. Three trends will shape its future.
Better materials: New polyurethane resins resist heat up to 150°C (compared to 80°C today) and withstand higher impacts. This means replicas can soon be used under car hoods or in industrial robots—places too harsh for current materials.
Automated production: Robots are entering the workflow. Automated systems now pour silicone into molds and remove cured replicas. This cuts labor costs by about 40% and reduces human errors like uneven pouring or demolding damage.
Eco-friendly options: Plant-based polyurethane resins are in testing. Early results show they emit 50% fewer harmful chemicals during curing compared to petroleum-based versions. For companies focused on sustainability, this is a game-changer.
Conclusion
The plastic vacuum replica prototype model process gives product teams a powerful way to get high-quality plastic parts without the high cost and long wait of injection molding. It works best for small batches—anywhere from 1 to 50 parts—and delivers precision within ±0.15mm typically. You can use it for functional testing to catch design flaws early, for aesthetic research to pick winning colors and textures, or for low-volume production when you need just a few parts. The process has limits: silicone molds wear out after 15 to 20 uses, walls must be at least 0.5mm thick, and temperature control matters for accuracy. But with the right preparation and material choices, these challenges are easy to manage. For startups iterating fast, for engineers validating designs, and for businesses needing small batches, vacuum replica remains one of the smartest choices available.
FAQ
How much does a plastic vacuum replica prototype cost?
Cost depends on part size and quantity. A small part like a 5cm x 5cm robot component costs $15 to $30 per replica. For 20 parts, total cost including the mold runs $300 to $600. This is 70% to 80% cheaper than injection molding for small batches.
How long does the entire process take?
From master prototype to finished replicas: 10 to 15 days. Breaking it down: master prototype takes 3 to 5 days, silicone mold making takes 2 to 3 days, and vacuum injection with curing takes 5 to 7 days. For urgent projects, using faster-curing silicone can shorten this to 7 to 10 days.
Can plastic vacuum replicas be used as final products (not just prototypes)?
Yes—for low-volume final products. If you are making 50 limited-edition wireless earbud cases, replicas work well. But for large batches of 1,000 or more, injection molding becomes cheaper per part (even with the high mold cost). Replicas also work great for replacement parts—like 20 plastic covers for old medical devices still in use.
What materials can I use in vacuum replica molding?
The most common material is polyurethane resin. It comes in many forms: rigid like ABS plastic, flexible like rubber, transparent like glass, and in any color you need. Some suppliers offer flame-retardant grades or high-temperature grades for special applications.
How accurate are vacuum replica parts?
Standard tolerance is ±0.15mm per 100mm of length. With careful process control, you can achieve ±0.05mm per 100mm for critical features. This matches the accuracy needed for most functional tests and assembly checks.
What is the largest part size possible?
Typical maximum size is about 400mm x 400mm x 300mm. Larger parts become difficult to handle and risk incomplete filling or bubbles. For bigger parts, consider splitting your design into smaller components that assemble together.
Discuss Your Projects with Yigu Rapid Prototyping
Have a project that needs plastic vacuum replica prototypes? Talk to our team at Yigu Technology. We help robotics startups, medical device companies, and consumer electronics brands turn their designs into physical parts fast. Our standard delivery is 10 to 12 days, and we regularly achieve ±0.05mm precision on critical features. We also advise on material selection—whether you need transparent covers, flexible seals, or flame-retardant housings. Tell us about your part, your quantity, and your timeline. We will give you a clear quote and a realistic schedule. Contact Yigu Rapid Prototyping today and move your project forward.