Introduction
The plastic aerospace prototype model processing process is a high-precision manufacturing workflow specifically tailored for the demanding aerospace industry. It verifies design feasibility, tests functionality under extreme conditions, and provides critical data for mass production—all while meeting the industry’s strict standards for accuracy and reliability. Whether you’re developing satellite components, aircraft interior parts, or rocket engine elements, this guide breaks down each step of the process with real-world examples and hard data to help you navigate every stage successfully.
How Do You Select the Right Plastic for Aerospace Prototypes?
Material Selection Is Your First Critical Decision
Choosing the correct plastic is absolutely the first and most critical step in the plastic aerospace prototype model processing process. Aerospace prototypes demand materials that balance mechanical strength, temperature resistance, and processability in ways that ordinary applications don’t require.
Aerospace manufacturer recently learned this lesson when developing a cabin window cover prototype. They needed a material that would match the optical clarity of real aircraft windows while surviving scratches and cleaning chemicals. After evaluating several options, they chose PMMA for its 92 percent light transmission and excellent scratch resistance. The prototype successfully mimicked the final product’s appearance and durability during testing, validating their material choice before production.
Common Materials and Their Aerospace Applications
| Material | Key Properties | Ideal Aerospace Applications | Machining Ease | Cost Range (Per kg) |
|---|---|---|---|---|
| ABS | Good transparency, easy to machine, moderate impact resistance | Internal component prototypes, dashboard parts, non-structural housings | High | $18–$28 |
| PC | Excellent impact resistance, high-temperature tolerance (up to 130°C), rigid | Engine compartment prototypes, heat-resistant covers, structural brackets | Medium | $25–$35 |
| PMMA | High transparency (92% light transmission), good scratch resistance | Optical component prototypes, window mockups, lens covers | Medium | $22–$32 |
| PP | Wear-resistant, acid/alkali resistant, lightweight | Fluid system prototypes, fuel line mockups, chemical containers | High | $15–$25 |
| Nylon | High tensile strength, wear-resistant, flexible | Moving part prototypes, hinge components, snap-fit assemblies | Low | $35–$45 |
| POM | Excellent dimensional stability, low friction, high mechanical strength | Precision component prototypes, gear mockups, bearing surfaces | Medium | $30–$40 |
Material Selection Tips That Save Time and Money
When choosing materials for aerospace prototypes, prioritize these four key factors:
Mechanical properties: Ensure the material can withstand aerospace-specific stresses like vibration, pressure differentials, and G-forces during testing.
High-temperature resistance: If your prototype will be exposed to engine heat or aerodynamic heating, opt for plastics like PC that maintain properties at elevated temperatures.
Corrosion resistance: For prototypes contacting fluids, fuels, or hydraulic systems, use PP or nylon that resist chemical attack.
Biocompatibility and toxicity: For cabin interior prototypes, select materials meeting low-toxicity and flame retardancy standards required for aircraft use.
What Data Collection Steps Ensure Prototype Accuracy?
Laying the Groundwork for Precision
Accurate data collection ensures your prototype matches the original design exactly. This phase of the plastic aerospace prototype model processing process involves gathering and verifying design files, then creating physical samples for confirmation before any plastic is cut.
A team working on a rocket engine bracket prototype discovered a 0.5mm curvature error during this phase. They caught it in a simple gypsum sample, corrected the CAD file before machining plastic, and avoided wasting $2,000 worth of high-grade PC material. This single catch paid for the entire prototyping effort many times over.
Key Data Collection Steps
Import 3D drawing files: Request complete 3D CAD files from your design team in formats like STEP or IGES. These files are your blueprint for machining. For a recent aerospace sensor housing prototype, the STEP file required 0.02mm dimensional tolerances to ensure proper fit with existing components.
Create gypsum samples: Use the 3D files to make a low-cost gypsum sample. Gypsum is easy to shape and inexpensive, making it perfect for verifying:
- Shape accuracy: Does the sample match the design’s intended contours?
- Curvature consistency: Are all curved surfaces smooth and uniform?
- Standard compliance: Does the sample meet aerospace size and fit standards?
Verify before machining: Never skip this step. A few hours spent validating with gypsum can save weeks of rework and thousands in wasted materials.
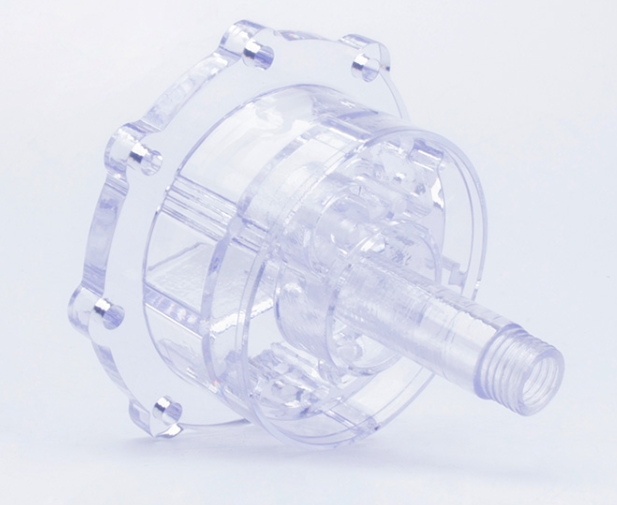
How Does CNC Machining Create Precision Aerospace Prototypes?
The Core of the Process
CNC machining is the absolute core of the plastic aerospace prototype model processing process. It uses computer-controlled cutting tools to transform raw plastic into finished prototypes with remarkable accuracy and repeatability.
A manufacturer recently machined a PC prototype for an aerospace valve body using a 5-axis CNC machine. The programmed toolpath cut internal channels just 0.5mm wide while simultaneously shaping external curved surfaces. The result was a prototype with ±0.01mm accuracy—well within aerospace standards and ready for immediate functional testing.
CNC Machining Workflow
Programming and setup: Your team uses CAM software to generate toolpaths—these dictate exactly where the cutting tool moves to remove excess material. Cutting parameters must be adjusted for each plastic:
- Spindle speed: Around 3,000 RPM for ABS, 2,500 RPM for PC
- Feed rate: Approximately 400 mm/min for soft plastics, 300 mm/min for rigid materials
Multi-axis machining: For complex aerospace parts like curved engine components or ergonomic brackets, use 5-axis CNC machines. These machines can access all sides of the plastic in a single setup, eliminating repositioning errors and improving precision by up to 30 percent compared to traditional 3-axis machines.
In-process verification: Smart shops verify critical dimensions during machining, not just at the end. This catches any tool wear or setup issues before they ruin a part.
What Post-Processing Steps Enhance Prototype Quality?
Improving Appearance and Durability
Post-processing transforms a machined part into a finished prototype ready for evaluation and testing. These steps improve both appearance and functional performance.
Deburring: Use 400-grit sandpaper or specialized deburring tools to remove sharp edges and tool marks. This step is critical for prototypes that will be handled during testing—like control panel mockups—to prevent injury and ensure realistic ergonomic evaluation.
Surface treatment options:
- Painting: Apply aerospace-grade paints like heat-resistant enamel to match final product colors and protect against corrosion
- Silk screening: Add permanent labels for part numbers, safety warnings, or identification marks
- Electroplating: For prototypes needing electrical conductivity, apply thin metal coatings like nickel to critical surfaces
A recent aerospace project required a prototype with specific color matching and anti-corrosion properties. Post-processing with aerospace-grade paint achieved both goals, and the prototype passed all visual inspections before functional testing began.
How Do You Verify Prototype Functionality Through Testing?
Assembly Testing Confirms Fit and Function
Assembly testing ensures your prototype works as intended and integrates properly with other aerospace components. This step catches fit issues that dimensional inspections alone might miss.
Test assembly steps:
First, assemble all prototype parts to check fit accuracy. Does a sensor housing align correctly with its mounting points? Does a bracket mate properly with existing structures? Are there any gaps or interference issues?
Second, verify mold quality and look for any warping or defects from machining that might affect assembly. Even a perfectly dimensioned part can have subtle warping that prevents proper assembly.
Functional Testing Simulates Real Conditions
Subject your assembled prototype to simulated aerospace conditions:
- Structural stability: Test vibration resistance at relevant frequencies—perhaps 50 Hz for 1 hour—to ensure no loosening or fatigue
- Mechanical performance: Verify that moving parts like hinges or latches operate smoothly through their full range
- Environmental resistance: Expose the prototype to high temperatures, humidity, or pressure differentials matching intended use
Real-world example: A prototype of an aerospace fuel line fitting made from PP underwent rigorous functional testing. Engineers exposed it to 80°C fuel at 10 psi pressure for 24 continuous hours. The prototype showed no leaks and no deformation, confirming it met all performance standards before production commitment.
How Should You Package and Ship Aerospace Prototypes?
Protecting High-Value Components
The final step in the plastic aerospace aerospace prototype model processing process is proper packaging and shipping. Aerospace prototypes are often high-value, delicate, and on tight schedules—so proper handling is essential.
Safe packaging practices:
Use custom foam inserts and rigid cardboard boxes to cushion prototypes during transit. For especially fragile parts like PMMA window mockups, add bubble wrap and clearly label boxes as “Fragile—Aerospace Prototype.”
Logistics selection matters:
Choose a logistics provider with demonstrated experience shipping aerospace components. Track shipments in real time and confirm delivery with the receiving team.
Delivery time planning:
Coordinate closely with your client to set realistic delivery dates. For urgent projects—like prototype testing before a satellite launch—prioritize expedited shipping while never compromising packaging safety. A prototype that arrives damaged is useless, no matter how fast it got there.
What Real Savings Can You Expect from Proper Prototyping?
The Cost of Getting It Wrong
Consider an aerospace company developing a new sensor housing. They spent $8,500 on PC prototypes to test complex internal geometries. Testing revealed that wall thickness in one area was insufficient for the pressure requirements. They adjusted the design, made new prototypes for $3,200, and validated the fix. Total prototyping cost: $11,700.
If they’d gone straight to production, they would have spent $95,000 on injection molds before discovering the problem. Fixing it then would mean scrapping and recutting molds—a $95,000 loss plus 4 to 6 months of delay. The prototyping approach saved them over $83,000 and kept their project on schedule for a critical launch window.
Industry Data Supports Prototyping
Industry surveys consistently show that aerospace prototyping reduces development costs by 30 to 45 percent compared to going directly to production. These savings come from:
- Catching design flaws before expensive tooling is cut
- Validating material choices without buying full production quantities
- Testing assembly methods to optimize manufacturing efficiency
- Avoiding field failures that trigger expensive recalls and reputation damage
What’s Yigu Technology’s Approach to Aerospace Prototyping?
Experience You Can Trust
At Yigu Technology, we deeply understand that the plastic aerospace prototype model processing process demands exceptional precision and material expertise. We’ve seen too many clients struggle with material mismatches or machining errors that could have been prevented.
Our solution combines three elements:
Tailored material recommendations: We help you match materials to applications—PC for high-heat parts, PMMA for optical components, nylon for moving elements—based on decades of accumulated experience.
Advanced machining capability: Our 5-axis CNC machines achieve ±0.005mm accuracy, exceeding typical aerospace requirements. Combined with skilled programmers, we deliver prototypes that meet all dimensional specifications.
Early error detection: We offer in-house gypsum sampling to catch design flaws before any plastic is cut. This single step cuts rework time by an average of 40 percent across our aerospace projects.
Quality You Can Count On
Our post-processing team uses aerospace-grade paints and coatings, ensuring every prototype meets industry standards for appearance and protection. We deliver reliable prototypes on time, helping clients accelerate their aerospace development cycles with confidence.
FAQ
Which material is best for a plastic aerospace prototype that needs to withstand high temperatures?
PC (Polycarbonate) is the ideal choice for most high-temperature aerospace applications—it tolerates continuous exposure up to 130°C while maintaining excellent impact resistance. For even higher temperatures up to 150°C, consider modified PC blends or specialty high-temperature plastics. Always test your specific material under your actual operating conditions to confirm performance.
How long does the entire plastic aerospace prototype model processing process take?
Timelines depend directly on complexity. A simple ABS prototype like a small sensor housing typically takes 5 to 7 days from material selection through shipping. A complex 5-axis machined PC prototype such as an engine component with internal features requires 10 to 14 days, including gypsum sampling and functional testing. Always discuss your timeline needs early with your prototyping partner.
Can CNC machining achieve the tight dimensional tolerances required for aerospace prototypes?
Absolutely. Modern 5-axis CNC machines routinely achieve ±0.005mm tolerances—significantly tighter than typical aerospace requirements of ±0.02mm. When you combine this machine capability with high-quality CAD/CAM software and experienced programmers, your prototype will meet or exceed all dimensional specifications.
What’s the most common mistake in aerospace prototype material selection?
The most frequent error is choosing a material based on one property—like strength or temperature resistance—while ignoring others like chemical compatibility or dimensional stability. A material that handles heat perfectly might swell when exposed to hydraulic fluid, ruining your test results. Always evaluate all relevant properties for your specific application.
Do I need to prototype every aerospace component?
No—focus your prototyping effort on parts that are new, mission-critical, or high-risk. Standard components like off-the-shelf fasteners, standard brackets, or previously validated designs don’t need prototyping. Use your budget where it provides the most learning and risk reduction.
Can prototypes be used for flight testing?
Generally, no. Prototypes made through this process are for design validation and functional testing on the ground. Flight-ready parts require production-grade materials, processes, and certifications. However, successful prototype testing gives you confidence to proceed with flight-qualified production.
Discuss Your Aerospace Projects with Yigu Rapid Prototyping
Ready to move your aerospace project forward with confidence and precision? The engineering team at Yigu Rapid Prototyping brings extensive specialized experience in the plastic aerospace prototype model processing process. We’ve helped hundreds of engineers and procurement professionals validate designs, select optimal materials, and avoid costly manufacturing mistakes.
Whether you’re developing satellite components, aircraft interior systems, rocket engine parts, or next-generation aerospace technology, we’re here to help. Contact us to discuss your specific requirements, material needs, and timeline. Let’s build something great together—the right way, from the very first prototype.