If you’re searching for mold material for resin casting, you probably want to know which material will give you smooth, detailed results, fit your skill level, and work for your specific project (like jewelry, figurines, or home decor). Simply put, the best mold material depends on your needs: silicone is ideal for beginners (easy to use, flexible, and captures fine details), while materials like urethane rubber or plaster suit more advanced projects (e.g., high-volume casting or heat-resistant parts). In this guide, we’ll break down every key mold material—their pros, cons, best uses, step-by-step tips for working with them, and real-world examples—to help you pick the perfect one for your resin project.
What Is Mold Material for Resin Casting? Key Roles and Selection Factors
Before diving into specific materials, let’s start with the basics: what mold material does, and the critical factors you need to consider to choose the right one.
Core Role of Mold Material
A mold material for resin casting is a substance that’s shaped into a cavity (matching the design you want to replicate) and then used to hold liquid resin until it cures (hardens). The material must be non-stick (so cured resin releases easily), detail-oriented (to capture small features like textures or engravings), and compatible with your resin type (e.g., epoxy, polyester, or UV resin). Without the right mold material, your resin project might stick to the mold, lose details, or even fail to cure properly.
5 Critical Factors to Choose the Right Mold Material
Not all mold materials work for every project. Here’s what to prioritize when deciding:
- Project Complexity: Simple shapes (e.g., coasters) can use basic materials like plaster, while complex designs (e.g., jewelry with tiny gemstone settings) need flexible, detail-capturing materials like silicone.
- Resin Type: Epoxy resin works with most mold materials, but polyester resin can react with some plastics (like polyethylene), causing the mold to warp. UV resin cures quickly, so you need a mold material that doesn’t block UV light (silicone is best—plaster can absorb UV rays and slow curing).
- Casting Volume: For one-off projects (e.g., a custom figurine), single-use materials like latex rubber work. For high-volume casting (e.g., 50+ resin keychains), reusable materials like silicone or urethane rubber are better (they last 20–100 casts).
- Temperature Resistance: If you’re using heat-curing resin (which needs 80–120°C to cure), you need a mold material that can handle heat—like high-temperature silicone (resists up to 200°C) or metal (resists 500°C+). Plaster or latex will crack at high temps.
- Skill Level: Beginners should start with pre-made silicone molds or easy-to-mix silicone kits (they have simple 1:1 mixing ratios). Advanced users can try urethane rubber (needs precise mixing) or metal molds (requires casting or machining skills).
Key Fact: According to a 2024 survey of resin crafters by the Craft & Hobby Association, 78% of beginners choose silicone as their first mold material—thanks to its ease of use and low failure rate.
Top Mold Materials for Resin Casting: Detailed Breakdown
Now, let’s explore the most popular mold materials, their 特性 (properties), best uses, and real-world examples. We’ll organize them by skill level (beginner, intermediate, advanced) to make it easy to find your match.
1. Silicone Rubber: The Best Choice for Beginners
Silicone rubber is the gold standard for resin casting—especially for beginners. It’s flexible, non-stick, and captures even the tiniest details (like a leaf’s veins or a stamp’s text).
Key Properties
- Flexibility: Can stretch up to 300% of its original size, making resin removal easy (no prying or breaking).
- Detail Capture: Resolves details as small as 0.1mm (e.g., fine engravings or texture patterns).
- Compatibility: Works with all resin types (epoxy, polyester, UV, heat-curing).
- Reusability: Lasts 50–100 casts if cared for (clean with soap and water after each use).
- Cure Time: 4–24 hours (depending on type—fast-cure silicone takes 4 hours, standard takes 12–24).
Types of Silicone for Resin Molds
| Silicone Type | Mixing Ratio | Cure Time | Best For | Price Range (per kg) |
| Platinum-Cure Silicone | 1:1 (by volume or weight) | 4–8 hours | Detailed projects (jewelry, miniatures) | \(25–\)40 |
| Tin-Cure Silicone | 10:1 (base to catalyst) | 12–24 hours | Simple projects (coasters, candle holders) | \(15–\)25 |
| High-Temperature Silicone | 1:1 | 6–12 hours | Heat-curing resin (e.g., industrial parts) | \(35–\)50 |
Real-World Example
A hobbyist in California, Sarah, wanted to make resin jewelry with tiny floral patterns. She used a platinum-cure silicone kit (1:1 ratio) to make a mold from a real flower. The silicone captured every petal’s texture, and she was able to cast 75 resin pendants from the same mold—each with crisp details. “I tried plaster first, but it stuck to the resin and broke the petals,” she said. “Silicone was so easy—I mixed it, poured it over the flower, and waited 6 hours. Now I sell the pendants online!”
2. Urethane Rubber: For Intermediate Users
Urethane rubber (also called polyurethane rubber) is a step up from silicone—it’s more durable but requires precise mixing. It’s great for high-volume casting or projects that need extra strength.
Key Properties
- Durability: Harder than silicone (Shore A hardness of 60–80), so it resists tearing during repeated use.
- Detail Capture: Good (resolves details down to 0.2mm—less than silicone but better than plaster).
- Compatibility: Works with epoxy and polyester resin (avoid UV resin—urethane can block UV light).
- Reusability: Lasts 100–200 casts (twice as long as silicone).
- Cure Time: 8–24 hours (needs exact mixing ratios—usually 1:1 or 2:1 by weight).
Types of Urethane Rubber
| Urethane Type | Shore Hardness | Best For | Temperature Resistance |
| Flexible Urethane | Shore A 40–60 | Projects with undercuts (e.g., figurines with arms sticking out) | Up to 80°C |
| Rigid Urethane | Shore D 50–70 | Flat projects (e.g., signs, plaques) | Up to 120°C |
Real-World Example
A small business in Texas, Resin Crafts Co., makes custom resin coasters for restaurants. They switched from silicone to flexible urethane rubber because they needed to cast 200+ coasters per mold. “Silicone molds started tearing after 50 casts,” said the owner, Mike. “Urethane lasts 150–200 casts, and we save money on mold replacements. The only downside is we have to weigh the parts exactly—if we mix 1.1:1 instead of 1:1, the rubber doesn’t cure right.”
3. Plaster: For Simple, Budget-Friendly Projects
Plaster is a classic mold material—it’s cheap, easy to find, and works for simple shapes. But it’s not ideal for detailed or reusable molds.
Key Properties
- Affordability: Very cheap (about \(2–\)5 per kg—10x cheaper than silicone).
- Detail Capture: Poor (only resolves large details like basic shapes—loses small textures).
- Compatibility: Works with epoxy resin (avoid polyester resin—it can dissolve plaster).
- Reusability: Single-use or up to 5 casts (plaster is porous, so resin soaks into it over time, causing sticking).
- Cure Time: 24–48 hours (needs to dry completely before use—moisture will ruin resin).
Tips for Using Plaster Molds
- Mix plaster with water until it’s the consistency of heavy cream (too thick, and it won’t pour into small spaces; too thin, and it shrinks).
- Seal the plaster with a clear acrylic spray before using resin—this prevents the plaster from absorbing resin and sticking.
- Use for simple shapes only (e.g., cube coasters, basic candle holders).
Real-World Example
A high school art class in Florida used plaster to make resin keychains. The students made simple mold shapes (hearts, stars) with plaster, sealed them with acrylic spray, and poured epoxy resin. Each plaster mold worked for 3–4 casts, which was enough for the class project. “It’s a great way to teach beginners about mold making without spending a lot,” said the art teacher, Ms. Lopez. “We just warned them not to try detailed designs—plaster can’t handle it.”
4. Latex Rubber: For One-Off, Textured Projects
Latex rubber (like liquid latex used for Halloween masks) is a flexible, low-cost material for one-off casts. It’s perfect for capturing textures but has a short lifespan.
Key Properties
- Flexibility: Very flexible (stretches up to 400%—great for projects with complex shapes).
- Detail Capture: Excellent for textures (e.g., wood grain, fabric patterns—resolves details down to 0.1mm, like silicone).
- Compatibility: Works with epoxy resin (avoid polyester resin—latex can react and break down).
- Reusability: Single-use or up to 5 casts (latex dries out over time and cracks).
- Cure Time: 24–72 hours (needs to air-dry—no mixing required, but it’s slow).
Real-World Example
A prop maker in New York used liquid latex to make a mold of a vintage book cover for a movie. He painted 5 layers of latex over the book (letting each layer dry 8 hours), then added a plaster backing for support. He cast one resin book cover from the latex mold—perfect for the movie set. “Latex is the best for texture,” he said. “It picked up every scratch and letter on the book. But I couldn’t reuse it—after one cast, the latex started to peel.”
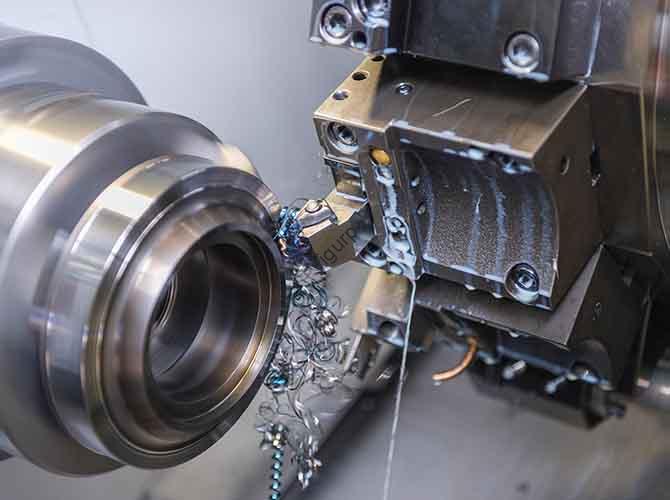
5. Metal: For Advanced, Industrial Projects
Metal molds (usually aluminum or steel) are for professional, high-volume casting—they’re durable but require machining skills to make.
Key Properties
- Durability: Extremely durable (lasts 10,000+ casts—ideal for industrial production).
- Detail Capture: Excellent (with CNC machining, can resolve details down to 0.05mm).
- Compatibility: Works with all resin types (including heat-curing resin—resists up to 500°C+).
- Reusability: Virtually unlimited (with proper maintenance—clean with solvent after each use).
- Cure Time: N/A (molds are pre-made—no curing required, but making the mold takes days/weeks).
Types of Metal Molds
| Metal Type | Best For | Cost (per mold) | Machining Requirement |
| Aluminum | Small parts (e.g., electronics components) | \(500–\)2,000 | CNC milling or turning |
| Steel | Large parts (e.g., automotive trim, industrial panels) | \(2,000–\)10,000+ | CNC machining or forging |
Real-World Example
An automotive parts manufacturer in Michigan uses aluminum molds to cast resin trim pieces for cars. The molds are CNC-machined to exact specifications, and they can produce 10,000+ trim pieces per mold. “Silicone molds were too slow and expensive for mass production,” said the engineer, Raj. “Aluminum molds have a high upfront cost, but they pay for themselves in 6 months. We also use them with heat-curing resin—aluminum dissipates heat evenly, so every trim piece cures the same way.”
How to Make a Mold for Resin Casting: Step-by-Step Guide (Using Silicone)
Silicone is the most popular mold material for beginners, so let’s walk through how to make a silicone mold from scratch. This process works for small projects like jewelry, miniatures, or keychains.
Step 1: Gather Your Supplies
You’ll need:
- A master model: The object you want to replicate (e.g., a small figurine, a real leaf, or a 3D-printed part).
- Platinum-cure silicone kit: 1:1 ratio (easier for beginners than tin-cure).
- Mixing cups: Disposable plastic cups (use two—one for mixing, one for measuring).
- Stir sticks: Wooden or plastic (disposable).
- Mold box: A small container (e.g., a plastic food container or cardboard box) to hold the silicone. The box should be 2–3cm larger than the master model on all sides.
- Release agent: Optional (silicone is non-stick, but a light spray helps with very detailed models).
- Scale: Digital kitchen scale (to measure silicone parts by weight—critical for 1:1 ratio).
Step 2: Prepare the Mold Box and Master Model
- Clean the master model: Wipe it with soap and water to remove dust or oil (dirt will show up in the mold).
- Secure the master model in the mold box: Use hot glue or tape to attach the model to the bottom of the box. Make sure it’s centered—leave 2–3cm of space between the model and the box walls.
- Apply release agent (if needed): Spray a light coat of mold release (e.g., silicone release spray) on the master model—this is only necessary if the model has deep crevices (like a figurine’s clothes) that might trap silicone.
Step 3: Mix the Silicone
- Measure the silicone: Use the scale to measure equal parts of silicone base and catalyst (e.g., 100g base + 100g catalyst for a 1:1 ratio). Pour each part into separate cups.
- Mix slowly: Pour the catalyst into the base cup. Stir slowly for 3–5 minutes (scraping the bottom and sides of the cup) to avoid creating bubbles. Bubbles will ruin the mold—slow mixing is key.
- De-gas (optional): If you have a vacuum chamber, put the mixed silicone in it for 5–10 minutes to remove bubbles. If not, let the silicone sit for 10 minutes—most bubbles will rise to the surface.
Step 4: Pour the Silicone
- Pour slowly: Tilt the mixing cup and pour the silicone into the mold box along the side (not directly on the master model). This reduces bubbles.
- Fill to the right height: Pour until the silicone covers the master model by 1–2cm. Too little, and the mold will be too thin; too much, and you’ll waste silicone.
- Tap the box: Gently tap the mold box on a table 5–10 times—this helps bubbles rise to the surface.
Step 5: Cure the Silicone
- Let it sit: Place the mold box in a cool, dry area (20–25°C) and let the silicone cure for the time specified on the kit (usually 4–8 hours for platinum-cure). Don’t move it during curing—this can shift the master model.
- Check for curing: After the cure time, touch the silicone gently—if it’s firm and doesn’t stick to your finger, it’s ready. If it’s still sticky, let it cure for another 2–4 hours.
Step 6: Demold and Clean
- Remove the mold from the box: Tear or cut the mold box open (if using cardboard) or flex the plastic box to release the silicone mold.
- Remove the master model: Gently stretch the silicone mold to pull out the master model. The mold’s flexibility should make this easy—if it sticks, wiggle the model slightly or use a toothpick to loosen it (be careful not to tear the mold).
- Clean the mold: Rinse the mold with soap and water to remove any silicone residue. Let it dry completely before using it for resin casting.
Pro Tip: A resin artist with 5 years of experience, Lisa, says, “Don’t rush the mixing step! I ruined my first 3 molds by stirring too fast—bubbles made the resin stick. Now I stir for 5 minutes, even if my arm gets tired. It’s worth it for a smooth mold.”
Maintenance Tips for Resin Casting Molds
Proper maintenance extends the life of your mold—whether it’s silicone, urethane, or metal. Here’s how to care for each type:
Silicone Molds
- Clean after each use: Rinse with warm soapy water to remove resin residue. Avoid harsh cleaners (like acetone)—they can break down the silicone.
- Dry completely: Pat the mold with a clean towel and let it air-dry for 1–2 hours before storing. Moisture trapped in the mold can cause resin to cure unevenly next time.
- Store properly: Keep silicone molds flat or in a sealed container to avoid dust buildup. Don’t fold or stretch them—this can cause permanent creases that ruin resin details. A resin crafter in Oregon stores her silicone molds in a plastic bin lined with tissue paper; she says her molds last 20% longer than when she stored them in a drawer.
- Avoid sharp objects: Don’t use metal tools (like scissors) to remove resin from the mold—they can scratch the surface. Use plastic or wooden tools instead.
Urethane Rubber Molds
- Clean with mild solvent: After use, wipe the mold with a cloth dampened with isopropyl alcohol (70%) to remove resin residue. Avoid acetone or paint thinner—they can dissolve the urethane.
- Condition regularly: Every 20–30 casts, apply a thin coat of urethane mold conditioner (available at craft stores) to keep the surface flexible. This prevents the mold from drying out and cracking.
- Store in a cool area: Urethane can degrade in high temperatures (above 30°C), so store molds in a room with stable temperature (18–25°C). A small business in Texas stores their urethane molds in a climate-controlled closet—their molds last 150+ casts, compared to 100 casts for molds stored in a garage.
Metal Molds
- Clean with industrial solvent: For aluminum or steel molds, use a solvent like mineral spirits to remove resin buildup. Avoid water—metal can rust if left wet.
- Oil after cleaning: After drying, apply a light coat of machine oil (e.g., 3-in-1 oil) to the mold’s cavity. This prevents rust and keeps the resin from sticking.
- Inspect for wear: Every 500–1000 casts, check the mold for scratches or dents. Use a metal file to smooth small scratches—deep damage may require professional re-machining. An automotive parts manufacturer in Michigan inspects their aluminum molds weekly; they say this routine extends mold life to 15,000+ casts.
Plaster Molds
- Dispose after use (or reuse carefully): Plaster molds are mostly single-use, but if you want to reuse them, clean them with a soft brush to remove loose plaster. Don’t get them wet—plaster dissolves in water.
- Seal before each use: Even if you’ve used the mold once, reapply a coat of clear acrylic spray before pouring resin. This re-seals the porous surface and prevents sticking.
Yigu Technology’s View on Mold Material for Resin Casting
At Yigu Technology, we believe the right mold material is the foundation of a successful resin project—choosing poorly can turn a creative idea into a frustrating failure. For beginners and hobbyists, we always recommend platinum-cure silicone: its 1:1 mixing ratio, fast cure time, and exceptional detail capture eliminate most common mistakes (like uneven mixing or stuck resin). For small businesses or high-volume projects, urethane rubber is a smarter investment—it balances durability and cost, cutting down on mold replacements. We also caution against overcomplicating: many new crafters jump to metal molds too soon, but metal’s high cost and machining needs are rarely worth it for non-industrial use. Over the years, we’ve helped hundreds of clients optimize their resin projects by matching them to the right mold material—from a student making resin keychains with silicone to a manufacturer casting industrial parts with aluminum molds. The key is to align the material with your project’s needs, not just your skill level.
FAQ About Mold Material for Resin Casting
1. Can I use household items (like plastic containers) as a mold for resin?
Yes, but only for simple projects. Plastic containers (e.g., yogurt cups, ice cube trays) are non-stick and work for basic shapes like coasters or small cubes. However, they have limitations:
- They can’t capture fine details (like textures or engravings).
- Some plastics (like polyethylene) may warp if used with polyester resin.
- They’re single-use (plastic can crack when removing cured resin).
For detailed projects, stick to silicone or urethane—household items are great for practice, but not for finished pieces.
2. How long does a silicone mold last for resin casting?
A well-maintained silicone mold lasts 50–100 casts. Factors that affect lifespan include:
- Silicone type: Platinum-cure silicone lasts longer (75–100 casts) than tin-cure (50–75 casts).
- Maintenance: Cleaning and storing the mold properly adds 20–30% to its life.
- Project type: Molds used for small, simple shapes (e.g., keychains) last longer than molds for complex shapes (e.g., jewelry with undercuts)—complex shapes put more stress on the silicone.
3. Can I reuse a latex rubber mold for resin casting?
Latex rubber molds are mostly single-use, but you can reuse them 2–5 times if cared for. To extend reuse:
- Clean the mold with soap and water after each cast (avoid solvent—latex dissolves easily).
- Let it air-dry completely before storing.
- Don’t stretch the mold when removing resin—latex tears easily.
Keep in mind: latex dries out over time, so even well-cared-for molds will crack after 5 casts.
4. Is it cheaper to make my own silicone mold or buy a pre-made one?
It depends on your project:
- For one-off projects: Pre-made molds are cheaper. A pre-made silicone jewelry mold costs \(10–\)20, while a silicone kit to make your own costs \(25–\)40.
- For repeated projects or custom shapes: Making your own is cheaper. If you want to cast 50+ resin pendants with a custom design, a \(30 silicone kit will make one mold that lasts 75+ casts—pre-made molds for custom designs can cost \)50–\(100 each. A hobbyist in California calculated that making her own silicone mold saved her \)80 over 6 months—she cast 100 pendants from one \(35 kit, compared to buying 2 pre-made custom molds for \)50 each.
5. Can I use a metal mold with UV resin?
Yes, but you need to adjust your curing process. Metal blocks UV light, so the resin won’t cure if the mold is fully enclosed. To fix this:
- Use a metal mold with an open top (so UV light can reach the resin).
- Cure the resin in a UV lamp for 2–3x longer than usual (e.g., 60 seconds instead of 20 seconds).
- Or, use a hybrid resin (UV + heat-cure) and apply gentle heat (50–60°C) while curing—this helps the resin harden fully.
An electronics manufacturer in Washington uses aluminum open-top molds with UV resin to make small components; they say curing time is 90 seconds, but the molds last 10,000+ casts—worth the extra time.
