Introduction
If you’re a procurement specialist or product engineer in the home appliance industry, mastering the metal home appliance prototype model process isn’t just helpful—it’s absolutely essential. These prototypes let you test design feasibility, verify functionality under real conditions, and gather critical data for mass production, all at a fraction of the cost of full-scale manufacturing. Whether you’re developing refrigerators, ovens, washing machines, or small kitchen appliances, this guide provides a step-by-step breakdown with real cases, hard data, and practical tips to help you avoid costly mistakes and build high-quality prototypes that perform.
How Do You Select the Right Metal for Home Appliance Prototypes?
Matching Material Properties to Appliance Needs
Choosing the right metal is the critical first step to a successful metal home appliance prototype. Home appliances need metals that balance durability, safety, cost, and often aesthetics. Here’s a detailed guide to help you decide:
| Metal Type | Key Properties | Ideal Appliance Parts | Real-World Example | Cost Range (USD/lb) |
|---|---|---|---|---|
| Aluminum Alloy | Lightweight, excellent heat dissipation, corrosion-resistant | Oven doors, refrigerator shelves, heat sinks, trim pieces | A fridge manufacturer used aluminum alloy for shelf prototypes—cut weight by 25 percent compared to steel while maintaining strength. | $2–$5 |
| Stainless Steel | Corrosion-resistant, easy to clean, strong, attractive finish | Dishwasher interiors, sink edges, oven cavities, refrigerator panels | A dishwasher brand tested 304 stainless steel prototypes through 100+ wash cycles—no rust, no staining, perfect performance. | $3–$8 |
| Brass | Good electrical conductivity, machinable, attractive gold-like appearance | Control knobs, decorative trim, fittings, electrical contacts | A coffee maker company used brass for knob prototypes—improved both the feel of operation and the premium aesthetic. | $8–$12 |
| Iron/Carbon Steel | High strength, low cost, magnetic | Washing machine frames, internal brackets, structural supports | A laundry appliance maker used iron for frame prototypes—saved 30 percent on material costs compared to stainless steel. | $1–$3 |
Practical Selection Tips for Procurement
For kitchen appliances exposed to water, heat, and food, prioritize stainless steel—its corrosion resistance and easy cleaning are worth the moderate cost increase.
For structural parts hidden inside appliances where appearance doesn’t matter, iron or carbon steel offers the best strength-to-cost ratio.
For small parts like knobs and trim where appearance matters, brass provides a premium feel without the high cost of solid stainless finishing.
For weight-sensitive applications like refrigerator shelves or oven doors, aluminum alloy cuts weight significantly while maintaining adequate strength.
What Data Collection Steps Ensure Prototype Accuracy?
Laying the Foundation for Success
You simply cannot build a good prototype without clear, precise data. This phase ensures your prototype matches your design vision exactly, preventing expensive rework later.
Import and verify 3D/CAD files: Always start by requesting complete 3D drawings or CAD files from your design team. These files are your blueprint. Common tools include AutoCAD for 2D files and SolidWorks for 3D models. Without verified files, you risk misinterpreting dimensions or missing critical features.
A toaster manufacturer learned this lesson painfully. They skipped checking CAD files thoroughly, and their prototype ended up with a 2mm error in the heating element slot. The part couldn’t fit the actual heating element, forcing a complete redesign that cost $4,000 and delayed their project by 3 weeks. Always verify file accuracy first—it takes minutes and saves weeks.
Create initial verification prototypes: Before committing to full metal machining, turn your files into simple prototypes to test basic design fit and ergonomics. Two common methods work well:
- SLA laser rapid prototyping: Fast turnaround of 1 to 2 days for small, detailed parts like control buttons, knobs, and trim pieces.
- CNC machining from soft materials: For larger parts, machining from modeling board or soft plastic verifies fit before cutting expensive metal.
A microwave development team used SLA to make button prototypes early in their project. When they tested them with real users, they discovered the buttons were too small for adult hands to press comfortably. They enlarged the design before any metal was cut, fixing an issue that would have been expensive to correct later.
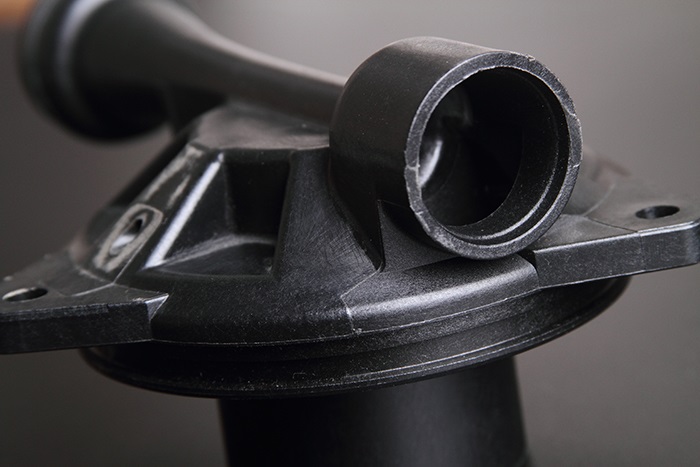
How Does Machining Turn Metal into Precise Prototype Parts?
CNC Machining: The Go-To Method for Metal Appliance Prototypes
Machining is where your chosen metal becomes actual appliance parts. Focus on precision here—even small errors can break functionality or cause assembly problems later.
CNC machining is the preferred method for metal home appliance prototypes because it delivers exceptional accuracy and consistency. Modern CNC machines achieve tolerances of ±0.01mm or better, ensuring parts fit together exactly as designed.
Programming and setup: Skilled engineers write code based on your 3D and 2D files, then input it into the CNC machine. This code tells the machine exactly how to cut, drill, mill, and shape the metal to create your part. Every feature—every hole, every curve, every mounting surface—is precisely defined in the program.
Multi-axis machining advantages: For complex parts like curved dishwasher doors or ergonomic oven handles, 5-axis CNC machines are essential. They can reach undercuts and angled surfaces in a single setup, eliminating the repositioning errors that plague simpler machines. Industry data shows multi-axis machining cuts prototype production time by 40 percent compared to traditional methods requiring multiple setups.
Manual Processing Fixes Small Flaws
Even the best CNC parts need some manual attention to be truly perfect:
Deburring: Use sandpaper or specialized deburring tools to smooth all sharp edges. This prevents scratches on users during handling and ensures parts won’t damage other components during assembly.
Grinding and polishing: Check drawings to ensure surface smoothness meets specifications. For example, refrigerator door prototypes need perfectly polished edges to seal properly against magnetic gaskets.
A stove development team once forgot to deburr a prototype’s handle. During testing, the sharp edge caught a tester’s glove, creating a safety concern. Manual processing caught and fixed this easily—but only because they had a review step before finalizing the prototype. These small issues are easy to miss and easy to fix if you’re looking for them.
What Surface Treatments Boost Aesthetics and Durability?
Making Prototypes Look and Perform Like Production Parts
Home appliances need to look good and last—surface treatment makes both happen. The right finish transforms a machined part into something that looks and feels like a finished product.
| Process | Purpose | Ideal Appliance Parts |
|---|---|---|
| Painting | Add color, hide machining marks, protect surfaces | Oven exteriors, washing machine bodies, visible panels |
| Sandblasting | Create matte, non-slip, uniform surface texture | Fridge handles, dishwasher fronts, grip surfaces |
| Oxidation/Anodizing | Prevent rust, add color (for aluminum parts) | Oven racks, microwave interiors, aluminum trim |
| Laser Engraving | Add permanent logos, text, or markings | Control panels, brand identification, serial numbers |
| Silk Screen Printing | Add text, diagrams, or designs to surfaces | Stove knobs, oven dials, control labels |
Real-world example: A blender company used sandblasting on their handle prototypes to create a matte, non-slip texture. During user testing, participants consistently noted that the sandblasted surface was much easier to grip when hands were wet—a significant safety improvement that wouldn’t have been discovered without the prototype finish.
How Do Assembly and Testing Validate Prototype Function?
Test Assembly Confirms Fit
You’ve made all your parts—now put them together and verify they work as a complete appliance.
During test assembly, check:
- Do all parts fit together correctly? Does the oven door close properly and seal? Do shelves slide into their tracks smoothly?
- Is the structure stable? Does the refrigerator shelf hold 10kg of weight without bending or shifting?
- Are there any interference issues? Do moving parts clear stationary components throughout their full range?
A washing machine team discovered during assembly testing that their drum didn’t properly align with the motor shaft. By catching this during prototype assembly, they adjusted the drum mounting position before any production tooling was cut—saving thousands in potential rework.
Functional Testing Simulates Real Use
Once assembled, test how the prototype performs under realistic conditions:
- Structural stability: Shake a refrigerator prototype vigorously to see if shelves shift or doors rattle. Simulate transportation vibration.
- Mechanical properties: Turn on a stove prototype to verify burners heat evenly and controls respond correctly.
- Simulated use: Run a dishwasher prototype through a complete cycle with water to test for leaks and proper operation.
A coffee maker prototype failed during simulated use testing—it leaked water steadily from the reservoir base. The team traced the leak to a poorly designed seal, fixed the design, and validated the correction in a second prototype. Finding this issue during prototyping saved them from a disastrous product launch with leaking units.
How Should You Package and Ship Metal Appliance Prototypes?
Protecting Your Hard Work
Don’t ruin weeks of careful work with bad packaging. Metal prototypes are heavy, and damage during shipping can destroy all your progress.
Safe packaging practices: Use foam inserts, bubble wrap, and custom-fitted boxes to prevent movement during transit. For large parts like oven doors, rigid packaging prevents bending or warping. For delicate surfaces, non-abrasive protective films prevent scratches.
On-time delivery coordination: Work with reliable logistics providers who understand the importance of prototype delivery dates. Most appliance development teams need prototypes within 2 to 3 weeks to stay on schedule. Communicate any potential delays immediately so clients can adjust their plans.
Practical tip: Always add a prominent “FRAGILE” label and include a detailed packing list. This helps clients immediately verify that all expected parts arrived intact and identifies any missing components before they start testing.
What Real Savings Can You Expect from Metal Prototyping?
The Cost of Getting It Wrong
Consider a company developing a new commercial refrigerator. They spent $12,000 on stainless steel prototypes to test door seal performance and internal shelving layout. Testing revealed that the original shelf spacing was too tight for standard sheet pans—a critical usability issue. They adjusted the design, made new prototypes for $5,000, and validated the fix. Total prototyping cost: $17,000.
If they’d gone straight to production, they would have spent $85,000 on tooling before discovering the problem. Fixing it then would mean scrapping and modifying tools—a $85,000 loss plus 3 to 4 months of delay. The prototyping approach saved them over $68,000 and kept their product launch on schedule.
Industry Data Supports Prototyping
Industry surveys consistently show that metal appliance prototyping reduces development costs by 25 to 35 percent compared to going directly to production. These savings come from:
- Catching design flaws before expensive tooling is cut
- Validating material choices without buying production quantities
- Testing assembly methods to optimize manufacturing efficiency
- Avoiding field failures that trigger expensive recalls
What’s Yigu Technology’s Approach to Metal Appliance Prototypes?
Experience You Can Trust
At Yigu Technology, we deeply understand that metal home appliance prototype model success lies in balancing precision with practical user focus. We’ve seen too many teams overcomplicate machining for simple parts—using 5-axis CNC for basic refrigerator shelves when a simple 3-axis machine would work perfectly at half the cost.
We work closely with clients to:
- Select the right materials: Stainless steel for wet areas, aluminum for weight-sensitive parts, iron for structural components where cost matters most
- Match processes to actual needs: Complex parts get multi-axis machining; simple parts get efficient 3-axis work
- Focus on user experience: Our manual processing and surface treatment teams pay close attention to how real people will use the appliance—deburring edges for safety, creating non-slip surfaces where needed, ensuring controls feel right
Quality Built In
A good prototype isn’t just dimensionally accurate—it’s built for how real people will actually use the appliance. That user focus, combined with technical precision, delivers prototypes that provide meaningful test data and confident decisions.
FAQ
How long does it take to make a metal home appliance prototype?
Timelines depend directly on part size and complexity. Small, simple parts like buttons or knobs typically take 3 to 5 days from design release. Larger, complex parts like complete oven bodies or dishwasher interiors require 2 to 3 weeks, including thorough machining, surface treatment, and testing.
Which material is best for a metal home appliance prototype on a tight budget?
Iron or carbon steel is the most affordable option for structural parts like frames and brackets where appearance doesn’t matter. However, if your part needs corrosion resistance (like dishwasher components), 304 stainless steel offers the best value—it costs more than iron but much less than specialty alloys. Avoid brass or titanium for budget projects unless you specifically need their unique properties.
Do I need to test assembly before functional testing?
Absolutely—this is non-negotiable. Assembly testing catches fit issues like parts that don’t align, holes that don’t match, or interferences that functional testing might miss. Skipping assembly testing almost guarantees you’ll discover problems halfway through functional tests, wasting time and potentially damaging parts.
Can metal prototypes be used for consumer testing?
Yes, and they should be. Metal prototypes with proper surface treatment look and feel remarkably like production parts. Consumers can evaluate ergonomics, appearance, and basic functionality, providing invaluable feedback before production commitment.
What’s the most common mistake in metal appliance prototyping?
The most frequent error is selecting material based on cost alone without considering the operating environment. Using carbon steel for a part that will see moisture guarantees rust problems. Always match material to actual use conditions.
How do I choose between aluminum and stainless steel?
For weight-sensitive applications like refrigerator shelves or oven doors, choose aluminum. For corrosion-sensitive applications like dishwasher interiors or any part exposed to water, choose stainless steel. For parts needing both properties, consider clad materials or coatings.
Discuss Your Metal Appliance Projects with Yigu Rapid Prototyping
Ready to move your home appliance project forward with confidence and precision? The engineering team at Yigu Rapid Prototyping brings extensive specialized experience in metal home appliance prototype models. We’ve helped hundreds of procurement specialists and product engineers validate designs, select optimal materials, and avoid costly manufacturing mistakes.
Whether you’re developing refrigerators, ovens, washing machines, dishwashers, or small kitchen appliances, we’re here to help. Contact us to discuss your specific requirements, timeline, and budget. Let’s build something great together—the right way, from the very first prototype.