Introduction
When it comes to bringing an automotive design to life, metal automobile prototype models are the unsung heroes of the development process. They let engineers test bold ideas, verify that complex parts work together seamlessly, and prepare for mass production—all without spending a fortune on full-scale production molds. Whether you’re a procurement professional sourcing the right prototypes or a product engineer refining a critical design, understanding how these models are made and why they matter is absolutely key to project success. Let’s break down everything you need to know, with real-world examples and actionable data that can save your team time and money.
Why Does Metal Stand Out for Automotive Prototypes?
The Unmatched Advantages of Metal
Not all prototype materials are created equal—and metal is consistently the top choice for serious automotive projects. Unlike plastic, metal materials offer the strength, heat resistance, and long-term durability that accurately mimic real-world automotive parts. This means tests conducted on metal prototypes are far more reliable, helping teams catch critical issues early when fixes are still cheap and fast.
A European automaker learned this lesson the hard way. They initially used plastic prototypes for an engine bracket, and the parts held up fine in controlled lab tests. But when exposed to the high temperatures of an actual running engine, the plastic brackets failed completely. Switching to an aluminum alloy prototype solved the problem because aluminum’s heat resistance matched the bracket’s actual working conditions. The metal prototype revealed no issues, giving them confidence to proceed with production.
Common Metals Used in Automotive Prototypes
| Metal Material | Key Properties | Typical Automotive Uses |
|---|---|---|
| Aluminum Alloys | Low density (2.7 g/cm³), high strength-to-weight ratio, excellent heat conductivity | Engine components, body structural parts, suspension arms, wheel rims, battery cases for EVs |
| Stainless Steel | Corrosion-resistant, high tensile strength (up to 1,500 MPa), excellent durability | Exhaust systems, fuel tanks, brake components, structural reinforcements |
| Brass | Easy to machine, good electrical conductivity, attractive appearance | Electrical connectors, small fittings, decorative trim, radiator cores |
| Magnesium Alloys | Ultra-light (1.8 g/cm³), high stiffness, excellent damping | Dashboard frames, seat structures, steering wheel cores, lightweight components |
| Zinc Alloys | Low melting point, good castability, dimensional stability | Door handles, decorative trim, small brackets, complex castings |
How Do You Match Metal Selection to Your Prototype Needs?
Choosing Based on Application
The first and most critical step is picking the right metal for your specific application. This decision depends entirely on what the prototype will be used for and what conditions it must survive.
If you’re testing a suspension component that needs high strength and fatigue resistance, stainless steel or a high-strength aluminum alloy like 6061-T6 is the right choice. These materials will accurately reflect how production parts will perform.
If weight is absolutely critical—for example, a prototype for an electric vehicle’s body panel—magnesium alloy might be the better option despite higher cost. Every kilogram saved in EV design translates directly to range.
A U.S.-based EV startup recently faced this decision when prototyping a battery case. They chose aluminum alloy 5052 for several smart reasons: it’s lightweight, corrosion-resistant (essential for battery protection), and easy to machine. This choice cut their prototyping time by 20 percent compared to using harder materials.
Real-World Selection Example
Consider a prototype brake caliper. The production part will face extreme heat, high pressure, and corrosive brake fluid. Testing this with an aluminum prototype might give misleading results if the production part will be stainless steel. Match your prototype material to your intended production material as closely as possible for valid test data.
How Do You Ensure Design Accuracy Before Machining?
Start with Verified Data
You simply cannot make a good prototype without good data. The process must start with:
Importing complete 3D CAD files: Formats like STEP or IGES from your design team are the essential blueprint for your prototype. These files contain every dimension, tolerance, and feature your part needs.
Verifying file accuracy: Use tools like SolidWorks or AutoCAD to check for common errors—missing dimensions, conflicting tolerances, or impossible features—before any metal is cut.
A Chinese automotive supplier once skipped this verification step and machined a prototype directly from a faulty CAD file. The resulting part looked right but didn’t fit during assembly testing, costing them 2 weeks of rework and a significant budget overrun. Always validate your 3D files first—it takes hours and saves weeks.
The Value of Gypsum Samples
For complex parts, consider making a low-cost gypsum sample before cutting expensive metal. This physical model lets you verify fit, clearance, and assembly issues in a material that’s cheap and easy to modify. Catching a 0.5mm error in gypsum costs virtually nothing; catching it in machined aluminum costs hundreds or thousands.
How Does CNC Machining Create Precision Metal Parts?
The Core of Metal Prototype Production
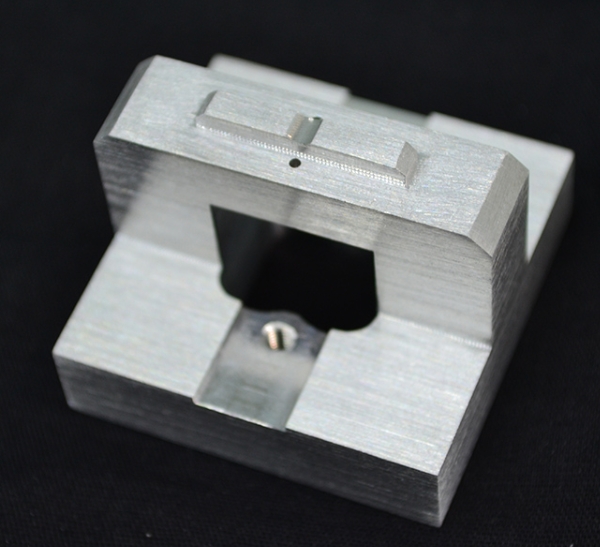
Most metal automotive prototypes are made with CNC machining—and for good reason. It’s fast, exceptionally accurate, and remarkably consistent across multiple parts.
Programming: A skilled engineer writes G-code (the language CNC machines understand) based on your verified 3D file. This code tells the machine exactly where to move, how fast to cut, and what tools to use.
Setup: The metal stock—an aluminum block, stainless steel plate, or other material—is securely clamped to the CNC machine’s table. Proper fixturing is essential for accuracy.
Machining: The machine automatically cuts, drills, mills, and shapes the metal to match your design exactly. Modern CNC machines achieve tolerances as tight as ±0.005mm—far beyond what most automotive applications require.
Multi-Axis Machining for Complex Parts
For complex parts like a curved exhaust manifold or an intricate cylinder head, multi-axis CNC machining (typically 5-axis) is essential. These machines can approach the part from any angle in a single setup, eliminating the need to reposition the workpiece. This saves significant time and reduces errors dramatically compared to multiple 3-axis setups.
Manual Finishing Work
Even the best CNC parts need some manual attention:
- Deburring: Using sandpaper, files, or specialized tools to smooth out sharp edges left by CNC cutting. This prevents injuries during handling and ensures parts assemble correctly.
- Grinding and polishing: Creating smooth surfaces where needed—for example, on a prototype door handle that needs a sleek, production-like finish for consumer evaluations.
What Surface Treatments Protect and Improve Metal Prototypes?
Beyond Just Looking Good
Surface treatment isn’t just about appearance—it significantly adds durability and functionality. Common processes include:
- Painting: Applying heat-resistant, corrosion-resistant, or color-matched paints. Engine compartment prototypes benefit from high-temperature coatings that survive testing conditions.
- Sandblasting: Creating a uniform matte finish for parts that need better grip—like a prototype gear shifter that users will evaluate for feel.
- Anodizing: Adding a protective oxide layer to aluminum parts. Anodizing makes aluminum 3 times more corrosion-resistant and allows for colored finishes.
A German automaker used anodized aluminum for their prototype steering wheel. The anodized layer made the wheel highly scratch-resistant—perfect for testing how drivers would handle it daily over weeks of evaluation.
How Do Assembly and Testing Validate Prototype Function?
Test Assembly Confirms Fit
Once all individual parts are complete, it’s time to put them together:
Test assembly: Assemble the prototype completely to verify that all parts fit as designed. A prototype engine block should line up perfectly with the cylinder head, with no gaps or interference. Bolts should thread properly, and moving parts should operate smoothly.
What to check:
- Do mating surfaces align correctly?
- Are there any unexpected interferences?
- Do fasteners engage properly?
- Can all parts be assembled in the intended sequence?
Functional Testing Simulates Real Use
After assembly, run tests that mimic actual operating conditions:
- A brake caliper prototype might be tested for stopping power at various speeds and pressures
- A suspension component might undergo 10,000+ cycles of loading to verify fatigue life
- An engine part might be exposed to operating temperatures to check thermal expansion and material stability
A Japanese automaker discovered a critical issue during functional testing: their prototype brake pad didn’t grip the rotor adequately at high speeds. By adjusting the pad material—switching from brass to a stainless steel composite—they fixed the problem before any production tooling was cut.
How Should You Package and Ship Metal Prototypes?
Protecting Your Investment
Finally, proper packaging ensures your hard work arrives safely:
- Foam inserts custom-cut to hold the part securely and prevent movement
- Waterproof boxes for overseas shipments that might encounter moisture
- Tracking and communication so you know exactly when to expect delivery
A Canadian automotive design firm once used flimsy packaging for a stainless steel prototype. The part bent during shipping, costing them $500 to replace plus lost time. Invest in good packaging—it’s far cheaper than reworking or replacing damaged prototypes.
What Real Savings Can You Expect from Metal Prototyping?
The Cost of Getting It Wrong
Consider a company developing a new suspension system. They spent $15,000 on aluminum prototypes to test geometry, clearance, and durability. Testing revealed that one bracket design created a stress concentration that would lead to early failure. They revised the design, made new prototypes for $6,000, and validated the fix. Total prototyping cost: $21,000.
If they’d gone straight to production, they would have spent $95,000 on tooling before discovering the problem. Fixing it then would mean scrapping and modifying tools—a $95,000 loss plus 3 to 4 months of delay. The prototyping approach saved them over $74,000 and kept their vehicle launch on schedule.
Industry Data Supports Prototyping
Industry surveys consistently show that metal automotive prototyping reduces development costs by 30 to 40 percent compared to going directly to production. These savings come from:
- Catching design flaws before expensive tooling is committed
- Validating material choices without buying production quantities
- Testing assembly methods to optimize manufacturing efficiency
- Avoiding field failures that trigger expensive recalls and reputation damage
What’s Yigu Technology’s Approach to Metal Automotive Prototypes?
Experience You Can Trust
At Yigu Technology, we firmly believe that metal automobile prototype models are the essential bridge between design concepts and successful production. Over the years, we’ve worked with 500+ automotive clients to create prototypes that solve real engineering problems—from lightweight electric vehicle components to high-strength engine parts that must survive extreme conditions.
We prioritize using high-quality metals like 6061-T6 aluminum and 304 stainless steel combined with 5-axis CNC machining to ensure every prototype meets exact specifications. Our quality control processes catch issues early, and our finishing team ensures prototypes look as good as they perform.
A Tool for Risk Reduction
For us, a good prototype isn’t just a faithful copy of the design—it’s a powerful tool to help clients reduce risks, make confident decisions, and launch better products faster. That user-focused philosophy drives everything we do.
FAQ
How long does it take to make a metal automobile prototype model?
Timelines depend directly on part complexity. A simple aluminum bracket might take 3 to 5 days from design release. A complex 5-axis machined part like an exhaust manifold could take 10 to 14 days, including thorough testing. Always share your timeline requirements with your supplier upfront so they can plan accordingly.
What’s the cost of a metal automobile prototype?
Costs range widely based on size, complexity, and material. A small, simple aluminum part might cost $200 to $500. A large, complex prototype like an engine block or full suspension assembly can run $5,000 to $15,000 or more. Material choice, machining time, and post-processing all affect the final price.
Can I use a metal prototype for mass production testing?
Absolutely—and you should. Metal prototypes are ideal for testing mass production processes like assembly line fit, tooling clearance, and manufacturing sequence. Because they accurately mimic the properties of production parts, your test results will be reliable and actionable.
What’s the most common mistake in metal prototype material selection?
The most frequent error is choosing a material based on cost alone without considering the actual operating environment. Using a standard aluminum alloy for a part that will see high temperatures, or choosing a non-corrosion-resistant material for an underbody component, guarantees misleading test results.
How do I choose between 6061 and 7075 aluminum?
Use 6061 aluminum for most general-purpose prototypes—it’s less expensive, easier to machine, and offers good strength. Choose 7075 aluminum when you need maximum strength (it’s about 70 percent stronger than 6061) and can accept higher material cost and slightly more difficult machining.
Do I need surface treatment for all metal prototypes?
Not necessarily. If your prototype is purely for dimensional verification or internal fit testing, raw machined surfaces may be sufficient. If you’re doing consumer evaluations, corrosion testing, or any user interaction, appropriate surface treatment is essential for valid results.
Discuss Your Automotive Projects with Yigu Rapid Prototyping
Ready to move your automotive project forward with confidence and precision? The engineering team at Yigu Rapid Prototyping brings extensive specialized experience in metal automobile prototype models. We’ve helped hundreds of engineers and procurement professionals validate designs, select optimal materials, and avoid costly manufacturing mistakes.
Whether you’re developing electric vehicle components, traditional powertrain parts, suspension systems, or interior trim, we’re here to help. Contact us to discuss your specific requirements, timeline, and budget. Let’s build something great together—the right way, from the very first prototype.