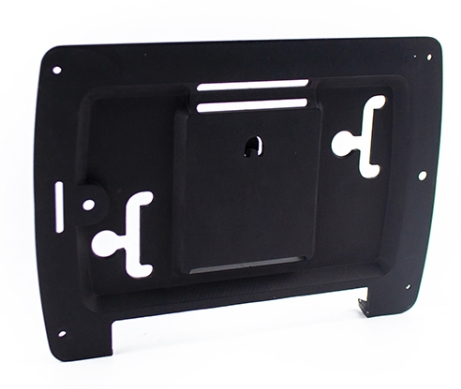
If you are a product engineer or a procurement professional, you likely value materials that offer both durability and flexibility. Polyurethane is a powerhouse in modern manufacturing. It is a go-to choice for automotive bushings, industrial seals, and medical device gaskets. Its unique mix of elasticity and wear resistance makes it irreplaceable.
However, its soft nature is a double-edged sword. Unlike rigid metals, polyurethane can “bounce” under a cutting tool or melt if the heat gets too high. This guide provides a clear, professional path for polyurethane CNC machining. We will cover everything from material selection to the final quality check, ensuring your precision parts meet every specification.
Why Is Polyurethane Difficult to Machine?
Before you start the spindles, you must understand the material’s physics. Polyurethane is an elastomer, meaning it wants to return to its original shape. This “memory” can make hitting tight tolerances a nightmare if you aren’t prepared.
Key Properties and Their Impact
| Property | Description | Impact on CNC Machining |
| Elasticity | High “bounce back” ability. | Can cause dimension errors; requires ultra-sharp tools. |
| Thermal Sensitivity | Softens at 60-80°C. | High speeds can melt the part; requires coolant control. |
| Wear Resistance | Resists friction damage. | Good for the final part, but dull tools will pull and tear the surface. |
| Impact Resistance | Absorbs shock well. | Reduces chipping risk but requires steady cutting forces. |
Real-World Case: A manufacturer recently tried to machine industrial seals at a high speed of 300 m/min. The friction heated the material to 85°C. The result? The seals warped by 0.5mm, making them useless. Once they lowered the speed to 150 m/min, the warping dropped to a manageable 0.1mm.
How to Prepare Polyurethane for Machining?
Success starts long before the machine is turned on. Proper preparation prevents the material from shifting or failing mid-cut.
Choose the Correct Material Grade
Not all polyurethane is created equal. For CNC machining, you generally choose between two types:
- Cast Polyurethane: This is the gold standard for complex prototypes. It has uniform density and very low internal stress, meaning it won’t “jump” when you cut into it.
- Extruded Polyurethane: Best for simple, flat seals. It is more affordable but can have slight density variations that affect precision.
Precision Blank Cutting
Cut your raw material into a “blank” that is 5-10mm larger than the final part. Use a bandsaw or a sharp utility knife. Never use scissors or heavy shears; these tools crush the soft edges of the material, creating internal stresses that lead to warping later in the process.
What Are the Best Programming Strategies?
Polyurethane’s elasticity means your CAM programming must be different from your metal-cutting strategies.
Optimize Your CAM Parameters
When converting your 3D model into CNC code, adjust your settings to keep the material stable:
- Cutting Speed: Keep it between 120-180 m/min. This prevents the material from reaching its melting point.
- Feed Rate: Use a steady 30-60 mm/min. This prevents the tool from “pushing” the material instead of cutting it.
- Climb Milling: Always use climb milling (cutting in the direction of tool rotation). This reduces friction and keeps the material from pulling away from the fixture.
Smart Design Tweaks
In your CAD software (like SolidWorks), avoid sharp internal corners. Use a 1-2mm radius instead. Sharp edges in soft polyurethane are prone to tearing. If you are designing a thin-walled part, add a 0.2mm support lip to keep the wall from bending during the cut. You can easily trim this off later.
Which Tools and Fixtures Work Best?
Using a tool designed for aluminum on polyurethane is a recipe for disaster. You need tools that act like razors.
Selecting the Right Tool
- Single-Edge Milling Cutters: These are perfect for flat surfaces. They minimize the contact area, which stops the material from deforming.
- Carbide-Tipped Tools: While HSS tools work for 1-5 parts, carbide stays sharp much longer. A dull tool won’t cut; it will simply stretch the polyurethane until it tears.
- Specialized Drills: Use bits with a narrow, sharp tip to prevent the material from “closing in” on the drill bit as it enters.
Stability Without Pressure
How do you hold something soft without squishing it?
- Vacuum Chucks: These are the best for flat parts. They hold the part down with even air pressure, ensuring zero deformation.
- Rubber-Padded Clamps: If you must use clamps, add rubber pads. This protects the surface from indentations and spreads the clamping force.
How to Manage the Machining Process?
The machining process should be split into two distinct stages: Roughing and Finishing.
Stage 1: The Roughing Pass
The goal here is to remove 80% of the excess material quickly while keeping heat low.
- Speed: 150-180 m/min.
- Allowance: Always leave a 0.5-1mm allowance. This “extra skin” gives you room to fix any minor thermal expansion that happened during the heavy cutting.
Stage 2: The Finishing Pass
This is where you achieve your final precision.
- Speed: Drop to 120-150 m/min.
- Coolant: Use a water-based coolant at a 5-10% concentration. This flushes away dust and keeps the part at room temperature.
- Target: Aim for a surface roughness of Ra 0.8-1.6 μm.
Why Is Post-Processing Necessary?
Once the machine stops, the part isn’t finished. Soft materials often leave behind “fuzz” or small burrs.
Deburring and Cleaning
Use 400-grit sandpaper to gently smooth the edges. After deburring, clean the part with isopropyl alcohol and a lint-free cloth. This removes any oils or coolant residue that could interfere with the part’s function in a medical or automotive environment.
Final Quality Inspection
- Dimensional Check: Use a CMM (Coordinate Measuring Machine) for critical fits.
- Functional Test: For industrial seals, we recommend a pressure test (e.g., 5 bar) to ensure the elasticity of the machined surface provides a perfect seal.
Yigu Technology’s Professional Approach
At Yigu Technology, we have helped over 200 clients perfect their polyurethane CNC machining projects. The biggest mistake we see is engineers using metal machining parameters on elastomers. This always leads to warped parts and wasted money.
Our solution includes custom CAM templates specifically designed for polyurethane. These templates pre-set the ideal speeds and feed rates to ensure a 99% success rate. We also utilize proprietary vacuum chuck setups to maintain a tolerance of ±0.05mm. By focusing on heat control and tool sharpness, we cut prototype defect rates by 40%.
FAQ
How long does it take to CNC machine a polyurethane prototype?
A simple seal (50x50mm) usually takes 30-45 minutes. A complex medical gasket with multiple holes can take up to 1.5 hours to ensure precision.
Can I use HSS tools for this material?
Yes, but only for very small batches. HSS dulls quickly on polyurethane. For anything over 10 parts, carbide tools are much more cost-effective.
What is the most common mistake in this process?
Over-clamping. If you tighten your clamps too much, you deform the part. When you release the clamps, the part “springs back” and your dimensions will be wrong. Use vacuum fixtures whenever possible.
Is coolant mandatory?
Yes. Without coolant, polyurethane dust can become gummy and clog your tools, leading to a poor surface finish or a melted part.
Discuss Your Projects with Yigu Rapid Prototyping
Do you have a challenging design that requires the flexibility of polyurethane and the precision of CNC? At Yigu Rapid Prototyping, we specialize in high-performance polymer machining. Our engineering team is ready to help you optimize your tool paths and material selection. Contact us today to discuss your project and get a professional quote for your next prototype.