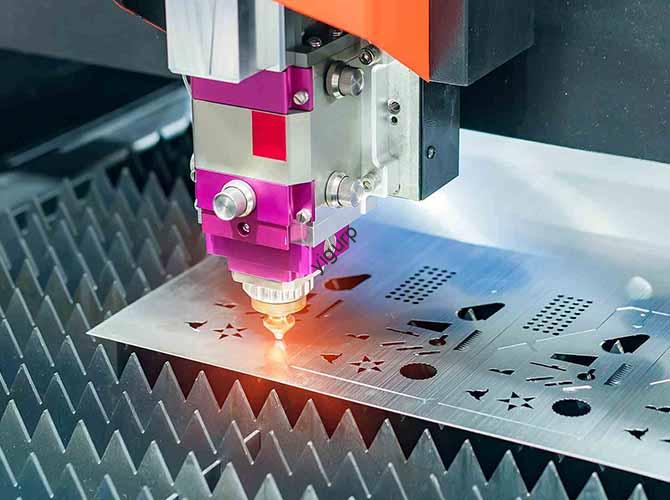
Introduction
If you work with metal, you have probably encountered iron milling. It is one of the most common machining processes, used for everything from engine blocks and industrial gears to simple brackets and hardware. But iron is not a single material. It comes in different types—gray, ductile, malleable, white—and each behaves differently under a cutting tool. Use the wrong approach and you will break tools, ruin surface finish, and waste time. This guide will walk you through everything you need to know: the types of iron, the right tools for each, the best machining strategies, and how to set your parameters for success. Whether you are a beginner or a seasoned pro, you will come away ready to tackle any iron milling job with confidence.
What Are the Different Types of Iron for Milling?
Before you start cutting, you must know what kind of iron you have. Each type has a unique microstructure that affects how it machines.
Gray Cast Iron
Gray cast iron gets its name from the gray color of its fracture surface. It contains graphite flakes that act as a built-in lubricant, making it the most machinable of all irons.
- Machinability: Excellent. The graphite flakes help break chips and reduce friction.
- Best for: Engine blocks, brake rotors, machine tool bases.
- Milling tip: You can run at higher speeds. The graphite lubricates the cut, so dry milling works well—no coolant needed.
Real example: A small engine shop was struggling with rough finishes on gray iron blocks. They were using speeds meant for aluminum. By increasing cutting speed by 20 percent and switching to a coated carbide end mill, their finish improved overnight and tool life doubled.
Ductile Iron (Nodular Iron)
Ductile iron has spherical graphite nodules instead of flakes. This structure gives it strength and flexibility—it can bend a little before breaking, unlike gray iron.
- Machinability: Good, but not as free-cutting as gray iron. The nodules create more tool impact.
- Best for: Pipes, gears, heavy-duty brackets, crankshafts.
- Milling tip: Use coolant to manage heat. The lack of graphite lubrication means you need to keep the cutting zone cool.
Malleable Iron
Malleable iron is produced by heat-treating white iron. It has irregular graphite clusters and is known for being tough and ductile.
- Machinability: Very good. It cuts cleanly and produces manageable chips.
- Best for: Pipe fittings, hand tools, railroad equipment.
- Milling tip: Standard carbide tools work well. Adjust feeds and speeds based on the part’s hardness.
White Cast Iron
White iron has no free graphite. The carbon is combined in cementite, making it extremely hard and wear-resistant but brittle.
- Machinability: Poor. It is very abrasive and wears tools fast.
- Best for: Wear-resistant parts like crusher jaws, mill liners, and slurry pump components.
- Milling tip: Use CBN (cubic boron nitride) inserts. Carbide will wear out in minutes. Expect to pay more for tooling, but the results justify it.
What Tools and Inserts Work Best for Iron Milling?
Choosing the right tool is half the battle. The wrong choice leads to rapid wear, poor finish, and broken inserts.
Tool Materials
- Carbide end mills: The workhorse for most iron milling. Carbide handles the high temperatures generated when cutting iron and lasts 5 to 10 times longer than high-speed steel. Look for coated carbide with TiAlN (titanium aluminum nitride) coating. It reduces friction and extends tool life further.
- CBN inserts: For hard irons like white cast iron or heat-treated ductile iron. CBN is second only to diamond in hardness. It can handle speeds up to 300 SFM (surface feet per minute) on the toughest materials. It is expensive, so use it only when carbide fails.
- Ceramic inserts: Great for high-speed milling of gray cast iron. Ceramic does not react with iron at high temperatures, so it stays sharp longer. But it is brittle—avoid interrupted cuts and heavy vibration.
Insert Features to Look For
- Insert geometry: For roughing, use a negative rake angle. It is stronger and handles heavy cuts. For finishing, use a positive rake angle. It cuts with less force and leaves a smoother surface.
- Wiper inserts: These have a larger contact area that flattens the surface in one pass. I use them for finishing ductile iron parts—they eliminate secondary sanding.
- Chip breaker: Iron chips can be sharp and stringy. A built-in chip breaker breaks them into small, manageable pieces that do not clog the tool or scratch the workpiece.
Pro tip: A client once tried to mill white iron with carbide inserts. The tool wore out in 15 minutes. We switched to CBN inserts, and they machined 50 parts before needing a change. The higher tool cost was trivial compared to the downtime saved.
What Milling Strategies Work Best for Iron?
Your approach depends on whether you are roughing (removing lots of material fast) or finishing (getting a perfect surface).
Face Milling
Face milling flattens the top surface of a workpiece. Use a large-diameter face mill with multiple inserts for efficiency.
- Best for: Engine block decks, mounting surfaces, any flat area.
- Tip: On gray iron, face mill dry. The graphite lubricates the cut, and you save on coolant costs.
Shoulder Milling
Shoulder milling creates a 90-degree step or angle. Use a shoulder mill with square inserts for sharp corners.
- Best for: Gear blanks, stepped shafts, L-shaped brackets.
Slotting
Slotting cuts narrow grooves. Use a slot drill—an end mill with two flutes—to clear chips efficiently. Slotting generates more heat than other operations, so watch your speeds.
- Best for: Keyways, lubrication grooves, T-slots.
High-Speed Milling
On gray iron or free-machining steel, high-speed milling (over 200 SFM) reduces cycle time and improves finish. You need a rigid machine—vibration ruins tools at high speeds.
Trochoidal Milling
Trochoidal milling moves the tool in a circular path instead of cutting straight through. This reduces cutting forces and heat, making it ideal for deep slots or hard irons.
- Case study: A furniture manufacturer was breaking tools making holes in malleable iron brackets. They switched to trochoidal milling for the initial cut, then finished with a reamer. Tool life increased 300 percent, and production time dropped by 15 minutes per part.
Dry vs. Wet Machining
- Dry milling: Best for gray cast iron. The graphite provides lubrication, and dry cutting is cleaner and cheaper.
- Wet machining: Use coolant for ductile and malleable iron. It reduces heat and flushes chips. Water-soluble coolant at 5 to 10 percent concentration works well. Avoid oil-based coolants—they can clog with graphite particles.
How Do You Set Machining Parameters for Iron?
Even with the right tools and strategy, bad parameters ruin the job.
Key Parameters
| Parameter | What It Means | Gray Iron Range | Ductile Iron Range |
|---|---|---|---|
| Cutting speed (SFM) | How fast the tool moves through the material | 150–300 | 120–240 |
| Feed per tooth (in/tooth) | How much each tooth advances per revolution | 0.002–0.005 | 0.0018–0.0043 |
| Depth of cut (roughing) | How deep the tool goes per pass | 0.1–0.5 inches | 0.075–0.4 inches |
| Depth of cut (finishing) | Light pass for final surface | 0.005–0.02 inches | 0.003–0.015 inches |
Conditions for Success
- Rigidity: Iron milling generates high forces. Your machine, workpiece, and tool holder must be rock solid. Use a sturdy vise, support long parts, and tighten everything. I fixed a client’s vibration problem just by adding a support block under a long ductile iron workpiece.
- Vibration control: If you hear a high-pitched whine or see chatter marks, reduce speed by 10 percent or increase feed slightly. Vibration is the number one killer of tools in iron milling.
- Test cuts: Run a test on scrap first. If chips are powdery, you are going too slow. If chips are long and stringy, increase feed to break them.
Data point: The American Machinists’ Handbook recommends 180–220 SFM for malleable iron and only 50–100 SFM for white cast iron. Always check your tool manufacturer’s recommendations—they know their products best.
Conclusion
Iron milling is a broad topic, but it boils down to matching your approach to the material. Gray iron cuts fast and dry, thanks to its graphite. Ductile iron needs coolant and careful speed control. Malleable iron is forgiving, while white iron demands CBN tools and respect. Choose carbide or CBN tools with the right geometry. Use wiper inserts for finishing and chip breakers for chip control. Match your strategy—face, shoulder, slot, trochoidal—to the part geometry. Set speeds and feeds based on the iron type, and always ensure your setup is rigid. With these fundamentals, you can machine iron parts that meet specs, look good, and last.
FAQ About Iron Milling
1. Can I use high-speed steel (HSS) tools for iron milling?
HSS works for soft irons like free-machining steel, but it wears out fast—only 1 to 2 hours of cutting on gray iron. For most jobs, carbide is better. Save HSS for small, low-volume work.
2. Why is my gray iron surface finish rough?
Check two things: insert geometry and cutting speed. Use a positive rake insert for finishing. Gray iron needs higher speeds to get a smooth finish. If that does not fix it, try wiper inserts.
3. Do I need coolant for ductile iron?
Yes. Ductile iron lacks the graphite lubrication of gray iron. Coolant reduces heat and prevents tool wear. Use water-soluble coolant at 5 to 10 percent concentration.
4. What is the difference between nodular iron and ductile iron?
They are the same. Nodular iron is another name for ductile iron, named for the spherical graphite nodules that give it flexibility.
5. How do I know when my tool is worn out?
Look for three signs: poor surface finish (chatter or roughness), increased cutting force (the machine sounds strained), or chips changing shape (from small broken chips to long stringy ones).
Discuss Your Projects with Yigu Rapid Prototyping
At Yigu Rapid Prototyping, we have extensive experience with iron milling across all material types. Our team helps clients choose the right tools, set optimal parameters, and avoid common mistakes. We work with gray iron for engine parts, ductile iron for heavy components, and even white iron for wear-resistant applications. Our shop is equipped with modern CNC mills and a range of carbide, CBN, and ceramic tooling. Whether you need a prototype or production run, we deliver precision and reliability. Contact Yigu today to discuss your iron milling project and get a free quote.