Introduction
Look around you right now. The computer mouse under your hand. The dashboard in your car. The outer shell of your coffee maker. Chances are, every single one of these items started as tiny plastic pellets. They were all made through a process called injection production, one of the most important manufacturing methods in the world. Simply put, injection production is a way to make huge numbers of identical plastic parts. It works by melting plastic and forcing it under high pressure into a custom-made steel or aluminum mold. This guide will walk you through that entire process, from the basic principles to the advanced techniques used by experts. We will explain each step in detail, show you how to make the process faster and better, and help you understand how to take a simple idea and turn it into millions of high-quality finished products.
Here is what we will cover:
- A simple overview of how the process works.
- A detailed, step-by-step explanation of the production cycle.
- Expert tips for making the process faster and more efficient.
- The key methods for ensuring consistent quality.
- A practical guide to finding and fixing common problems.
- How to successfully scale up from a prototype to mass production.
What Is Injection Production? An Overview
To understand injection production, you need to grasp its basic principles, benefits, and limits. This gives you the “big picture” context you need to decide if this powerful process is right for your project.
What Is the Core Principle?
Imagine a very advanced, industrial-sized hot-glue gun. That is essentially how injection production works. Raw plastic, in the form of small pellets called resin, is fed into a heated barrel. It is melted and then pushed under enormous pressure into a precisely machined metal mold. The plastic cools, hardens into the exact shape of the mold cavity, and is then ejected. This entire cycle takes anywhere from a few seconds to a couple of minutes. It repeats with amazing consistency, thousands or even millions of times. This combination of speed and reliability is what makes injection production the best method for mass-producing plastic parts.
What Are the Key Advantages and Disadvantages?
Like any process, injection production has clear pros and cons. The decision to use it often comes down to balancing the high initial investment against the very low cost per part when making large quantities.
| Advantages | Disadvantages |
|---|---|
| High Efficiency & Speed: Short cycle times allow for rapid mass production. | High Initial Costs: Making the mold requires a significant upfront investment. |
| Complex Part Shapes: Can create detailed and intricate geometries. | Design Restrictions: Requires design rules like draft angles and uniform wall thickness. |
| Material & Color Flexibility: A wide range of plastics and colors are available. | Not Cost-Effective for Small Batches: The high setup cost does not work well for small runs. |
| Excellent Consistency: High precision and uniformity across millions of parts. | Long Lead Times: Designing and making the mold can take weeks or months. |
| Low Per-Part Cost: The unit cost becomes very low at high volumes. |
What Key Terminology Do You Need to Know?
To communicate effectively with a mold maker or manufacturer, you need to speak their language. Here are the essential terms.
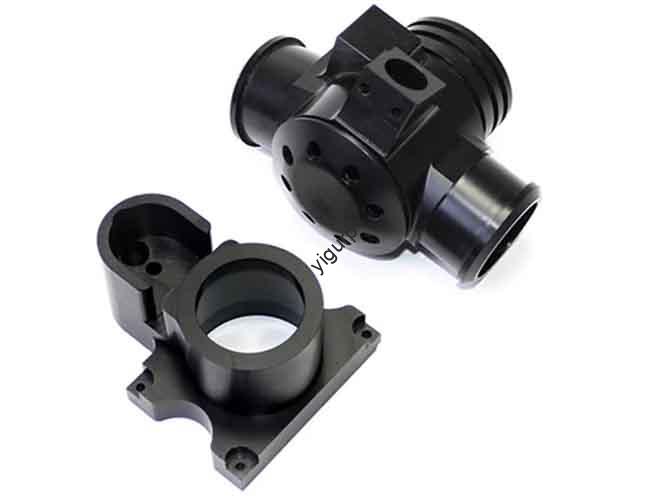
- Mold / Tooling: The custom-made metal block, usually steel or aluminum, that contains the hollow cavity which shapes the melted plastic. This is the heart of the process.
- Resin / Polymer: The raw plastic material, supplied as small pellets. Examples include ABS, Polycarbonate, and Polypropylene.
- Shot: The specific amount of melted plastic injected into the mold during one cycle.
- Clamping Unit: The part of the machine that holds the two halves of the mold tightly closed against the enormous pressure of injection.
- Injection Unit: The part of the machine that melts the plastic and injects it into the mold.
- Gate: The specific opening through which the melted plastic enters the actual part cavity.
- Runner: The system of channels within the mold that guides the melted plastic from the machine’s nozzle to the gate(s).
How Does the Injection Production Cycle Work Step by Step?
At the heart of injection production is a carefully coordinated, four-stage cycle that repeats with precise accuracy. Understanding each stage is crucial for diagnosing problems and improving performance.
Stage 1: Clamping
Before any plastic is injected, the two halves of the mold must be securely closed. This is the job of the clamping unit, which uses hydraulic or electric power to press the mold halves together. The force required is enormous, measured in tons. It must be strong enough to hold the mold shut against the intense pressure of the injected plastic. If the clamp force is too low, the pressure will force the mold open slightly, causing a defect called flash, where a thin layer of plastic leaks out along the seam.
Stage 2: Injection
With the mold clamped shut, the injection stage begins. Plastic pellets fall from a hopper into a heated barrel. Inside the barrel, a large rotating screw does three jobs: it moves the pellets forward, it heats and melts them through friction and external heaters, and it mixes them into a uniform liquid. As the screw rotates, it builds up a “shot” of melted plastic at the front. Once the correct amount is ready, the screw stops rotating and acts like a plunger, shooting forward at high speed and pressure. This forces the plastic out of the barrel, through the nozzle, and into the mold’s runner system, filling the cavity.
Stage 3: Cooling
Once the mold cavity is full, the cooling stage begins. The hot plastic, now pressed against the cool inner surfaces of the mold, starts to harden, taking on the final shape. This is not a passive process. The mold has a network of internal channels through which temperature-controlled water flows to actively draw heat away. Cooling is often the longest part of the entire cycle. In fact, it can account for up to 80% of the total cycle time. If the part is ejected before it is cool enough, it will warp or deform.
Stage 4: Ejection
After the part has cooled to a solid state, the clamping unit opens the mold. Now the finished part needs to be removed. A system of precise ejector pins built into the mold pushes forward, cleanly releasing the newly formed part. The part then falls into a collection bin or is picked up by a robotic arm. This clears the way for the mold to close and the cycle to begin again, just seconds later.
How Can You Optimize the Cycle Time?
In injection production, time literally equals money. The total time for one full cycle directly determines the per-part cost. Reducing even one second from the cycle can save thousands of dollars over a large production run.
What Are the Components of Cycle Time?
The formula is simple:
Cycle Time = Clamping Time + Injection Time + Cooling Time + Ejection Time
While every part can be adjusted, the biggest savings are almost always found in the longest phase: cooling.
Why Is Cooling Time the Biggest Challenge?
Reducing cooling time without hurting part quality is where real expertise comes in. The science involves thermal conductivity. A standard mold made of P20 tool steel is durable, but aluminum has much higher thermal conductivity. It can draw heat away much faster. For some projects, using an aluminum mold or aluminum inserts can dramatically cut cooling times.
However, the most important factor is the mold’s cooling channel design. Think of it like a car’s radiator. The more efficiently you can circulate coolant close to the “hot spots” of the part, the faster it will cool. The placement, size, and closeness of these channels to the part surface are critical. Poorly designed channels lead to uneven cooling, causing warping and sink marks, and they extend the cycle.
Real-World Case Study: Cutting Cooling Time
We once worked on a project for a 100-gram ABS plastic housing. The initial cycle time was 45 seconds, with a huge 30 seconds dedicated just to cooling. This made the part too expensive. A mold-flow simulation revealed significant hot spots in thick areas, far from the conventional straight-drilled cooling lines.
The Solution: We re-engineered the mold with conformal cooling channels—channels that followed the complex shape of the part itself. By running channels closer to the problem areas, we reduced the cooling time to just 18 seconds.
The Result: This single change cut the total cycle time by 27% and turned a potential loss into a profitable project.
What Other Factors Affect Cycle Time?
- Material Selection: A resin with a higher melt flow index (MFI) will fill the mold faster. Some materials also set up faster, allowing for shorter cooling.
- Machine Settings: Optimizing mold open and close speeds and reducing the ejector stroke distance can save fractions of a second from each cycle.
- Automation: Using a robot for part removal ensures the mold-open time is always the absolute minimum required and enables a faster, more reliable cycle.
How Do You Ensure Consistent Quality?
Consistency is the hallmark of injection production, but it does not happen by accident. A strong quality control (QC) system is essential to ensure the first part is identical to the millionth.
What Quality Checks Happen Before Production?
- Material Certification: Every batch of incoming resin is verified with a Certificate of Analysis (CoA) from the supplier, confirming its properties match the specifications.
- Mold Qualification: A new mold undergoes a series of tests to establish a stable and repeatable process window.
- First Article Inspection (FAI): Before mass production, a few initial parts are produced. Every dimension on the engineering drawing is measured and verified. This FAI report is sent to the client for final approval.
What Quality Checks Happen During Production?
- Process Monitoring: Modern machines track dozens of parameters in real-time. If any setting, like injection pressure, moves outside the approved window, an alarm alerts the operator.
- Operator Checks: At regular intervals, the operator performs visual inspections, checking for common defects like flash or surface blemishes.
- Statistical Process Control (SPC): For critical dimensions, a small sample of parts is measured periodically. The data is plotted on a control chart to track trends and catch process drift before it creates bad parts.
What Quality Checks Happen After Production?
- Final Inspection: A quality inspector randomly samples a number of parts from the completed lot, based on standards like AQL (Acceptable Quality Limit) . These parts undergo a final dimensional and visual check.
- Specialized Equipment: Precision tools are used for these checks.
- Calipers & Micrometers: For quick measurement of basic dimensions.
- Coordinate Measuring Machine (CMM): A highly precise machine that measures complex 3D shapes with micron-level accuracy.
- Optical Comparators: Projects a magnified silhouette of a part onto a screen for easy inspection of profiles and angles.
What Are the Most Common Defects and How Do You Fix Them?
Even in a well-managed process, defects can occur. The key is to quickly identify the defect, understand its cause, and apply the right fix.
| Defect | Visual Description | Common Causes | How to Fix It |
|---|---|---|---|
| Flash | A thin layer of excess plastic along the part’s edge or parting line. | 1. Clamp force too low. 2. Worn or damaged mold. 3. Injection pressure too high. | 1. Increase clamp tonnage. 2. Reduce injection pressure. 3. Repair the mold parting line. |
| Sink Marks | Small dimples or depressions, usually on thick areas. | 1. Insufficient holding pressure. 2. Cooling time too short. 3. Part wall is too thick. | 1. Increase holding pressure/time. 2. Increase cooling time. 3. Redesign part for uniform wall thickness. |
| Short Shot | The part is incomplete; the mold did not fill fully. | 1. Not enough material injected. 2. Low injection speed or pressure. 3. Blocked gate or vent. | 1. Increase shot size. 2. Increase injection speed/pressure. 3. Clean gates and vents. |
| Warping | The part is bent or twisted out of shape. | 1. Uneven cooling. 2. Part ejected too hot. 3. Internal stress from poor design. | 1. Balance cooling channel temperatures. 2. Increase cooling time. 3. Redesign for uniform walls. |
| Weld Lines | A visible line where two plastic flows met but did not fuse well. | 1. Mold temperature too low. 2. Low injection speed. 3. Poor gate location. | 1. Increase mold temperature. 2. Increase injection speed. 3. Relocate gates to change flow pattern. |
How Do You Scale Up from Prototype to Mass Production?
Successfully making a prototype is one thing. Scaling up to high-volume manufacturing is another challenge entirely. This transition requires strategic planning.
When Should You Move from a Single-Cavity to a Multi-Cavity Mold?
For prototypes and low-volume runs (under a few thousand parts), a single-cavity mold is the right choice. It has the lowest initial cost.
Once your product gains traction and you need tens or hundreds of thousands of parts, you invest in a multi-cavity mold. These molds contain multiple identical cavities, producing two, four, eight, or more parts in the same cycle time. The trade-off is a higher initial tooling cost for a much lower per-part price. A 4-cavity mold, for example, might cost 2.5 to 3 times as much as a single-cavity mold, but by producing four parts per cycle, it can reduce the per-part molding cost by nearly 75%. This is called tooling amortization, and it is the key to cost-effective mass production.
What Is the Role of Automation?
As volume scales, automation becomes a necessity.
- Robotic Part Removal: A robotic arm removes parts from the mold with perfect consistency, enabling “lights-out” manufacturing where production runs 24/7 with minimal human supervision.
- Downstream Automation: Integrated systems can perform automated quality inspection, assembly, and even packaging.
How Do You Choose the Right Manufacturing Partner?
Choosing the right partner is a critical decision. Use this checklist to evaluate suppliers.
- ✅ In-House Tooling? A partner with an in-house tool room has better control over quality and can make revisions or repairs much faster.
- ✅ Quality Certifications? Look for certifications like ISO 9001, which demonstrates a commitment to quality processes.
- ✅ Engineering Support? A top-tier partner will offer Design for Manufacturability (DFM) analysis, providing feedback to optimize your part and prevent defects.
- ✅ Range of Equipment? A partner with a wide range of machine sizes can accommodate your part today and grow with you in the future.
- ✅ Clear Pricing? A trustworthy quote clearly breaks down one-time tooling costs, material costs, and the per-part molding cost.
Conclusion
You have now journeyed from the simple concept of melting plastic pellets to the complex strategies of mass production. You understand the core cycle of Clamp, Inject, Cool, and Eject. You know that true efficiency lies in mastering details like cooling time optimization, rigorous quality control, and smart scaling. Injection production is a powerful and remarkably versatile technology when it is understood and managed correctly. Armed with this knowledge, you are far better prepared to design products for manufacturing, communicate effectively with suppliers, and make the strategic decisions that lead to a successful product launch. From a simple concept to millions of identical, high-quality finished products, injection production remains the gold standard for manufacturing at scale.
Frequently Asked Questions
- How long does it take to make an injection mold?
The lead time for a production-grade steel mold is typically 4 to 8 weeks. Simple molds for smaller parts can be ready in 2-3 weeks. Complex molds with moving parts or slides will be on the longer end of that range. Prototype molds made from aluminum can be made in 1 to 3 weeks. - How much does an injection mold cost?
Mold cost varies widely based on size, complexity, and the steel used. A small, simple mold for a part like a bottle cap might cost $3,000 to $5,000. A large, complex mold for something like an automotive dashboard can cost $50,000 to $200,000 or more. The cost is an investment that is recovered over the life of the product through the low cost per part. - What is the difference between a single-cavity and a multi-cavity mold?
A single-cavity mold makes one part per cycle. A multi-cavity mold makes two or more identical parts per cycle. Multi-cavity molds cost more upfront but dramatically lower the cost per part for high-volume production because they make many parts in the same cycle time. - What is a “hot runner” system in a mold?
A hot runner is a system of heated channels inside the mold that keeps the plastic in the runners molten. This means the runner does not cool and eject with the part. It eliminates the waste plastic (the runner) that is typical of a “cold runner” mold, saving material and reducing cycle time. - What is the most common defect in injection molding?
Flash and sink marks are among the most common defects. Flash is often caused by machine settings (too much pressure) or a worn mold. Sink marks are most frequently caused by part design (thick sections) or insufficient holding pressure during the cooling phase.
Discuss Your Injection Production Project with Yigu Rapid Prototyping
At Yigu Technology, we live and breathe the details of injection production every day. We know that a successful project depends on getting every stage right, from the initial mold design to the final quality inspection. Our team of experienced engineers works with you to optimize your part for manufacturing, choose the right material, and develop a production plan that meets your budget and timeline. Whether you are prototyping a new idea with a single-cavity aluminum mold or scaling up for high-volume production with a multi-cavity steel tool, we are here to help. Let’s discuss your project and put our expertise to work for you.