In the challenging world of creating new products, finding a design problem after production starts can cause huge budget issues, major delays, and losing your place as a market leader. The distance between a digital idea on a computer screen and a real, manufacturable product is enormous and full of risks. Industrial prototyping is the essential bridge across this gap. It is a careful engineering process for reducing risk, testing ideas, and speeding up innovation. This complete guide serves as your roadmap, explaining the what, why, and how of industrial prototyping, from the first sketch to a design fully ready for mass production.
What Is Industrial Prototyping?
To master the process, you must first understand what makes a true industrial prototype different from a simple model. It is more than just something that looks good; it is a working and manufacturable preview of a final product, built to answer important engineering and business questions.
How Is “Industrial” Different?
Unlike concept models which mainly test how things look or hobby prints which explore shape, industrial prototypes are engineered to test performance under real-world pressures. They are defined by a focus on concrete, measurable results.
Industrial Prototypes Focus On:
- Function Testing: Does the part or assembly perform its mechanical, electrical, or heat function as specified in the design?
- Design for Manufacturing (DFM): Can this design be produced efficiently, reliably, and cost-effectively at the intended production scale?
- Material Testing: Does the chosen material, or a close substitute, withstand the operational stresses, temperatures, and environmental conditions it will face?
- Assembly & Integration: Do all individual components fit together as intended? Are assembly procedures logical and efficient?
What Is Its Critical Lifecycle Role?
Industrial prototyping is not an optional expense; it is an essential risk-reduction strategy. Its primary role is to provide physical feedback early and often, allowing design teams to fail fast, learn cheaply, and improve toward a strong final design. Committing to mass production tooling without this testing is a significant financial gamble. Tooling for injection molding can cost anywhere from $10,000 to over $100,000, making pre-tooling testing essential. By identifying flaws at the prototype stage—where changes cost hundreds or thousands of dollars—companies avoid corrections that would cost tens or hundreds of thousands at the tooling stage, all while speeding up their time-to-market.
What Are the Key Prototyping Technologies?
The effectiveness of an industrial prototype is directly tied to the manufacturing technology used to create it. Modern prototyping relies on a suite of advanced technologies, each with distinct advantages and ideal applications. Understanding these core processes is fundamental to making sound strategic decisions.
What Is CNC Machining?
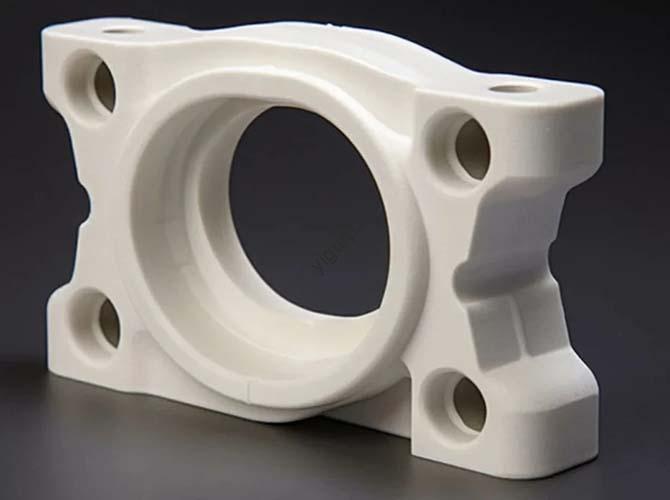
CNC (Computer Numerical Control) machining is a subtractive manufacturing process. It starts with a solid block of production-grade material (like aluminum or ABS plastic) and uses computer-controlled cutting tools to remove material layer by layer, carving out the final part. Its primary strength lies in its exceptional precision and the ability to use the exact materials intended for the final product. This makes it the gold standard for functional prototypes that require tight tolerances, superior surface finishes, and testing of real-world material properties. It’s commonly used for creating robust functional parts, jigs, fixtures, and pre-production components that must withstand significant mechanical stress.
What Is 3D Printing?
Also known as additive manufacturing, 3D printing is an additive process that builds parts layer by layer from a digital file. Instead of removing material, it adds it. This approach unlocks tremendous speed and geometric freedom. Key industrial methods include Fused Deposition Modeling (FDM) for basic form-fit tests, Stereolithography (SLA) for parts requiring high detail and a smooth surface finish, and Selective Laser Sintering (SLS) for creating durable, complex functional parts from nylon powders. The primary advantage of 3D printing is its speed for early-stage iterations and its ability to produce highly complex geometries that would be impossible or prohibitively expensive to machine. It is ideal for one-off parts, rapid design verification, and creating complex internal channels or organic shapes.
What Is Sheet Metal Fabrication?
Sheet metal fabrication involves a set of processes used to cut, bend, and form flat sheets of metal into structural parts. Processes like laser cutting, waterjet cutting, press brake bending, and stamping are used to create components like enclosures, brackets, panels, and chassis. For products that will have a metal casing or structural frame, sheet metal prototyping is essential. It allows engineers to test the form, fit, and assembly of these components, test the design of bend radii and fastening points, and ensure the final product is both rigid and manufacturable at scale.
Technology Comparison
Choosing the right technology depends entirely on the prototype’s objective. The following table provides a clear comparison to guide your decision-making.
| Technology | Process Type | Best For… | Key Strengths | Limitations | Common Materials |
|---|---|---|---|---|---|
| CNC Machining | Subtractive | High-fidelity functional testing, tight tolerances, final material testing | High precision, excellent surface finish, uses production-grade materials | Higher cost for complex geometries, can have longer lead times | Aluminum (6061, 7075), Stainless Steel, ABS, Polycarbonate, PEEK |
| 3D Printing (SLA/SLS) | Additive | Rapid iterations, complex geometry, form and fit checks, low-volume functional parts | Very fast lead times, geometric freedom, low cost for single units | Material properties may not match final product, lower strength than CNC | SLA Resins (Standard, Tough, High-Temp), SLS Nylon (PA12), Glass-filled Nylon |
| Sheet Metal Fab | Forming | Enclosures, brackets, panels, chassis, structural components | High strength and durability, cost-effective for boxy forms | Limited to parts with uniform wall thickness, geometric complexity is limited | Aluminum (5052), Steel (Cold Rolled), Stainless Steel (304) |
How Do You Choose the Right Material?
The material used for a prototype is as important as the geometry itself. Selecting a material that accurately simulates the final product’s performance is crucial for meaningful testing. The choice ranges from versatile plastics to robust metals, each offering a unique profile of properties.
What Are Common Industrial Plastics?
Plastics offer a vast range of properties suitable for nearly any application, from simple enclosures to high-performance mechanical components.
- ABS (Acrylonitrile Butadiene Styrene): A common thermoplastic known for its good impact resistance, toughness, and rigidity. It is often used for prototyping consumer electronics housings and automotive trim parts.
- Polycarbonate (PC): Valued for its incredible strength, temperature resistance, and optical clarity. Ideal for prototyping lenses, protective guards, and components requiring high impact strength.
- Nylon (PA): A family of polymers (e.g., PA6, PA12) known for excellent mechanical wear resistance, low friction, and high strength. Perfect for prototyping gears, bearings, and living hinges.
- PEEK (Polyether Ether Ketone): A high-performance thermoplastic with exceptional mechanical strength, chemical resistance, and stability at high temperatures. Used for demanding aerospace, medical, and industrial applications.
What Are Essential Industrial Metals?
When strength, durability, and thermal conductivity are paramount, metals are the material of choice.
- Aluminum (e.g., 6061, 7075): Offers an excellent strength-to-weight ratio, good thermal conductivity, and natural corrosion resistance. 6061 is a versatile workhorse, while 7075 provides aerospace-grade strength. It’s the go-to for lightweight structural components.
- Stainless Steel (e.g., 304, 316): Known for high strength, durability, and excellent corrosion resistance. 304 is a general-purpose grade, while 316 offers superior resistance to chlorides, making it ideal for marine and medical applications.
- Titanium: Boasts the highest strength-to-weight ratio of any common metal, along with outstanding corrosion resistance and biocompatibility. Its high cost reserves it for high-performance aerospace, racing, and medical implant prototypes.
How Do You Match Materials to Goals?
To simplify selection, map your primary need to a suitable material family. This practical approach moves from theory to application.
If you need…
- High Strength & Durability: Consider Stainless Steel, Titanium, or high-strength Aluminum alloys like 7075.
- Lightweighting: Consider Aluminum, Nylon (especially glass-filled variants), or ABS.
- Visual Appearance & Smooth Finish: Consider SLA Resins for 3D printing or CNC-machined and polished ABS or PC.
- High-Temperature Resistance: Consider PEEK, Ultem (PEI) resins, or any of the industrial metals.
- Chemical Resistance: Consider Stainless Steel 316, PEEK, or Polypropylene (PP) .
What Is the Industrial Prototyping Workflow?
Industrial prototyping is a structured process, not a single event. Following a clear, step-by-step workflow ensures that each prototype yields maximum value and moves the project closer to a successful launch.
1. Concept & Digital Design (CAD)
Every physical prototype begins as a digital blueprint. This is the 3D CAD (Computer-Aided Design) model, which defines the complete geometry of the part. During this stage, engineers and designers must define not just the shape but also critical features and tolerances that will dictate the part’s function. A well-defined CAD model is the single source of truth for the entire fabrication process.
2. Design for Manufacturing (DFM) Analysis
This is arguably the most critical and value-adding step before any material is cut. A DFM analysis is a review where the CAD model is evaluated for manufacturability using the intended production method. For an injection molded part, this means checking for proper draft angles and uniform wall thickness. For a CNC part, it means ensuring tools can access all features. This step catches design flaws that would make manufacturing difficult or impossible, preventing costly and time-consuming redesigns later.
3. Technology & Material Selection
With a manufacturable design, the team makes a strategic choice based on the prototype’s purpose. Is this a quick, low-cost model to check form and fit? FDM 3D printing might be best. Is it a full functional test of a high-stress mechanical part? CNC machining in the final production metal is the right choice. This is where the decisions from the previous chapters are put into action.
4. Fabrication & Production
This is the stage where the digital file becomes a physical object. The CAD model is sent to the chosen machine—a CNC mill, a 3D printer, or a laser cutter—and the part is fabricated according to the specifications. This process can take anywhere from a few hours for a simple 3D print to several days for a complex CNC-machined part.
5. Post-Processing & Finishing
Raw parts directly off the machine are rarely “finished.” They almost always require post-processing steps to meet the final requirements. This can include removing support structures from 3D prints, deburring sharp edges on machined parts, sanding and polishing for a smooth cosmetic finish, or applying surface treatments like anodizing for aluminum or painting. This step is what transforms a rough part into a prototype with production-level appearance and feel.
6. Testing, Testing, and Iteration
This is the ultimate goal of the entire process. The finished prototype is put to the test. This can involve functional testing (Does it perform its job?), stress testing (Does it break under load?), and assembly testing (Does it fit with other components?). This is where invaluable insights are gained. During this phase, we often see teams discover that a snap-fit tab, perfect in CAD, is too brittle when made from the prototype material. This single discovery justifies the entire process, preventing a massive tooling change that would have been required if the flaw were found in a production part. The results of this testing feed back into Step 1, creating a powerful iterative loop of design, build, test, and learn.
What Is the Core Trade-Off in Prototyping?
Every prototyping project operates within a set of constraints. Successfully navigating these requires understanding a fundamental trade-off. There is no single “best” method; there is only the best method for your specific goal at a specific stage of development.
The “Triangle of Constraints”
We can visualize this trade-off as a project triangle with three competing vertices: Speed, Cost, and Fidelity.
- Speed: How quickly can you get a physical part in hand?
- Cost: How much does the prototype cost per unit?
- Fidelity: How closely does the prototype represent the final product in terms of material, tolerance, surface finish, and strength?
The rule of the triangle is that you can typically optimize for two of these priorities, but the third will be a compromise. A very fast, low-cost prototype (FDM 3D print) will have low fidelity. A very high-fidelity prototype (CNC machined titanium) will not be fast or cheap.
Strategic Decision Matrix
Use this matrix to align your prototyping strategy with your project’s current goal.
| Primary Goal | Optimized for Speed & Low Cost | Balanced Approach | Optimized for High Fidelity |
|---|---|---|---|
| Early-Stage Concept Testing (Quickly test ergonomics, form, and basic fit) | FDM 3D Printing: Fastest, lowest cost. Ideal for multiple design variations in a single day. Fidelity is low. | SLA 3D Printing: Good speed, moderate cost. Offers a much better surface finish for appearance models. | Not Recommended |
| Functional/Engineering Test (Test mechanical performance, stress, and assembly) | SLS 3D Printing (Nylon): Good for testing complex parts where strength is needed but material match isn’t critical. | CNC Machining (in a similar, cheaper material like Aluminum instead of Steel): Good balance of speed, cost, and functional accuracy. | CNC Machining (in final production material): Highest cost and slowest, but provides definitive data on performance. |
| Pre-Production/Marketing Sample (A prototype that looks and feels like the final product) | Not Recommended | SLA 3D Printing + Post-Processing: Can achieve excellent cosmetic results with painting and finishing. | CNC Machining + Finishing/Anodizing: The most accurate representation of a production part. |
What Are Pro Tips for Cost Optimization?
Optimizing cost doesn’t have to mean sacrificing quality. With experience, teams learn to make smart trade-offs that reduce expenses without compromising the validity of the test.
- Design with the manufacturing process in mind. For CNC, simplifying geometry, avoiding deep pockets, and using standard tool sizes can dramatically reduce machine time and cost.
- Order multiple units at once. For processes like CNC machining, the setup cost is a significant portion of the total. Ordering several units in a single run dilutes this setup cost across all parts.
- Clearly define and communicate tolerances. Tighter tolerances equal higher costs. Identify the few critical surfaces that require high precision and allow for looser tolerances on non-critical features.
- Use a “good enough” material for early tests. If your final part is stainless steel but you’re only testing fit, make the first prototype from a cheaper aluminum or even a robust plastic.
Real-World Impact: Case Studies
The theoretical benefits of industrial prototyping are best understood through its real-world application. These case studies from diverse industries demonstrate how a strategic prototyping process delivers tangible engineering and business value.
Case Study 1: Aerospace
Problem: An existing CNC-milled aluminum bracket on a satellite was functional but over-engineered and heavy. Every gram of weight saved translates to significant launch cost reductions.
Process: Engineers used generative design software to create a new, organic, lattice-like structure optimized for a specific load case. This design was impossible to machine. The team prototyped it using Direct Metal Laser Sintering (DMLS) , a 3D printing process, with a high-strength titanium alloy.
Outcome: The functional prototype was subjected to rigorous load testing. It passed 150% of the required load while achieving a 40% weight reduction compared to the original part. This tested the design and material choice, paving the way for its use in the next generation of satellites.
Case Study 2: Automotive
Problem: A high-performance engine design required a new intake manifold with highly complex internal geometry to optimize airflow. Engineers needed to test performance before committing to expensive casting tools.
Process: The team used SLS 3D printing with a glass-filled nylon material to create a full-scale, high-fidelity functional prototype in under a week. The material was strong and temperature-resistant enough to be used in a live engine test. The prototype was fitted to a test engine and put on a dynamometer for real-world performance measurement.
Outcome: This real-world test revealed an unexpected airflow resonance at a specific RPM that complex CAD fluid dynamics simulations had missed. This insight prompted a crucial but minor design change to an internal runner. The discovery avoided an $80,000 tooling modification and a potential 3-month project delay.
Case Study 3: Energy
Problem: A new remote sensor designed for an offshore oil rig needed an extremely durable and weather-sealed enclosure to protect sensitive electronics in a harsh, corrosive environment.
Process: A hybrid prototyping approach was used. The main body of the enclosure was rapidly iterated using sheet metal fabrication to test the overall size, mounting points, and internal component layout. Simultaneously, the critical sealing interface—a complex groove for a custom gasket—was CNC machined from aluminum to ensure perfect precision.
Outcome: This combination allowed for rapid iteration on the form factor while ensuring the most critical feature was perfect. The assembled prototype, combining the sheet metal body and CNC-machined interface, passed rigorous IP67 water ingress testing on the first try, dramatically accelerating the timeline for regulatory approval and field deployment.
Conclusion
Industrial prototyping is not a line item in a project budget; it is a fundamental pillar of a modern innovation strategy. It is the disciplined practice of turning digital ideas into physical knowledge. As we have seen, the path from concept to production is paved with critical decisions—choosing the right technology, the correct material, and the optimal workflow for each stage of development. Making these choices wisely is what separates market leaders from those who fall behind. The future of prototyping promises even tighter integration with digital tools, with AI-driven design suggesting manufacturable forms and new materials enabling even higher-fidelity results at greater speeds. By embracing industrial prototyping not as a cost but as an investment in quality, speed, and risk reduction, you empower your team to build better products, faster, and with greater confidence than ever before.
FAQ
What is the difference between a concept model and an industrial prototype?
A concept model is mainly used to test visual appearance and basic shape. It is often made quickly and cheaply. An industrial prototype is engineered to test function, performance, and manufacturability. It is made with processes and materials that closely simulate the final production part.
When should I use 3D printing versus CNC machining for a prototype?
Use 3D printing (like SLA or SLS) when you need speed, have complex geometries, or are in the early stages of design iteration. Use CNC machining when you need parts with the highest precision, superior strength, and properties that exactly match the final production material, especially for functional testing.
How can I reduce the cost of industrial prototyping?
You can reduce costs by simplifying your design, using standard materials, only specifying tight tolerances on critical features, and ordering multiple units at once to spread setup costs. Most importantly, work with a partner who provides early Design for Manufacturability (DFM) feedback to optimize your design for the chosen process.
Discuss Your Projects with Yigu Rapid Prototyping
Ready to de-risk your product development and move from concept to a production-ready design? At Yigu Rapid Prototyping, we are experts in the full spectrum of industrial prototyping services. Our facility in Shenzhen is equipped with advanced 5-axis CNC machining, industrial SLA and SLS 3D printing, and precision sheet metal fabrication. We are ISO 9001 certified, and our experienced engineering team provides in-depth DFM feedback on every project. We help you navigate the trade-offs between speed, cost, and fidelity to choose the optimal path for your specific needs. Contact us to discuss your project and let’s build something great together.