yigu is a step-by-step guide for anyone who wants to create a high-precision CNC game machine prototype. Whether you’re a hobbyist, a small business owner, or a product designer, we’ll walk you through every stage—from initial design to final testing. We focus on practical steps, real-world examples, and easy-to-understand explanations, so you don’t need advanced engineering skills to follow along. By the end, you’ll know exactly how to turn your game machine idea into a functional, high-quality prototype.
What Do You Need Before CNC Machining?
Before you start cutting material with a CNC machine, you need to plan and prepare. This stage sets the foundation for a smooth process and a precise prototype. Skipping any step here can lead to mistakes, rework, and wasted time.
Analyze Your Product Needs
First, clarify what kind of game machine you want to build. Ask yourself: Is it a handheld or a desktop model? What size do you need? What core features must it have? These details guide every other decision.
| Game Machine Type | Standard Size | Key Features to Reserve Space For |
|---|---|---|
| Handheld | 180×100×30mm | Joysticks, action/start/select buttons, 4-7 inch touchscreen, 5000-8000mAh battery, USB-C/HDMI/headphone ports, anti-slip grip, fan slots for heat dissipation |
| Desktop | 300×200×150mm | Controller docks, internal cooling brackets, large display mount, multiple ports, sturdy case panels |
Real Case Example: A client once asked us to make a handheld game machine prototype for a retro gaming project. They forgot to reserve space for a cooling fan, and the prototype overheated during testing. We had to rework the shell design, adding fan slots—this delayed the project by 3 days. Always double-check your feature list!
Split the Prototype into Machinable Parts
You can’t machine the entire game machine as one piece. Split it into simple, machinable components. Here’s how we do it for most projects:
- Handheld models: Upper shell, lower shell, joystick bases, button panels, screen frames, circuit board mounts
- Desktop models: Case panels, controller docks, internal cooling brackets, display stands
Avoid overhangs (parts that stick out without support) or closed cavities (hollow spaces that the CNC tool can’t reach). These will make machining impossible or lower precision.
Create a 3D Model
Use easy-to-learn CAD software (like SolidWorks or UG NX) to make a 3D model of each part. Focus on precise dimensions—small mistakes here will ruin your prototype.
Key details to highlight in your model:
- Button holes: 8-10mm in diameter (fits most standard game buttons)
- Joystick mounting slots: 15-20mm deep (ensures the joystick stays in place)
- Screen cutouts: Match your display size with a 0.1mm gap (prevents the screen from being too tight or loose)
- Screw holes: M2-M3 size (for assembling the shell)
Add a 3°-5° draft slope (a slight angle) to all parts. This makes it easier to remove the prototype from molds if you later move to mass production.
Choose the Right Materials
Pick materials based on function, how easy they are to machine, and durability. We recommend these materials for common parts (they balance cost and performance):
| Part Type | Recommended Material | Why It Works |
|---|---|---|
| Handheld/Desktop Shells | ABS Plastic | Low cost, impact-resistant, easy to dye (great for custom colors) |
| Joystick Bases/Button Panels | PC Plastic | High rigidity, wear-resistant (handles frequent button presses) |
| Internal Cooling Brackets | Aluminum Alloy | Good heat conduction, lightweight (keeps the machine cool) |
| Transparent Screen Frames | Acrylic | Clear, scratch-resistant (doesn’t block the screen) |
Pretreat Your Materials
Prepare raw materials before machining to avoid errors:
- Cut raw materials into blanks (leave 2-3mm of machining allowance—extra material to trim during machining).
- For plastic sheets: Use laser cutting (clean, precise cuts).
- For aluminum alloy blocks: Use bandsaw cutting.
- Anneal aluminum alloy (heat to 300-350°C for 1-2 hours) to reduce internal stress (prevents deformation during machining).
- Clean all blanks with alcohol to remove oil and dust (ensures the CNC tool doesn’t slip).
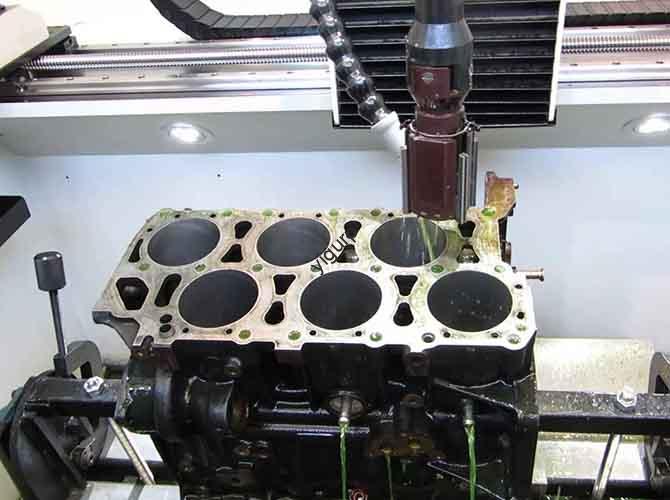
How to Do CNC Machining for Your Prototype?
CNC machining turns your 3D model into physical parts. The key is to control programming, clamping, and cutting to get precise results. We’ll break this down into simple steps.
Program the CNC Machine
Use CAM software to tell the CNC machine how to cut the material. Good programming boosts efficiency and quality. Here’s what you need to do:
| Programming Step | Key Actions | Tools & Parameters |
|---|---|---|
| Import Model & Set Coordinates | Import 3D models (STEP/IGS format) into CAM software. Set the machining origin (align with the part center for symmetrical parts like handheld shells). | Software: Mastercam, PowerMill |
| Generate Toolpaths | Roughing: Remove 80-90% of excess material (leave 0.5-1mm for finishing). Finishing: Cut small details (button holes, joystick slots) with precision. Corner Cleaning: Remove residue from complex areas. | Roughing: φ8-10mm HSS cutters. Finishing: φ0.3-0.5mm carbide cutters. Corner Cleaning: φ1-2mm end mills. |
| Set Cutting Parameters | Adjust speed, feed rate, and cutting depth based on material (faster for metal, slower for plastic). | Aluminum: 8000-10000 RPM, 300-500 mm/min. ABS: 4000-6000 RPM, 200-300 mm/min. PC: 5000-7000 RPM, 250-350 mm/min. |
Pro Tip: Always test your toolpath with a scrap piece of material first. This avoids ruining your actual blank if the program has errors.
Clamp the Material Properly
Clamping keeps the material in place during machining. Poor clamping causes displacement and imprecise parts. Follow these guidelines:
- Aluminum alloy blocks: Use vises with soft rubber jaws (avoids scratches on the surface).
- Thin plastic sheets (2-3mm): Use vacuum suction cups (even pressure, no deformation).
- Irregular parts (e.g., curved joystick bases): Use custom jigs (maintains alignment).
- Symmetrical parts (e.g., handheld shells): Use double-sided clamping. Machine one side, flip it, and re-calibrate with a probe. Aim for ≤±0.05mm symmetry error.
Execute the Machining
Follow these steps for smooth machining:
- Roughing: Focus on speed. Use layer-by-layer milling to shape the basic outline. For plastic, control cutting force (max 30N) to avoid cracking. For aluminum, use cutting fluid to reduce heat deformation.
- Finishing: Prioritize precision. Machine critical features first (button holes, joystick slots). For M2-M3 threaded holes, use taps (plastic) or thread milling cutters (metal) to ensure smooth screw installation.
- Special Processing: Use 4-axis linkage machining for curved surfaces (e.g., handheld grips) to get consistent curvature (≤±0.1mm error). Add C0.5 chamfers to button holes (avoids sharp edges that scratch fingers).
Check Quality During Machining
Test parts after each process to catch defects early. Here’s what to check:
- Dimensional Inspection: Use digital calipers (outer dimensions, ±0.1mm tolerance) and micrometers (aluminum parts, ±0.01mm tolerance).
- Surface Quality: Use a stylus roughness meter. Visible parts (shells) need Ra ≤1.6μm; internal parts (brackets) need Ra ≤3.2μm.
- Feature Verification: Use go/no-go gauges to test button holes (buttons fit smoothly) and joystick slots (0.1mm gap with joystick).
What to Do After CNC Machining?
Machined parts need surface treatment to look good, last longer, and feel better. This stage also fixes small flaws from machining.
Deburr and Polish
Deburring removes sharp edges (burrs) left by machining. Polishing improves the surface feel and appearance:
- Deburring: Use 400-mesh sandpaper for plastic parts. For metal parts, use round files (holes) and flat files (edges). Blow debris from small holes with compressed air (0.5-0.8 MPa).
- Polishing: Aluminum parts: Vibration grinding (1-2 hours) for a matte finish; mechanical polishing (800-1200 mesh sandpaper + wool wheel) for high gloss. Plastic parts: Cotton wheel polishing machine to remove machining marks.
Material-Specific Surface Treatment
Different materials need different treatments to meet design goals. Here’s our go-to guide:
| Material | Treatment Method | Purpose & Effect |
|---|---|---|
| Aluminum Alloy | Sandblasting + Anodizing | Sandblasting (80-120 mesh) creates a non-slip texture. Anodizing (5-10μm thick) adds corrosion resistance (salt spray test ≥48 hours) and color options (black, red, blue) for gaming themes. |
| ABS Plastic | Painting + Silk Screen | 2-3 coats of matte/gloss paint (12-24 hours dry time) matches brand colors. Silk screen adds button labels (A/B/X/Y) and logos (no peeling after 100 tape pulls). |
| Acrylic | Laser Engraving + Anti-Fingerprint Coating | Laser engraving adds translucent game icons (no screen obstruction). Anti-fingerprint coating reduces smudges by 60%. |
How to Assemble and Test the Prototype?
Assembly and testing ensure your prototype works as intended. Follow these steps to avoid mistakes and validate performance.
Assembly Step-by-Step
Assemble parts in the right order to prevent damage or misalignment:
- Pre-Assembly Check: Use a coordinate measuring machine (CMM) to inspect critical dimensions (button hole spacing, ±0.03mm tolerance). Test-fit all parts to ensure buttons align with holes, joysticks fit slots, and the screen matches the frame (≤0.1mm gap).
- Housing Assembly: Fasten handheld shells with M2 screws (1-1.5 N·m torque, no gaps). Assemble desktop panels with snaps (plastic) or screws (metal brackets).
- Install Functional Parts: Add buttons (with silicone gaskets for tactile feedback), joysticks (spring mechanisms for reset), and the screen (double-sided tape). Connect the circuit board to buttons/joysticks with wires.
- Add Internal Components: Mount the battery, cooling fan, and ports. Ensure the fan aligns with vent slots (no airflow blockage) and ports match case cutouts (no interference).
- Final Check: Shake the prototype gently (handheld: 10° tilt; desktop: 5° tilt) to check for loose parts (no rattling).
Test the Prototype Thoroughly
Test every aspect of the prototype to ensure it’s functional and durable. We use these tests for all our projects:
Appearance Inspection
- Color consistency: ΔE ≤1.5 (no visible color differences).
- Surface defects: No scratches >0.5mm; ≤1 blemish per 100cm².
- Labels/logos: No smudging; logos are properly aligned.
Structural Testing
- Button Durability: Press each button 10,000 times (no sticking or reduced feedback).
- Joystick Reliability: Move joysticks in all directions 5,000 times (no drift >0.1mm).
- Drop Test: Drop handheld prototypes from 1.2m (foam pad) (no cracks or damage).
Functional Verification
- Power on: Test button responsiveness (trigger time ≤0.1s) and joystick accuracy (no input lag).
- Game Simulation: Run action games for 1 hour (surface temperature ≤45°C; battery life ≥4 hours).
Real Case Example: A retro game machine prototype we made failed the drop test—its shell cracked. We thickened the shell edges and added rib structures. The revised prototype passed the test easily. Iteration is normal!
How to Optimize and Iterate?
No prototype is perfect on the first try. Use test results to fix issues and improve your design.
Log and Analyze Problems
Record every defect with photos and measurements. Common issues include:
- Button stuck after 5,000 presses
- Joystick drift (0.2mm)
- Shell cracks in drop test
- Overheating during gameplay
Optimize the Design and Process
- Modify 3D models: Adjust button hole depth (add 0.5mm to prevent sticking), thicken joystick bases (better stability), or reinforce shell edges (ribs for impact resistance).
- Update CAM programs: Adjust toolpaths for optimized parts (e.g., joystick slot size to reduce drift).
- Rework defective parts: Re-machine button holes, polish joystick slots, or replace cracked shells with ABS+PC blend (stronger than pure ABS).
What Do You Get in the End?
After all steps, you’ll have a complete prototype package. This includes functional prototypes and useful documentation for future use.
Final Prototypes
You’ll get 1-10 functional game machine prototypes. Use them for demonstrations, user testing, or low-volume trial production.
Technical Documents
- 3D model files (STEP/IGS) and 2D drawings (DXF) with dimensions.
- CNC machining programs (G-code) and tool lists (cutter type, diameter, service life).
- Assembly drawings (part numbers, screw torque) and inspection reports (CMM data, test results).
Feedback Report
A summary of challenges and solutions (e.g., “Aluminum bracket deformed—increased annealing time to 2.5 hours”). It also includes mass production suggestions (e.g., “Use injection molding for ABS shells to cut costs”).
What Are the Key Precautions?
Follow these tips to avoid common mistakes and keep the process efficient:
- Precision Control: CNC accuracy is ±0.05mm, but account for material behavior. Aluminum expands (add +0.02mm tolerance); plastic shrinks (add -0.03mm tolerance) after machining.
- Cost Balance: CNC is great for small batches (1-100 units). For mass production (>1000 units), use injection molding (plastics) or die casting (metals)—cuts costs by 50-70%.
- Safety First: Wear safety glasses and gloves during machining. Use fume extractors when painting or anodizing (avoids toxic exposure).
Conclusion
Creating a high-precision CNC game machine prototype is a step-by-step process—from design and preparation to machining, surface treatment, assembly, and testing. The key is to focus on user needs, use the right materials and tools, and iterate based on test results. You don’t need to be an expert, but attention to detail will make your prototype functional, durable, and ready for the next step (whether that’s user feedback or mass production). By following this guide, you can turn your game machine idea into a real, working prototype without unnecessary delays or mistakes.
FAQ
What materials work best for CNC game machine prototypes? It depends on the part’s function. ABS plastic is best for shells (low cost, impact-resistant). PC plastic works for button panels/joysticks (wear-resistant). Aluminum alloy is ideal for cooling brackets (heat conduction). Acrylic is great for transparent screen frames (clear, scratch-resistant). All balance machinability and functionality.
Can I use a CNC prototype directly for mass production? No. CNC prototypes are for testing and design verification, not mass production. For >1000 units, use injection molding (plastics) or die casting (metals)—they cut per-unit costs by 50-70% and speed up production 3-5 times.
How long does it take to make a CNC game machine prototype? A simple handheld prototype takes 7-10 days (2-3 days design, 3-4 days machining, 1-2 days surface treatment, 1 day assembly/testing). A complex desktop prototype takes 12-15 days (more intricate machining and testing).
Do I need advanced CAD/CAM skills to make a prototype? No. You can use user-friendly CAD software (like SolidWorks) and follow basic programming steps. Many CAM tools have pre-set parameters for common materials, making it easy for beginners.
Discuss Your Projects with Yigu Rapid Prototyping
At Yigu Rapid Prototyping, we help turn game machine ideas into high-precision prototypes. Our team has 10+ years of experience in CNC machining for gaming products—we handle everything from design optimization to assembly and testing. Whether you’re working on a handheld retro console or a desktop gaming station, we can tailor our process to your needs. Contact us today to discuss your project, and we’ll help you shorten the prototype cycle by 20-30% while maintaining top-tier quality.