Introduction
Designing a new electric face wash brush is a detailed challenge. It needs to vibrate at just the right frequency to clean skin gently but effectively. It must be completely safe to use in the shower, meaning it has to be waterproof. It also needs to feel comfortable and secure in your hand. Before you invest in expensive production molds, you need a prototype to prove your design works. The CNC machining electric face wash prototype process is the ideal way to create accurate, functional models. But how do you actually make one? This article walks you through the entire process. We will cover the essential design steps, the core machining work, the finishing touches, and how to test your prototype to ensure it is safe, effective, and ready for the market.
What Design and Preparation Work Is Needed Before Machining?
A great prototype starts with a solid plan. The design stage is where you define every detail that will make your face wash brush a success.
Understanding Your Product’s Core Functions
First, define the core functions. Your device will have a motor that vibrates. You need to decide on the vibration frequency, perhaps with 2-3 adjustable gears ranging from 8,000 to 12,000 RPM. A critical requirement is an IPX7 waterproof rating , meaning it can be submerged in 1 meter of water for 30 minutes. It will be rechargeable, likely via a 5V/1A USB-C port , with a battery life of 40-60 minutes from a 2-3 hour charge.
The appearance is also key. It needs an ergonomic grip that fits comfortably in the palm, with a diameter of about 30-40mm. The overall length might be 150-180mm. Inside, you must reserve space for the motor, the battery, the circuit board, and the power and gear buttons.
Designing the Internal and External Structure
The design needs careful attention to both the inside and outside.
- Internal Structure: You need a precise motor mounting slot. This slot must be perfectly aligned with the brush head spindle, with a coaxiality tolerance of ≤0.05mm. This ensures smooth, quiet operation. You also need battery fixing ribs to hold the battery securely and a cavity for the circuit board.
- External Structure: The grip area should feature a non-slip texture. You need to create button grooves (about 2-3mm deep). The top needs a brush head connection interface, which could be a thread or a snap-fit. Most critically, you must design waterproof sealing grooves at the joints where the two halves of the housing come together.
Creating 3D Models and Running Simulations
Use CAD software to design a split housing, typically with upper and lower shells. Mark every key dimension. The motor slot diameter must match the motor’s outer diameter, with a small 0.1mm gap for fitting. The brush head interface thread might be M10×1. Model the USB-C charging port cutout to its exact size, about 8.4mm by 2.6mm.
You can also use simulation software. Run a vibration analysis to check for abnormal noise at maximum RPM. Simulate the waterproof performance to ensure the sealing groove can withstand pressure, targeting a resistance of ≥0.1MPa.
Selecting the Right Materials
Choose materials that are water-resistant, durable, and skin-friendly.
| Component | Recommended Material | Key Reason |
|---|---|---|
| Housing | ABS/PC Alloy or Aluminum Alloy 6061 | ABS/PC is waterproof and impact-resistant. Aluminum alloy is lightweight and can be polished for a premium feel. Aim for a wall thickness of 1.5-2mm. |
| Brush Head | Medical-grade Silicone | It is soft and non-irritating. The pores on the brush head might be 0.5-1mm in size. |
| Internal Support | PA66 Nylon or Aluminum Alloy | Nylon is insulated and wear-resistant. Aluminum alloy provides a very stable mount for the motor. |
Preparing the Raw Materials
Before machining, you must prepare your material blanks. Cut them slightly larger than the final part, leaving a 0.5-1mm machining allowance. Use laser cutting for plastic and a bandsaw for metal. It is vital to dry ABS/PC plastic at 80-100°C for 2-3 hours to remove moisture, which can cause bubbles during machining. You should also anneal aluminum alloy by heating it to 300-350°C for 1-2 hours to relieve internal stress and prevent warping.
What CNC Machining Preparation Is Needed for a Face Wash Prototype?
With the design ready, you now prepare the tools and plan the machining process.
Selecting Tools and Parameters
The right tools and settings are essential for good results.
| Category | Specific Options | Key Parameters |
|---|---|---|
| Roughing Tools | Φ8mm flat cutter (for plastic), Φ10mm flat cutter (for aluminum) | Plastic: 6,000 rpm, 300mm/min feed, 0.5mm cut depth. Aluminum: 10,000 rpm, 400mm/min feed, 0.8mm cut depth. |
| Finishing Tools | Φ1.5mm ball cutter (for curves), Φ3mm drill bit (for button holes) | Aim for surface finish Ra1.6-3.2 (aluminum) or Ra3.2 (plastic). Add small C0.3-C0.5mm chamfers. |
| Special Tools | M10×1 tap (for brush head thread), laser engraver | Thread accuracy must be 6H. Engraving depth for logos: 0.2-0.3mm. |
Programming and Designing Fixtures
Good planning prevents errors.
- CAM Programming: Use sub-zone machining. First, machine the outer shape of the housing. Then, machine the internal motor slot and battery compartment. Use layered cutting, with roughing removing most material and finishing focusing on the critical features like the brush head interface and sealing grooves. Remember to reserve a tiny amount (about 0.1mm) for plastic shrinkage, as ABS/PC can shrink by 0.2-0.3% as it cools.
- Fixture Design: How you hold the part is critical. For ABS/PC, use a vacuum adsorption platform to hold it flat without deforming it. For aluminum alloy, use a precision vise with soft jaws to prevent scratches. For the long, thin grip area, add auxiliary supports to prevent vibration during machining.
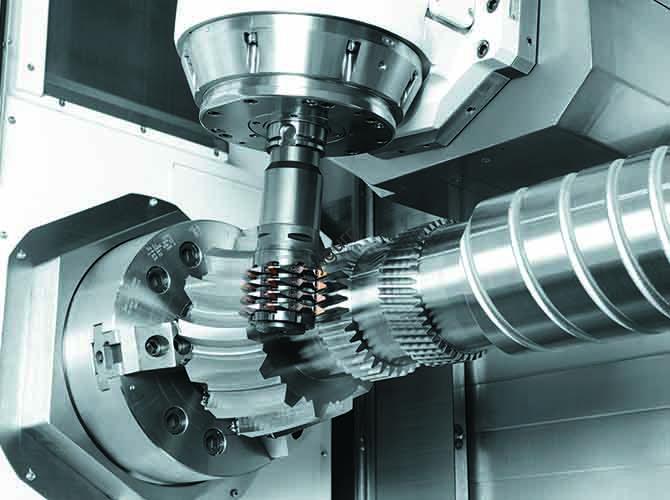
How Does the Core CNC Machining Process for a Face Wash Brush Work?
This is where your design becomes a physical object. The process is broken down into machining the main parts and then the fine details.
Machining the Housing
The housing is machined differently depending on the material.
| Material | Roughing Steps | Finishing Steps |
|---|---|---|
| ABS/PC Alloy | 1. Mill the outer grip shape (ergonomic curve, ~35mm diameter). 2. Drill the button holes (e.g., Φ6mm) and the USB-C cutout. 3. Mill the battery compartment to the correct depth. | 1. Etch the non-slip texture on the grip area. 2. Machine the waterproof sealing grooves (e.g., 2mm wide, 1mm deep). 3. Tap the M10×1 brush head interface thread. |
| Aluminum Alloy | 1. Mill the outer shape (will be polished later, ~38mm diameter). 2. Drill the motor mounting hole (e.g., Φ20mm), ensuring it is perfectly coaxial with the brush head. 3. Mill the circuit board cavity. | 1. Polish the surface to a smooth Ra1.6 finish. 2. Chamfer all edges (C0.5mm) for a safe, comfortable feel. 3. Machine any internal threads, for example, for a battery cover. |
Machining the Key Components
These small features are vital for the device’s function.
- Motor Bracket: If you use a separate bracket, machine it from aluminum alloy. Create the motor fixing hole (e.g., Φ20mm) with a very tight tolerance of ±0.02mm. The bracket must be perfectly perpendicular to the housing to avoid motor eccentricity.
- Brush Head Interface: Tap the M10×1 thread on the top of the housing. Use a thread gauge to check its accuracy. You might also machine a small locating boss (2mm high) to help align the brush head perfectly when it is screwed on.
- Waterproof Grooves: Mill the U-shaped grooves at the joint between the upper and lower shells. The depth must be extremely uniform, with no deviation greater than 0.05mm. This ensures the silicone O-ring will fit perfectly and create a watertight seal.
Applying Special Processes
- Thread Sealing: For an extra layer of waterproofing, you can apply a small amount of thread sealant to the brush head interface during final assembly.
- Logo Engraving: Use a laser engraver to add the power and gear symbols onto the button surfaces. The engraving should be clear enough to be visible even when the device is wet.
- Edge Smoothing: Use fine 400-600 grit sandpaper to carefully smooth all sharp edges, especially on the grip area. This prevents any possibility of the device scratching the user’s skin.
What Post-Processing and Assembly Steps Finish the Prototype?
After machining, the parts need finishing and then need to be put together.
Applying the Right Surface Treatment
Different materials get different treatments to improve performance and looks.
| Material | Surface Treatment Method | Purpose & Effect |
|---|---|---|
| ABS/PC Housing | UV Paint Spraying + Laser Engraving | UV paint makes the surface highly scratch-resistant. Laser engraving can create translucent button symbols that light up when an internal LED is on. |
| Aluminum Alloy Housing | Anodization (black/white) + Polishing | Anodizing provides excellent corrosion resistance (passes a 72-hour salt spray test). Polishing gives a smooth, premium feel. |
| Silicone Brush Head | Secondary Vulcanization + Pore Opening | Vulcanization ensures the silicone is soft but durable, with a Shore hardness of 30-40A. Opening the pores to the correct size (0.5-1mm) ensures effective cleaning. |
Assembling and Testing the Prototype
Now, put all the pieces together and see how well they work.
Assembly Process:
- Pre-Assembly Check: Inspect all parts for defects. Test-fit the motor in its bracket (it should fit snugly, not loosely) and screw the brush head onto the interface (the threading should be smooth).
- Install Components: Fix the motor to its bracket with small screws (e.g., M2, torque to about 1N·m). Solder the motor wires to the circuit board. Install the battery in its compartment, perhaps adding a small foam pad to prevent it from rattling. Fix the circuit board in place.
- Assemble the Housing: Carefully place the silicone O-ring into the waterproof groove on one half of the housing. Bring the two halves together and fasten them evenly with small screws (e.g., M3, torque to about 1.2N·m). Finally, screw the silicone brush head onto the top.
- Final Check: Press the buttons. They should move smoothly and not stick. Check that any LED indicator light is properly aligned with its hole.
Testing Procedures:
- Safety Tests:
- Waterproof Test: This is critical. Perform an IPX7 immersion test. Submerge the prototype in 1 meter of water for 30 minutes. Afterward, open it and check for any water inside.
- Insulation Test: Use a tester to check that there is no electrical leakage between the internal circuits and the outer housing. The resistance should be very high (≥100MΩ).
- Overload Protection: Simulate a motor stall. The device’s circuit should automatically cut power within a few seconds to prevent damage.
- Performance Tests:
- Vibration Frequency: Measure the vibration speed in different gears. The error should be less than 5% from your target (e.g., 8,000 RPM or 12,000 RPM).
- Battery Life: Run the device continuously on the highest setting and time how long it takes for the battery to drain. It should meet your target of at least 40 minutes.
- Brush Head Durability: Simulate repeated use against a surface. The bristles should not deform or break.
- User Experience Tests:
- Grip Comfort: Have someone hold the prototype for several minutes. It should not cause fatigue.
- Noise Level: Measure the sound at maximum speed. It should be quiet, ideally under 55 decibels , with no strange rattling or grinding noises.
Conclusion
Creating a high-precision CNC machining electric face wash prototype is a detailed process that prioritizes safety and user experience. It starts with a design focused on the critical requirements: a precise motor-to-brush alignment within 0.05mm, a reliable IPX7 waterproof seal achieved through precision-machined grooves, and an ergonomic grip. You select materials like ABS/PC alloy for a durable, waterproof housing and medical-grade silicone for a skin-safe brush head. The CNC process then brings this design to life, machining every feature with tight tolerances. Careful post-processing, assembly, and rigorous testing for waterproofing, electrical safety, and vibration performance then prove your design. This entire process allows you to validate your product’s safety and effectiveness long before mass production, saving time and money, and ensuring your face wash brush is ready for the bathroom.
FAQ
What materials are best for CNC machined electric face wash prototype housings, and why?
The best materials are ABS/PC alloy and aluminum alloy 6061. ABS/PC alloy is an excellent choice because it is inherently waterproof, impact-resistant (it won’t crack if dropped), and machines well. Aluminum alloy 6061 is a great option for a more premium feel; it is lightweight, can be polished to a beautiful finish, and also machines with high precision.
How do you ensure a CNC machined face wash prototype is truly waterproof to IPX7 standards?
IPX7 waterproofing relies on two things: precision and assembly. First, you must machine the waterproof sealing grooves in the housing with a very tight tolerance of ±0.05mm. This groove must be perfectly clean and uniform. During assembly, you place a soft, compressible silicone O-ring into this groove. When the two halves of the housing are screwed together with even force, the O-ring compresses to create a watertight seal. Finally, the assembled prototype is tested by submerging it in 1 meter of water for 30 minutes to verify that no water has entered.
Can a CNC machined prototype be used for small-batch production or custom orders?
Yes, absolutely. CNC machining is very flexible and cost-effective for producing small quantities, typically up to 100 units. This makes it perfect for small-batch customization, such as creating special edition colors for a brand, adding custom logos, or even producing prototypes with hypoallergenic brush heads for medical skincare applications. It allows you to fulfill these orders without the high cost and long lead times of injection molding.
Discuss Your Projects with Yigu Rapid Prototyping
Are you developing a new electric face wash brush and need a precise, safe, and testable prototype? At Yigu Rapid Prototyping, we specialize in the CNC machining electric face wash prototype process. Our experienced team understands the critical challenges: maintaining perfect motor alignment, creating reliable waterproof seals, and ensuring a comfortable, ergonomic grip. We can help you select the optimal materials, refine your design for manufacturability, and build a fully functional prototype that is ready for the most rigorous testing.
Contact Yigu Rapid Prototyping today to discuss your personal care project. Let’s work together to create a prototype that is safe, effective, and ready to refresh your customer’s skincare routine.