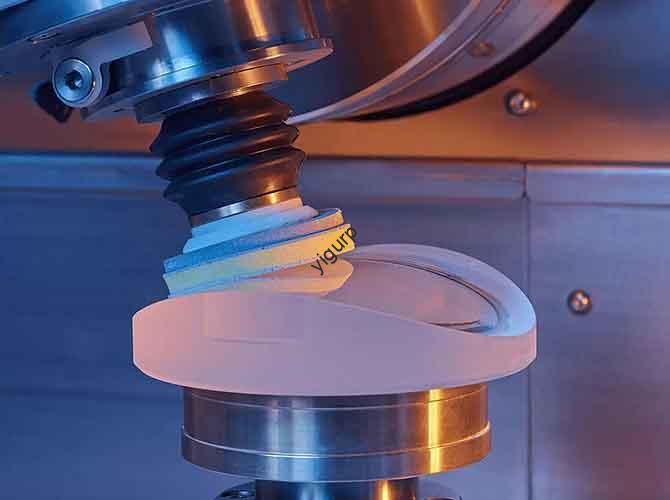
Introduction
If you’re working with carbon fiber—whether for aerospace parts, race car components, or high-end sports gear—you’ve probably wondered: What makes this material so different to machine, and how do I get it right? The short answer is that carbon fiber isn’t like metal. It’s a composite made of strong fibers held together by resin, which means it’s abrasive, brittle, and prone to damage like delamination or fraying if you treat it like aluminum or steel. But once you understand its quirks and use the right techniques, you can produce parts that are incredibly strong, lightweight, and precise. Let’s dive into exactly how to do that.
Key Challenges in Carbon Fiber Machining
Before we talk solutions, you need to understand what you’re up against. Carbon fiber machining presents four main challenges that can ruin your part if you ignore them.
Delamination: When Layers Separate
Delamination happens when the resin bond between carbon fiber layers fails. The layers literally peel apart, creating gaps that weaken the part dramatically. In aerospace, even tiny delamination can ground a component—NASA’s Composite Materials Handbook makes that clear.
The usual culprit? Heat. Most carbon fiber resins soften between 120°C and 180°C (about 250–350°F). When you machine too fast or with dull tools, you generate heat that melts the resin. Suddenly, those beautiful carbon fibers have nothing holding them together.
Fraying and Fiber Pull-Out
Carbon fibers are incredibly strong—each one is thinner than a human hair but tougher than steel. But at cut edges, they can fray if the tool doesn’t slice them cleanly. This leaves a fuzzy, rough edge that looks bad and can weaken the part.
I worked with an automotive parts manufacturer that had this exact problem. Their carbon fiber chassis components came off the machine with frayed edges that required over 2 hours of hand sanding per part. That’s expensive labor, and it delayed their entire production line.
Tool Wear: Carbon Fiber Is Abrasive
Here’s something that surprises most metal machinists: carbon fiber is like cutting hardwood mixed with tiny glass shards. Those fibers act as abrasive particles that wear down cutting tools fast.
A 2023 study in the Journal of Manufacturing Processes found that carbide tools lose 30% of their sharpness after just 50 minutes of cutting carbon fiber. For comparison, machining aluminum gives you over 2 hours before similar wear. This means you’re buying tools more often, and your tooling budget will be higher.
Dust and Safety Risks
When you machine carbon fiber, you create a fine dust that’s bad news in two ways. First, it’s a health hazard—inhaling it can irritate your lungs. OSHA limits worker exposure to 15 mg/m³ over an 8-hour shift for a reason. Second, that dust can contaminate your part, especially if you’re doing any bonding or coating later.
I’ve seen shops skip dust collection to save money, only to end up with parts that wouldn’t bond properly because resin dust contaminated the surface. Cleanliness matters.
Essential Carbon Fiber Machining Techniques
Now that you know the challenges, let’s talk about the specific techniques that work. These aren’t theory—they’re methods proven in real production environments.
Milling Carbon Fiber: Slow and Controlled
Milling is how you create complex shapes, slots, or pockets in carbon fiber. The key difference from metal milling? You go slower.
Best practices for milling:
- Use down-milling (where the cutter rotation matches the feed direction). This shears fibers cleanly at the top surface. Up-milling tends to lift fibers and cause fraying.
- Keep spindle speeds between 3,000 and 6,000 RPM for solid carbide tools. Higher speeds generate too much heat.
- Use a light feed rate—50 to 150 mm/min is a good starting point. Too fast increases tool wear; too slow builds heat.
Real-world example: A drone frame manufacturer was struggling with frayed edges on their carbon fiber arms. They switched from up-milling to down-milling and cut fraying by 75% . Post-processing time dropped from 45 minutes per frame to just 10 minutes. That’s the kind of improvement that pays for new tooling quickly.
Drilling Carbon Fiber: Support the Exit
Drilling holes in carbon fiber is tricky because the material wants to delaminate at both entry and exit. The exit side is especially vulnerable—when the drill breaks through, it can push the last layers apart.
Best practices for drilling:
- Use a stepped drill bit or a drill with a point angle of 135° to 150° . Sharper angles reduce the pushing force on the material.
- Always add backing material to the exit side. A piece of aluminum or plywood clamped behind your workpiece supports the fibers when the drill breaks through.
- Use peck drilling—drill in short cycles, pulling out frequently to clear dust. For a 6mm hole in 10mm-thick carbon fiber, peck 2–3mm at a time.
Key data point: A study in Composites Science and Technology showed that using backing material reduces exit delamination by 90% compared to drilling without it. That’s huge.
Cutting and Trimming: Choose the Right Blade
For rough cutting or trimming large sheets, sawing is efficient. But the blade matters more than you might think.
Best practices for cutting:
- Use a carbide-tipped circular saw blade with 80 to 120 teeth. More teeth give cleaner cuts. Avoid abrasive blades—they generate too much heat and cause fraying.
- Clamp the material tightly to a flat surface. Vibration makes the blade bounce, leading to uneven, ragged cuts.
- Use coolant—compressed air or a water-mist system works well. This removes dust and keeps the blade cool. Dry cutting is possible but wears tools faster.
Choosing the Right Tools for Carbon Fiber
Using the wrong tool is the most expensive mistake beginners make. Yes, carbon fiber tools cost more upfront—but they last much longer when used correctly.
Tool Material Comparison
| Tool Material | Best For | Tool Life vs. Metal | Cost | Pros | Cons |
|---|---|---|---|---|---|
| Solid Carbide | Milling, drilling, cutting | 5–10x longer | Medium-high | Abrasion-resistant, precise cuts | Brittle—can chip if dropped |
| Diamond-Coated | High-volume work | 10–15x longer | Very High | Almost no wear, ideal for production | Expensive for small jobs |
| HSS | Small, low-volume cuts | 1–2x longer | Low | Affordable, flexible | Wears fast, not for thick parts |
Pro tip: For most small-to-medium projects, solid carbide tools offer the best balance of cost and performance. If you’re drilling hundreds of holes daily, invest in diamond-coated tools—they’ll save you money on replacements over time.
Tool Geometry Matters
Beyond material, the shape of your tool matters:
- Milling cutters: Look for compression router bits. These have both up-cut and down-cut flutes, which press fibers down at the top and cut them cleanly at the bottom. This prevents delamination on both surfaces.
- Drills: Choose spur-point drills. The small center point keeps the drill from wandering on carbon fiber’s hard surface.
Step-by-Step Carbon Fiber Machining Workflow
Follow this five-step workflow to get consistent, high-quality results. It’s based on processes used by a leading aerospace supplier—I’ll share their case study throughout.
Step 1: Prepare the Material
First, cut your carbon fiber sheet to within 5–10mm of the final size using a saw. This reduces the amount of precision machining needed and saves tool life.
Clean the surface with isopropyl alcohol to remove any dust or oil. Contaminants can cause tool slip and vibration.
Clamp the material securely. The aerospace supplier uses vacuum clamps for large parts—they distribute pressure evenly and prevent the material from shifting or delaminating under clamping force.
Step 2: Set Up the Machine
Calibrate your speeds and feeds based on the tool manufacturer’s recommendations. For example, a 6mm solid carbide drill might use 4,000 RPM and a feed rate of 80 mm/min.
Install the tool and tighten it to the manufacturer’s torque specs. Loose tools vibrate, and vibration ruins carbon fiber cuts.
Critical step: Test on a scrap piece of the same carbon fiber material first. The aerospace supplier found this simple step reduced part waste by 40% . It catches setup errors before they ruin expensive material.
Step 3: Machine the Part
Start with low-risk operations. Drill holes first—they’re easier to fix if something goes wrong—then move to milling complex shapes.
Monitor for heat constantly. If the tool or material feels hot to the touch, stop and adjust. Heat is the #1 cause of delamination.
Clear dust continuously with a vacuum attachment or compressed air. Accumulated dust can scratch your part and clog the tool, making cuts rougher.
Step 4: Post-Processing
Inspect the part under 10x magnification. Check edges for fraying and holes for delamination.
If you find minor fraying, sand gently with 240-grit sandpaper. Wet-sanding reduces dust. Don’t overdo it—removing too much material can thin the part and weaken it.
Clean the finished part with isopropyl alcohol again to remove all sanding dust.
Step 5: Quality Control
Measure critical dimensions with calipers or a CMM. Carbon fiber doesn’t expand and contract much with temperature, but machining errors can still happen.
For high-stress parts, perform strength testing. The aerospace supplier requires all parts to pass a 200 MPa tensile test. Delaminated parts typically fail below 150 MPa , so this test catches hidden defects.
Common Mistakes to Avoid
Even experienced machinists slip up with carbon fiber. Here are three mistakes to watch for:
Using Metal Machining Speeds
Many people set carbon fiber speeds based on aluminum experience—like 10,000 RPM for milling. That’s way too fast. The heat generated will melt the resin and destroy your part.
Fix: Reduce speeds by 50–60% and feeds by 30–40% compared to aluminum. Start conservative and adjust up if needed.
Skipping Backing Material for Drilling
Drilling without backing causes exit delamination 90% of the time , according to that Composites Science and Technology study. Yet people skip this step constantly.
Fix: Always use a 3–5mm thick aluminum backing plate. It’s cheap insurance against ruined parts.
Ignoring Dust Safety
Carbon fiber dust isn’t just messy—it’s a health risk. Long-term exposure can cause respiratory problems.
Fix: Wear an N95 mask , use a HEPA-filtered vacuum at the machine, and ensure your workspace is well-ventilated. This isn’t optional.
Yigu Technology’s Perspective on Carbon Fiber Machining
At Yigu Technology, we’ve spent over a decade machining carbon fiber composites for industries ranging from automotive to renewable energy. Our biggest lesson? Carbon fiber machining is about precision control, not force. Too many shops buy expensive tools but ignore process basics—like calibrating spindle runout or using proper clamping—that have a bigger impact on quality.
We’re also seeing a trend toward hybrid machining: combining milling with laser cutting for complex parts. Lasers handle fine details without tool wear, while milling does the rough shaping. For small businesses, we recommend starting with solid carbide tools and a simple dust collection system. These investments pay for themselves quickly in reduced waste and better parts.
Finally, never compromise on material quality. Low-grade carbon fiber with uneven fiber distribution is harder to machine and produces weaker parts. Partner with reputable suppliers—it saves time and frustration in the long run.
Frequently Asked Questions
Can I use standard metal tools for carbon fiber machining?
You can, but they’ll wear out fast. HSS tools might last less than an hour on carbon fiber, compared to 5+ hours on aluminum. For best results, use solid carbide or diamond-coated tools. They cost more upfront but save money on replacements.
What’s the best coolant for carbon fiber?
Compressed air is the most common choice—it’s cheap and won’t contaminate the material. For high-volume work, a water-mist system with a small amount of lubricant reduces tool wear further. Avoid oil-based coolants—they can seep into the carbon fiber and weaken the resin bond.
How do I fix delamination in a carbon fiber part?
Minor delamination (smaller than 5mm) can sometimes be repaired with epoxy resin. Clean the area, apply a thin layer of epoxy, and clamp the part until it cures. For larger delamination, the part is usually unsalvageable. Prevention—using slow speeds and backing material—is much better than repair.
Is carbon fiber machining more expensive than metal machining?
Yes, but the cost is often worth it. Tool costs are 2–3x higher , and machining time is 1.5–2x longer . However, the final part’s light weight and high strength can justify the expense—especially in aerospace, automotive, or high-end sports equipment where performance matters more than upfront cost.
Can I machine carbon fiber at home?
Absolutely, with the right setup. Start with a desktop CNC router , a solid carbide bit, and a vacuum for dust collection. Always wear an N95 mask. Begin with small, simple parts until you’re comfortable with speeds and feeds. Avoid large projects until you’ve gained some experience.
Discuss Your Projects with Yigu Rapid Prototyping
Ready to take your carbon fiber parts to the next level? At Yigu Rapid Prototyping, we’ve machined thousands of carbon fiber components for clients in aerospace, automotive, sports equipment, and beyond. Our team can help you select the right materials, optimize your designs for manufacturability, and deliver precision parts that meet your exact specifications—whether you need a single prototype or full production runs. We also offer hybrid machining solutions combining milling and laser cutting for complex geometries. [Contact Yigu Rapid Prototyping today] for a free consultation and quote. Let’s build something extraordinary together.