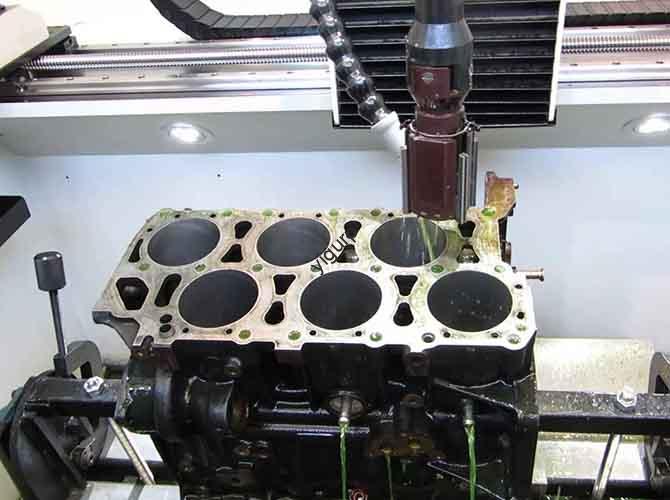
In the world of precision manufacturing, the “internal right angle” is a bit of a myth. Theoretically, a design might call for a sharp 90-degree corner in a cavity or groove. However, in reality, the laws of physics and tool geometry get in the way. Since CNC tools rotate, they naturally leave a rounded corner, known as a fillet radius or R-value.
For engineers, this isn’t just a visual detail. Unplanned fillets can ruin assembly precision, prevent parts from fitting together, and lead to costly design failures. This guide explores why these corners are so difficult to machine and provides the technical roadmaps to achieve the sharpest angles possible.
Why Are Internal Right Angles So Challenging?
The struggle to create a sharp internal corner comes down to three main factors: tool physics, material behavior, and mechanical interference.
Tool Geometry Limitations
Think of a CNC milling tool like a round-tipped marker. No matter how hard you press into a corner, the marker will always leave a curve the size of its tip. Most end mills have a circular diameter. The center axis of the tool creates a minimum fillet equal to half its diameter. For example, a φ4 mm end mill will always leave at least an R2 mm fillet.
Material-Specific Constraints
Hard materials like titanium alloys or stainless steel make things worse. To prevent the tool from chipping, we must use tools with larger edge radii. While you might use a tiny R0.05 mm edge for aluminum, titanium often requires at least R0.15 mm. This physical “safety margin” increases the final size of your corner.
Deep Cavity Interference
When you need a right angle at the bottom of a deep pocket, the tool must be long. This overhang causes the tool to vibrate or bend during the cut. Even a tiny bit of deflection can widen your fillet by 0.05 mm to 0.2 mm, which is a deal-breaker for aerospace parts like hydraulic valve bodies.
What Are the Best Technical Solutions?
If a standard end mill can’t do the job, we turn to specialized methods. The table below compares the three most effective ways to minimize R-values.
| Solution | Core Principle | Best For | Pros / Cons |
| Spindle Orientation | Tilts the spindle (e.g., 45°) to “sink” a special slotting tool into the corner. | Precision Molds (Automotive) | + One setup on 5-axis. / – Needs high rigidity. |
| Universal Optimization | Uses specialized tool paths and small-diameter cutters on a standard machine. | Mass Production (Electronics) | + Low cost. / – Hard to reach R < 0.08 mm. |
| EDM (Electrical Discharge) | Uses electrical sparks to erode the corner after CNC roughing. | Ultra-High Precision (Semiconductors) | + Sharpest corners (R ≤ 0.05). / – Very slow and expensive. |
How Spindle Orientation Works
This is a favorite for 5-axis CNC users. By tilting the spindle, we can use a high-strength alloy steel slotting tool with a tiny edge radius (R0.05 mm). We cut one wall at a time, effectively “cleaning out” the material that a round tool would have left behind.
Which Variables Impact Your Final R-Value?
Choosing a method is only half the battle. You must also control the following four variables to keep your corners sharp.
1. Tool Design and Coating
For corners where you need R ≤ 0.08 mm, you should use ultra-fine grain carbide tools. We recommend diamond coatings for aluminum parts. This prevents “built-up edge” (BUE), where soft metal sticks to the tool and distorts the corner profile.
2. Programming Strategy
Avoid stopping the tool in the corner. Instead, use spiral interpolation to keep the tool moving. This reduces “dwell time,” which prevents the tool from digging too deep and widening the fillet. For deep cavities, a “zig-zag” path with small steps reduces vibration.
3. Machine Rigidity
A shaky machine will never produce a sharp corner. We use high-rigidity spindles with a static stiffness >200 N/μm. If your machine has a “backlash” larger than 0.001 mm, it will be nearly impossible to maintain micro-R-value accuracy.
4. Material Properties
- Aluminum (6061/7075): Easy to cut; can reach R0.05–0.1 mm.
- Titanium (Ti-6Al-4V): Hard and brittle; usually requires R0.15–0.2 mm to avoid tool breakage.
Practical Tips for Better Corners
Improving your internal angles requires a plan that starts at the drawing board and ends with inspection.
Design Phase: Be Realistic
Don’t mark a corner as “R0” on your blueprint—it is physically impossible with CNC. Instead, specify “R ≤ 0.1 mm.” This gives the machinist a clear goal while keeping costs down. If a cavity is very deep, consider adding relief slots (0.5 mm wide) at the corner to give the tool extra room.
Machining Phase: Trial and Error
Before running a batch of 1,000 parts, run a trial cut. Use a Coordinate Measuring Machine (CMM) to measure the test piece. For example, we often find that a φ2 mm micro-tool with a 45° tilt works perfectly for aluminum but fails on stainless steel without a slower feed rate.
Inspection Phase: Beyond the Human Eye
You cannot check an R0.08 mm corner with a standard ruler. Use a laser scanner or an optical comparator. These tools capture the corner profile in 3D, ensuring that the “sharp” corner is actually within your tolerance.
Real-World Case Studies
Automotive Mold Inserts
Challenge: A 15 mm deep groove requiring R ≤ 0.1 mm.
Solution: We used a 5-axis machine with a 45° tilted spindle and a φ2 mm carbide slotting tool.
Result: We achieved a consistent R0.08 mm fillet, perfect for high-quality plastic parts.
Aerospace Connectors
Challenge: Mounting holes in titanium alloy requiring R ≤ 0.05 mm.
Solution: CNC pre-machining left a small amount of metal, followed by EDM secondary discharge using a copper electrode.
Result: A sharp R0.045 mm finish, ensuring the pins aligned perfectly every time.
Conclusion
Achieving a near-perfect internal right angle is a balancing act between precision, time, and cost. While a true 90-degree sharp corner remains out of reach for conventional CNC tools, using spindle orientation or EDM can get you incredibly close. By designing for manufacturing and choosing the right variables, you can ensure your parts assemble perfectly without expensive reworks.
FAQ
What is the minimum R-value I can expect from CNC? In aluminum, you can reach R0.05–0.08 mm using micro-tools and 5-axis tilt. In harder metals like titanium, expect R0.1–0.15 mm. If you need sharper, you must use EDM.
Can I get a sharp corner on a 3-axis machine? Yes, but it is limited. You can use very small cutters (φ2 mm), but they are prone to breaking if the cavity is deeper than 8 mm. For deep or complex work, a 5-axis machine is far superior.
How does tool length affect the corner? Long tools are “springy.” A tool that sticks out 10 mm will deflect much more than one that sticks out 5 mm. This deflection creates a “ghosting” effect that widens your corner radius.
Discuss Your Projects with Yigu Rapid Prototyping
At Yigu Technology, we specialize in solving the toughest CNC challenges. Whether you are building automotive mold inserts or aerospace connectors, our team uses 5-axis spindle orientation and EDM to hit your R-value targets. We use advanced simulation to reduce vibration and cut your production time. Would you like me to review your design to see which machining method will give you the sharpest corners at the lowest cost?