Introduction
Creating a new TV is a major project. The design must be sleek, with thin bezels and a stable base. The structure needs to be strong enough to hold the screen and hide all the internal components. Before you commit to expensive injection molds, you need a prototype to see if your design works in the real world. The CNC machining TV prototype process is the best way to create accurate, physical models of your TV design. But how do you actually make one? This article walks you through the entire journey. We will cover the design preparation, the core machining steps, the finishing work, and how to test your prototype. By the end, you will have a clear roadmap for creating a high-quality TV prototype.
What Design and Preparation Work Is Needed Before Machining?
A successful prototype starts long before the CNC machine starts cutting. The design and preparation stage sets the foundation for everything that follows.
Understanding Your TV’s Requirements
First, you need to define the core specifications of your TV. What is the screen ratio? Most modern TVs use 16:9. A key goal is a thin and light design; you might aim for a total thickness of 15mm or less. Think about the back cover—it will need a layout of heat dissipation holes to keep the electronics cool. You also need to decide on the button functions: power, volume, and input mode. Finally, plan for installation by designing wall-mounted holes on the back.
Designing a Split Structure
A TV is too big and complex to machine as one piece. You should adopt a split structure. This typically means designing a screen frame and a separate base. The base can be detachable or integrated, depending on your design. This split makes it easier to transport and assemble the prototype. Inside the frame, you need to design internal support structures, like stiffening ribs, to ensure the housing is strong without adding bulk.
Creating Detailed 3D Models
Use CAD software to create precise 3D models of every part. You need to highlight all the critical features.
- The screen frame inner diameter must match your screen size exactly, leaving a small 0.1mm gap for fitting the screen or a screen simulation panel.
- The base mounting slots need high positioning accuracy, within ±0.05mm.
- Model the wall-mounted holes, typically 6-8mm in diameter.
- Add the button grooves with a depth of 2-3mm.
It is also smart to add small draft slopes of 3 to 5 degrees to vertical walls. This makes the part compatible with future injection molding processes.
Selecting the Right Materials
Choose materials that match the function of each part and are easy to machine.
| Component | Recommended Material | Key Reason |
|---|---|---|
| Shell (Screen Frame & Base) | ABS/PC Alloy | It is lightweight, heat-resistant, and easy to shape into complex forms. |
| Metal Parts (e.g., Base Support) | Aluminum Alloy 6061 | It is lightweight, strong, and can be polished to a high-quality finish. |
| Screen Simulation | Clear Acrylic Sheet | It is transparent and can be used to mark the screen position, even though it won’t display an image. |
Preparing the Raw Materials
Before machining, you need to prepare the raw material blanks. Cut them slightly larger than the final part, leaving a 2-3mm machining allowance. For plastic sheets, you can use laser cutting. For aluminum blocks, a bandsaw works well. It is also important to preheat ABS/PC alloy blanks to 60-80°C for 1-2 hours. This relieves internal stress and prevents the part from warping during machining. Finally, clean all blanks with alcohol to remove any oil or dust.
What CNC Machining Preparation Is Needed for a TV Prototype?
With the design ready, you now prepare for the actual machining. This involves choosing the right tools and planning the work.
Selecting Materials and Tools
The choice of tools is just as important as the choice of materials.
| Category | Specific Options | Application Scenarios |
|---|---|---|
| Housing Materials | ABS/PC plastic plate (3-5mm thick) | Ideal for machining screen frames and bases with complex surfaces. |
| Metal Materials | Aluminum alloy 6061 (5-8mm thick) | Used for base supports and other structural metal parts. |
| Roughing Tools | Φ8-Φ10mm flat end mill | For quickly removing large amounts of material. |
| Finishing Tools | Φ2-Φ4mm ball nose cutter | For machining curved surfaces (like base edges) and creating smooth finishes. |
| Special Process Tools | Drill bits, small engraving cutters | For drilling wall-mounted holes and engraving button symbols and logos. |
Programming and Designing Fixtures
Good programming and fipping prevent errors and ensure accuracy.
- CAM Programming: Use software to create toolpaths. A good strategy is sub-zone machining—first machine the main shell, then the base and brackets separately. Use layered cutting: set the roughing layer thickness to 1mm and the finishing layer to 0.2mm. This balances speed with precision.
- Fixture Design: How you hold the part is critical. For plastic plates, use a vacuum adsorption platform. This holds the part flat without applying clamping pressure that could bend it. For metal parts, clamp them in a precision vise. Use a level to make sure the part is perfectly flat, with an error of less than 0.02mm.
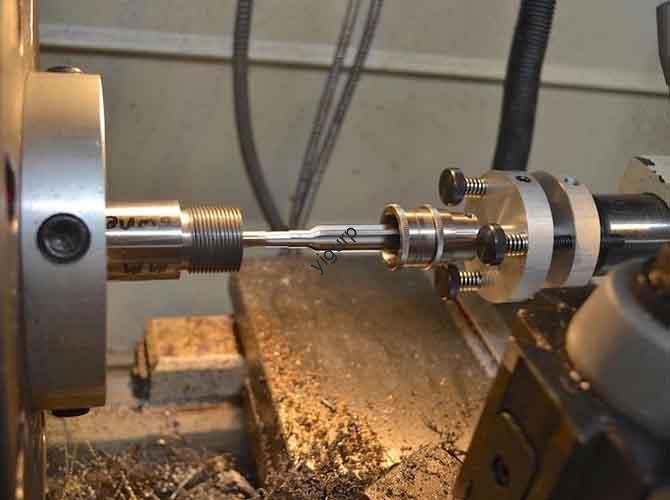
How Does the Core CNC Machining Process for a TV Work?
This is where your design becomes a physical object. The process is broken down into machining the main parts and then the fine details.
Machining the Housing: Screen Frame and Base
The housing is machined in two stages: roughing and finishing.
| Machining Stage | Material | Key Parameters | Processing Effects |
|---|---|---|---|
| Roughing | ABS/PC Alloy | Low speed (6,000 rpm), high feed (800 mm/min), 1mm cut depth. | Quickly removes excess material to form the basic shape. |
| Aluminum Alloy | High speed (12,000 rpm), 0.5mm cut depth, leave a 0.3mm allowance. | Prevents material hardening from heat, ensuring good finishing quality. | |
| Finishing | ABS/PC Alloy | Use Φ2-4mm ball cutter for curves. Target surface finish Ra3.2. | Makes the shell surface smooth with no visible tool marks. |
| Aluminum Alloy | Polish to Ra0.8-1.6. Add a C1mm chamfer on edges. | Enhances the metal’s premium look and removes sharp edges for safety. |
Machining the Fine Details
The details are what make the prototype feel real.
- Button and Interface Machining: Use milling cutters to create the power button groove (matching your button size, 2-3mm deep) and volume key grooves. Drill holes for interfaces like USB and HDMI. The positioning accuracy for these holes must be within ±0.1mm so that cables can plug in easily.
- Logo Engraving: Use a small engraving cutter (Φ1-2mm) to carve your brand logo or decorative lines onto the screen frame or base. An engraving depth of 0.5-1mm ensures the pattern is clear and durable.
- Heat Dissipation Hole Machining: On the back of the shell, machine an array of small holes (Φ1-2mm) or use hollow geometric patterns. Space the holes 5-8mm apart. This pattern allows for airflow while maintaining the shell’s structural strength.
Machining the Base and Bracket
The base must support the TV securely.
- Base Machining: Machine the mounting slots on the base that will connect to the screen frame. The fit must be tight, with a gap of ≤0.1mm. For an aluminum base, you can plan to anodize it after machining for a better finish and corrosion resistance.
- Bracket Machining: If your design has internal brackets, machine the interfaces that hold them in place. Positioning accuracy here is critical, within ±0.05mm, to ensure the bracket lines up perfectly with the mounting points in the shell. If the bracket is for wall-mounting, machine the holes with the same high precision.
What Post-Processing and Assembly Steps Finish the Prototype?
After machining, the parts need finishing touches and then need to be put together.
Applying the Right Surface Treatment
Different materials need different treatments to look their best.
| Material | Surface Treatment Method | Purpose & Effect |
|---|---|---|
| ABS/PC Alloy Shell | Spray with matte paint (like a real TV). Add highlight effects on edges. | Enhances the texture and reduces glare. |
| Laser engrave translucent button symbols. | Creates a realistic look, especially if you plan to add LED backlighting later. | |
| Aluminum Alloy Parts | Anodization (black or silver) or sandblasting. | Anodizing adds color and protection. Sandblasting gives a soft, anti-fingerprint feel. |
| Acrylic Sheet (Screen) | Polishing to a high clarity (surface finish Ra0.8). | Makes the “screen” area look more realistic and clear. |
Assembling and Testing the Prototype
Now, put all the pieces together and see how well they work.
Assembly Process:
- Pre-Assembly Check: Inspect every part. Check that dimensions are within tolerance (±0.1mm) and that there are no major scratches or defects.
- Component Installation: Fix the acrylic screen sheet into the screen frame using strong double-sided tape. Make sure it is perfectly aligned.
- Join Frame and Base: For a detachable design, install the snaps or screws (M3-M4). The joint should be tight with no wobble.
- Install Internal Brackets: Screw the brackets into place inside the shell. Use a level to ensure they are perfectly horizontal (tilt ≤0.05mm).
- Final Check: Gently shake the assembled prototype. There should be no rattling or loose parts. Place it on a flat surface; it should not wobble.
Testing Procedures:
- Structural Stability Test: Test the wall-mounted holes by hanging a 5kg weight for 24 hours. Check for any deformation. Test the base stability by placing the prototype on a 30-degree inclined plane; it should not slide.
- Heat Dissipation Test: Simulate the heat from internal electronics using a 50W heating pad placed inside. After 1 hour, measure the temperature of the shell’s surface. It should stay below 40°C.
- Button Performance Test: The buttons should have a consistent feel, with a pressing force of about 2-3N and a travel of 1-2mm. Press each button 1000 times to check for wear or sticking.
- Appearance Inspection: Check the color consistency (ΔE ≤1.5) under good light. Ensure all logos and patterns are sharp and clear, and that all edges are smooth with no burrs.
What Are the Key Application Scenarios for a TV Prototype?
A high-quality CNC machined TV prototype is useful in many ways.
- Product Design Verification: You can use it to check the feasibility of your design. Does the ultra-thin bezel look right? Does the detachable base work? You can also use it for human-computer interaction studies, like checking if the button layout is comfortable.
- Marketing and Exhibition Display: A physical prototype is a powerful tool for trade shows and customer presentations. It lets you show off your design concept and gather valuable feedback before mass production.
- Small-Batch Customization: For high-end needs like corporate gifts or special concept models, CNC machining can be used to produce a small run of finished products (up to 100 units) without the high cost of molds.
- Education and R&D: The prototype can serve as a teaching aid in industrial design courses, helping students understand mechanical structures and material applications. It can also be used by R&D teams for further study on TV structure and cooling technology.
Conclusion
Making a high-quality CNC machining TV prototype is a detailed but achievable process. It begins with careful design, where you define the TV’s specifications, split the model into machinable parts, and select the right materials like ABS/PC alloy for the shell. The core CNC process, with its precise programming and step-by-step machining, creates the main housing and fine details like button grooves and heat dissipation holes, holding tolerances like ±0.1mm for the shell and ±0.05mm for critical mounts. Post-processing, assembly, and rigorous testing for structural stability and heat dissipation then validate the design. This entire process allows you to see, touch, and test your TV design long before committing to expensive production tooling, saving time, money, and risk.
FAQ
What materials are most suitable for CNC machined TV prototype shells, and why?
The most suitable material is ABS/PC alloy. It is an excellent choice because it is lightweight, which helps achieve the thin, modern designs consumers expect. It also has good heat resistance to handle warmth from internal components, and it machines very well, allowing for precise reproduction of complex curves and fine details on the screen frame and base.
Can CNC machined TV prototypes be directly used for mass production?
No, they are not meant for that. CNC machining is perfect for creating one or a few prototypes for design verification and testing. For mass production, making thousands of units, you should switch to processes like injection molding for the plastic parts and stamping for any metal brackets. These methods are far more cost-effective and faster at high volumes.
How long does it take to produce a CNC machined TV prototype from design to assembly and testing?
The timeline depends on the complexity of the design. For a simpler TV with a regular flat screen frame and a basic base, you can expect the process to take about 7 to 10 days. For a more complex design with features like ultra-thin bezels, curved screen elements, and multiple metal parts, the cycle may extend to 12 to 15 days due to the more intricate machining and testing required.
Discuss Your Projects with Yigu Rapid Prototyping
Are you developing a new TV and need a high-quality prototype to bring your vision to life? At Yigu Rapid Prototyping, we specialize in the CNC machining TV prototype process. Our experienced team understands the importance of sleek aesthetics, precise fits, and structural integrity. We can help you select the optimal materials, refine your design for manufacturability, and build a stunning, functional prototype that is perfect for design verification, trade shows, or investor presentations.
Contact Yigu Rapid Prototyping today to discuss your TV project. Let’s work together to turn your concept into a reality you can see and touch.