Introduction
An electric mosquito swatter is a simple but essential household tool. It needs to be safe, effective, and comfortable to hold. The design must include a high-voltage grid that kills insects on contact, a protective outer layer to keep fingers safe, and a reliable circuit. Before you invest in expensive production molds, you need a prototype to test your design. The CNC machining electric mosquito swatter prototype process is the ideal way to create accurate, functional models. But how do you actually achieve it? This article walks you through the entire process. We will cover the essential design steps, the core machining work, the finishing touches, and how to assemble and test your prototype to ensure it is safe and ready for the market.
What Pre-Machining Design and Material Choices Are Needed?
A great prototype starts with a solid plan. The design and material selection stage is the foundation for everything that follows.
Creating 3D Models and Designing the Structure
Before machining, you need a detailed 3D model of every part. For an electric mosquito swatter, the key components are the handle, the grid frame, the circuit board compartment, and the buttons.
| Component | Design Requirements | Key Considerations |
|---|---|---|
| Handle | Design an ergonomic curved grip with a non-slip texture. | It must be comfortable to hold for long periods. The shape must also be easy to hold securely in a CNC machine. |
| Grid Frame | Design a three-layer structure: an outer protective net, a middle high-voltage grid, and an inner support frame. The grid spacing must be ≤ 2mm. | This tight spacing prevents mosquitoes from escaping. All edges of the grid must be smooth to avoid scratching users. |
| Circuit Board Compartment | Reserve space inside the handle for the step-up transformer, battery (like an 18650 lithium cell), and the switch. | The compartment must be easy to access for wiring. Ensure good insulation between the electronics and the outer handle. |
| Buttons & Indicators | Design the button positions, often using waterproof silicone. The power indicator light needs a small hole. | Buttons should be easy to press. The counterbore for the button must be machined accurately for a smooth fit. |
Comparing Materials for Core Components
Choosing the right material balances performance, cost, and how easy it is to machine.
| Component | Optional Materials | Advantages | Disadvantages |
|---|---|---|---|
| Handle | ABS Plastic | Low cost, excellent electrical insulation, very easy to machine. | Lower strength and poor heat resistance compared to metal. |
| Aluminum Alloy | Lightweight, strong, good heat dissipation for the circuit. | High cost. Requires coolant during machining. | |
| Power Grid | Stainless Steel Wire | Excellent electrical conductivity, very corrosion-resistant. | Higher machining difficulty. |
| Galvanized Iron Wire | Low cost, easy to shape. | Poor corrosion resistance; may rust over time. | |
| Circuit Components | PCB Board, High-Temp Insulated Wire | Stable performance, safe to use. | Need precise positioning inside the handle during assembly. |
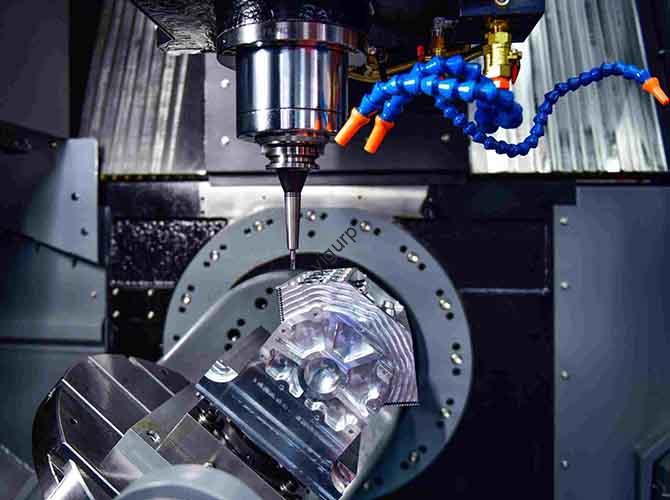
What CNC Machining Setup and Execution Is Required?
This is where your digital design starts to become a physical object. Careful setup and execution are key.
Selecting the Machine and Preparing Tools
For a small, precise product like a mosquito swatter, a small CNC engraving and milling machine (like a 3018 Pro model) or a desktop machining center is ideal. These machines offer the precision needed for small parts.
You will need a selection of tools:
- For Rough Machining: A flat end mill (Φ6-8mm) . This tool quickly removes large amounts of waste material to form the basic shape of the handle.
- For Finishing: A ball-nose cutter (Φ2-4mm) . This is used for the final pass on curved surfaces, like the handle grip, to ensure a smooth feel. It is also used to machine the fine grid details.
- For Drilling and Tapping: Center drills and taps are used to create precise holes for assembly screws.
Setting Key Processing Parameters by Material
Different materials need different cutting speeds and feeds to prevent problems like melting or tool wear.
| Material | Rotational Speed (RPM) | Feed Speed (mm/min) | Special Requirements |
|---|---|---|---|
| ABS Plastic | 8,000 – 12,000 | 400 – 600 | Use layered cutting. Make sure each layer is at least 0.5mm deep. This prevents heat buildup and melting. |
| Aluminum Alloy | 12,000 – 20,000 | 300 – 500 | Must use coolant. This keeps the material and tool cool and prevents wear. |
| Stainless Steel | 12,000 – 18,000 | 250 – 450 | Use a slower feed speed. Increase coolant supply to manage the high heat. |
Clamping and Machining Key Components
- Clamping Methods: How you hold the part is critical. For the handle, you can use a vise or a vacuum chuck, but be careful not to clamp so hard that you deform it. The grid frame is a thin, delicate part. It must be clamped very lightly to prevent crushing.
- Machining the Grid Frame: This is the most critical part. Use precise movements (linear interpolation) to machine the grid. The spacing between the grid wires must be ≤ 2mm. After machining, every single edge of the grid must be carefully chamfered and deburred. This is a vital safety step to prevent the user from getting scratched by sharp metal edges.
- Machining the Battery Compartment: Machine the slot inside the handle to the exact size of your chosen battery (like an 18650 cell). Also, create small channels for the wires to pass through.
- Machining the Button Holes: Precisely machine the countersunk holes where the silicone buttons will sit. The fit must be accurate so the buttons press smoothly without sticking.
What Post-Processing and Assembly Steps Finish the Prototype?
After machining, the parts need finishing and then need to be put together with the electronics.
Applying the Right Surface Treatment
This step makes the parts look good and feel smooth.
| Component | Material | Surface Treatment Method | Purpose |
|---|---|---|---|
| Handle | ABS Plastic | Sanding burrs + Spraying matte paint | Makes the handle non-slip and improves the overall appearance. |
| Aluminum Alloy | Anodization (black/silver) or Sandblasting | Anodizing prevents corrosion and adds color. Sandblasting gives a nice textured feel. | |
| Power Grid | Stainless Steel / Galvanized Iron Wire | Cleaning + Anti-rust treatment (like applying a thin layer of insulating paint) | Prevents rust and ensures the grid is electrically insulated from the outer casing. |
Assembling and Safety Testing the Prototype
Follow a logical sequence to ensure everything works together safely.
Assembly Steps:
- Install the Grid: Carefully attach the machined grid frame to the handle. Test that it has a little bit of give and doesn’t feel brittle.
- Install the Electronics: Fix the battery compartment and the high-voltage circuit board inside the handle. Connect all the wires carefully, paying close attention to insulation. A short circuit here could be dangerous.
- Install the Battery and Test: Insert the battery. Test the switch to see if the indicator light turns on. Use a non-contact voltage tester to verify that the high-voltage grid is working.
- Final Fit Check: Ensure the gap between the grid and the handle is very small (≤ 1mm) and that everything is firmly attached with no loose parts.
Safety Testing (This is Critical):
- Use a safe, low-voltage power supply for initial tests. Check the entire grid for any short circuits.
- Test the insulation of the handle. When the grid is live, there should be absolutely no electrical feeling when you touch the handle.
- Press the switch repeatedly, maybe 100 times, to check that it makes reliable contact every time.
Quality Inspection Standards
- Functional Testing: Safely test the high-voltage effect. (This must be done with extreme care).
- Visual Inspection: Check that the grid spacing is uniform, the handle surface has no deep scratches, and the color is consistent.
- Dimensional Verification: Use a caliper to measure the grid spacing and the handle diameter. The tolerance should be within ±0.1mm.
How Do You Optimize and Iterate the Prototype?
Testing will reveal areas for improvement. This is a normal and valuable part of the process.
Structural Optimization Directions
- Reduce Handle Weight: If the handle feels too heavy, you can modify the design to be hollow inside, as long as it doesn’t compromise strength.
- Optimize Grid Resilience: If the grid frame seems flimsy, you can add small support ribs behind it to prevent it from bending out of shape over time.
Material Substitution and Smart Features
- Material Substitution: You could test a carbon fiber handle for a very lightweight, high-end feel. If the swatter has any moving parts, you could test POM plastic gears for quieter operation.
- Smart Features: Consider adding a USB charging port to the handle for easy recharging, or a small LED power display to show the battery level.
What Key Precautions Ensure Safety and Control Costs?
Safety Specifications
- During Machining: Always wear safety goggles to protect your eyes from flying metal or plastic chips.
- During Aluminum Machining: You must use coolant. This prevents the material and the tool from overheating and getting damaged.
- During High-Voltage Testing: Follow strict safety procedures. Only use insulated tools. Never touch the grid when it is powered.
Cost and Time Management
- Cost Control: Where possible, use standard tools and common materials. For example, if the performance requirements for the handle are not extremely high, choose ABS plastic instead of aluminum alloy. It is much cheaper and easier to machine.
- Time Management: Work in clear, separate stages (design → machining → assembly). This prevents your CNC machine from being tied up for too long on a single project and keeps production efficient.
Conclusion
Achieving a successful CNC machining electric mosquito swatter prototype is a process that prioritizes precision and, above all, safety. It starts with a design that focuses on the critical ≤2mm grid spacing for effectiveness and an ergonomic handle for comfort. You select materials like ABS for the insulating handle and stainless steel for a durable, rust-resistant grid. The CNC process then precisely machines these parts, paying special attention to deburring every sharp edge on the grid. Careful post-processing, followed by meticulous assembly and rigorous safety testing for insulation and high-voltage function, proves your design. This entire process allows you to validate your product’s safety and effectiveness long before mass production, ensuring the final swatter is a reliable and safe tool for every home.
FAQ
What is the most suitable CNC machine tool for electric mosquito swatter prototype machining?
A small CNC engraving and milling machine (like a 3018 Pro model) or a desktop machining center is most suitable. These machines are designed for the small size and high precision required for components like the handle and the fine grid frame of a mosquito swatter.
Why is the grid spacing of the electric mosquito swatter prototype required to be ≤ 2mm?
The main purpose is to prevent mosquitoes from escaping. If the spacing is larger than 2mm, small mosquitoes can fly through the gaps without touching the high-voltage wires. This tight spacing also acts as a safety feature, making it harder for fingers (especially small ones) to accidentally contact the live inner grid.
What surface treatment method is recommended for aluminum alloy handles, and why?
Anodization (in colors like black or silver) is highly recommended. This electrochemical process creates a thick, dense oxide layer on the surface of the aluminum. This layer provides excellent corrosion resistance, preventing the handle from rusting over time. It also significantly improves the handle’s texture and appearance, giving it a more premium and durable finish that meets consumer expectations.
Discuss Your Projects with Yigu Rapid Prototyping
Are you developing a new electric mosquito swatter and need a safe, precise, and effective prototype? At Yigu Rapid Prototyping, we specialize in the CNC machining electric mosquito swatter prototype process. Our experienced team understands the critical balance between effective mosquito killing and absolute user safety. We can help you select the optimal materials, from durable ABS for the handle to corrosion-resistant stainless steel for the grid, and build a fully functional prototype that is ready for rigorous testing.
Contact Yigu Rapid Prototyping today to discuss your project. Let’s work together to create a prototype that is safe, effective, and ready to make homes more comfortable.