This guide helps you build a safe, functional CNC electric heating hand warmer prototype. Whether you’re a product designer, small business owner, or hobbyist, we break down every step in simple terms. We focus on real-world experience, clear data, and practical tips—no advanced engineering skills needed. By the end, you’ll know how to create a prototype that meets safety standards, works well, and feels great to use.
What Prep Do You Need First?
Good preparation sets the stage for a smooth CNC machining process. Skipping these steps leads to mistakes, rework, and unsafe prototypes. We follow a linear, user-friendly sequence here.
Analyze Product Needs
Start by defining what your hand warmer must do. Focus on three core areas: function, safety, and portability. These details guide every other decision.
| Requirement Type | Key Details | Why It Matters |
|---|---|---|
| Heating Function | 40°C-60°C adjustable temperature; even heat distribution | Meets user comfort needs (not too hot, not too cold) |
| Safety Protection | Anti-scald housing, auto-off at ≥70°C, IPX4 waterproof | Prevents burns, overheating, and short circuits from water |
| Portability | Single-hand holdable, ≤200g, 100×60×20mm size | Easy to carry in pockets or bags for daily use |
| Other Features | Rechargeable 5V/2A battery, LED indicator (power/temp) | Convenient to use and lets users check status |
Real Case Example: A client once skipped the IPX4 waterproof requirement for a outdoor hand warmer prototype. During testing, water splashed on the device and caused a short circuit. We had to rework the housing with waterproof grooves and silicone rings—delaying the project by 2 days. Always prioritize safety features!
Design the Structure
Your hand warmer’s structure must fit its components and keep users safe. Split it into internal and external parts for clarity:
- Internal Structure: Add fixing slots for PTC heating elements (ceramic fins), a mount for the NTC thermostat sensor, and a battery compartment (if rechargeable). Leave space for wiring.
- External Structure: Design a non-slip grip, holes for LED indicators, and 2-3 temperature adjustment buttons. Add sealing grooves at joints for waterproofing.
Pro Tip: Keep the internal layout simple. Crowded components make assembly hard and increase safety risks.
Do 3D Modeling
Use easy-to-learn CAD software (SolidWorks or UG) to create your 3D model. Focus on precision—small mistakes here ruin functionality.
Key model details:
- Heat dissipation holes: Φ1-2mm, spaced 5mm apart (prevents overheating).
- Threaded holes: M3/M4 size (for fixing components).
- Silicone ring grooves: For waterproofing (width 2mm, depth 1mm).
- Component slots: Match PTC fin and battery sizes (tolerance ±0.05mm).
Run a thermodynamic simulation to check heating uniformity. Aim for a regional temperature difference ≤5°C—this ensures no hot spots that could burn users.
Choose the Right Materials
Pick materials for heat resistance, insulation, and ease of machining. We recommend these options (balanced for function and cost):
| Part Type | Recommended Material | Why It Works |
|---|---|---|
| Housing | Aluminum Alloy 6061/6063 or ABS/PC Alloy | Aluminum: Lightweight (≤200g), good heat conduction. ABS/PC: Heat-resistant, insulated (prevents electric shock). |
| Internal Support | PA66 Nylon or Aluminum Alloy | PA66: Insulated, heat-resistant (for wiring). Aluminum: Sturdy (for heating element brackets). |
| Heating Element | Custom PTC Ceramic Fins | Adjusts heat automatically, safe, and matches housing size. |
Pretreat Materials
Prepare raw materials to avoid machining errors. Follow these steps:
- Cut raw materials into blanks. Leave 0.5-1mm of machining allowance (extra material to trim).
- Aluminum alloy: Use bandsaw cutting. ABS/PC alloy: Use laser cutting (clean, precise).
- Preheat ABS/PC to 60-80°C for 1-2 hours (prevents stress deformation during machining).
- Clean all blanks with alcohol (removes oil and dust, so the CNC tool doesn’t slip).
How to Prep for CNC Machining?
Proper prep before machining ensures speed, precision, and safety. This section covers tools, programming, and fixtures.
Choose Tools & Params
The right tools and parameters directly impact quality. Use this table as a guide:
| Machining Type | Tools | Key Parameters |
|---|---|---|
| Rough Machining | Φ10mm flat-bottom cutter (aluminum), Φ8mm flat-bottom cutter (ABS/PC) | Aluminum: 12,000rpm, 500mm/min feed rate, 0.5mm cutting depth. ABS/PC: 8,000rpm, 300mm/min feed rate, 0.2mm cutting depth. |
| Finishing | Φ2mm ball-nose cutter (arcs/chamfers), Φ1mm drill bit (small holes) | Surface finish: Ra1.6-Ra3.2 (aluminum), Ra3.2 (ABS/PC). Chamfer size: C0.5mm. |
| Special Processing | M3/M4 taps (threaded holes), laser engraver (logos/indicators) | Thread accuracy: 6H. Engraving depth: 0.3-0.5mm (clear visibility). |
Expert Insight: For aluminum alloy, use higher spindle speed and feed rate. For ABS/PC, go slower to avoid melting the plastic.
Program & Design Fixtures
Good programming and stable fixtures prevent errors. Here’s how to do it:
CAM Programming
- Use sub-zone machining: First mill the outer shape, then internal grooves (heating element slots).
- Layered cutting: Roughing removes 90% of excess material. Finishing ensures precision.
- Reserve 0.1mm shrinkage for aluminum alloy (it cools and shrinks 0.1%-0.2% after machining).
This avoids component interference and keeps internal structure tolerance at ±0.05mm.
Fixture Design
- Aluminum alloy: Use a precision vise with soft jaws (prevents scratches on the surface).
- ABS/PC: Use a vacuum adsorption platform (even pressure, no deformation).
- Thin-walled parts: Add auxiliary supports (avoids vibration during machining).
Fixtures keep the workpiece stable, ensuring no deviation >0.03mm.
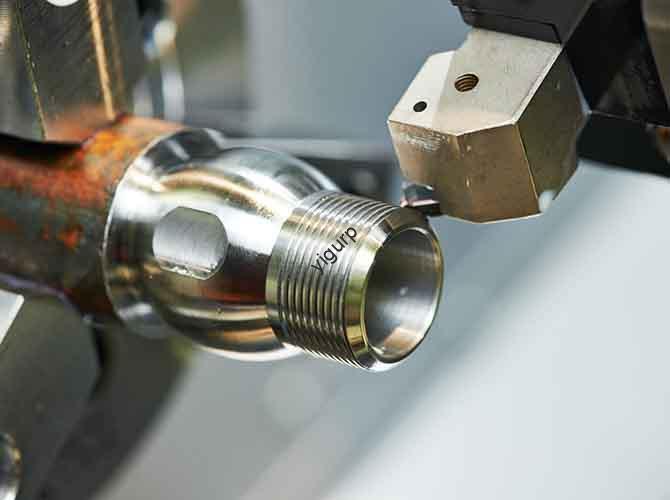
How to Do CNC Machining?
Now it’s time to turn your 3D model into physical parts. Focus on housing, internal structures, and special processes.
Machine the Housing
Housing machining differs by material. Follow these steps for best results:
| Material | Roughing Steps | Finishing Steps |
|---|---|---|
| Aluminum Alloy | 1. Mill outer shape (match 3D model). 2. Drill heat dissipation holes (Φ1.5mm array). 3. Mill battery compartment (if rechargeable). | 1. Polish surface (Ra1.6, anti-scald). 2. Chamfer edges (C0.5mm). 3. Tap M3 threaded holes (assembly). |
| ABS/PC Alloy | 1. Mill curved outer shape (ergonomic grip). 2. Mill button grooves (2mm depth). 3. Drill LED holes (Φ3mm). | 1. Etch non-slip texture (grip area, Ra3.2). 2. Polish button grooves. 3. Mill waterproof sealing grooves. |
Machine Internal Structures
Internal parts directly affect function and safety. Focus on these key areas:
- PTC Fixing Slot: Mill a rectangular slot (±0.05mm tolerance) matching PTC fin size. A tight fit boosts heat conduction (apply thermal conductive silicone grease later).
- Thermostat Hole: Drill a Φ5mm hole (±0.03mm accuracy) for the NTC sensor. Leave 0.5mm gap for wiring.
- Battery Compartment: Mill a cavity matching the battery size (0.2mm clearance for easy installation). Add ribs to prevent battery movement.
Do Special Processes
These steps enhance functionality and aesthetics:
- Waterproof Groove: Mill a 2mm-wide, 1mm-deep groove at housing joints. Embed a silicone ring for IPX4 waterproofing (prevents short circuits).
- Logo Engraving: Use laser engraving to add brand logos and temperature icons (e.g., “Low 40°C”). Keep depth 0.3-0.5mm for clarity.
- Thread Processing: Tap M4 holes at housing edges. Use thread gauges to check accuracy (no cross-threading).
What to Do After Machining?
Post-processing improves durability and appearance. Assembly and testing ensure safety and function.
Surface Treatment
Treat materials based on their type to boost performance and look:
| Material | Treatment Method | Effect |
|---|---|---|
| Aluminum Alloy Housing | Anodization (black/silver) + Local Sandblasting | Anodization: Corrosion resistance (salt spray test ≥48 hours). Sandblasting: Better grip. |
| ABS/PC Housing | Soft-Touch Paint + Laser Engraving | Soft-touch paint: Comfortable grip. Engraving: Translucent buttons (shows LED light). |
| PTC Fins | Thermal Conductive Coating | Reduces regional temperature difference by 2°C (more even heating). |
Assemble & Test
Follow this sequence for safe, correct assembly. Then test thoroughly to validate performance.
Assembly Process
- Pre-Check: Inspect parts for defects (no scratches, ≤0.05mm deviation). Test-fit PTC fins (no looseness).
- Install Components: Attach PTC fins to brackets (apply thermal grease). Connect wires to the NTC thermostat (±1°C accuracy). Install battery or wiring port. Secure the circuit board with M2 screws (no wire compression).
- Assemble Housing: Embed silicone ring in waterproof grooves. Fasten upper/lower shells with M3 screws (1.5N·m torque, even force).
- Final Check: Ensure no loose parts. Test buttons (smooth, no sticking). Check LED alignment (matches holes).
Testing Procedures
Test every aspect to ensure safety and function. We use these tests for all our prototypes:
- Safety Tests:
- Overheating: Heat to 70°C, verify auto-off (≤10s response).
- Waterproof: IPX4 spray test (30s, no water ingress).
- Insulation: Check for electric leakage (resistance ≥100MΩ).
- Performance Tests:
- Heating Uniformity: Use infrared thermometer (regional difference ≤5°C).
- Endurance: Rechargeable models (5V/2A) test for ≥4 hours continuous use.
- Button Durability: Press 10,000 times (no damage, consistent feel).
- User Experience Tests:
- Grip: Test single-hand hold (no fatigue after 30 minutes).
- Weight: Ensure ≤200g (portable).
Real Case Example: A rechargeable hand warmer prototype we made failed the endurance test (only 2 hours of use). We found the battery compartment was too tight, compressing the battery. We adjusted the compartment size by 0.3mm, and the revised prototype lasted 4.5 hours—meeting the requirement.
How to Use the Prototype?
CNC hand warmer prototypes have many uses in product development. Here’s how they add value:
| Application | Uses | CNC Advantage |
|---|---|---|
| Design Verification | Test heating, safety, and ergonomics; optimize structure. | ±0.05mm precision; rapid iteration (re-machine in 2-3 days). |
| Market Research | Display at exhibitions; collect user feedback on look and function. | Matches final product quality; attracts user attention. |
| Small-Batch Customization | Corporate gifts (logo engraving), high-end custom models (≤100 units). | No mold fees; cost-effective for small batches. |
| Educational Training | Demonstrate heating principles, thermostat logic, and waterproof design. | Clear internal structure; safe (meets insulation standards). |
What Precautions to Follow?
These tips keep your prototype safe, precise, and cost-effective:
- Safety First: Isolate heating elements from the housing (use PA66 brackets or ceramic insulators) to avoid scalds. Ensure thermostat accuracy (±1°C) to prevent overheating.
- Precision Control: Keep internal structure tolerance at ±0.05mm (tight PTC fit). Reserve 0.1mm shrinkage for aluminum alloy parts.
- Cost Optimization: CNC is ideal for ≤100 units. For mass production (>1000 units), use injection molding (cuts cost by 60%). Simplify complex surfaces to reduce tool wear.
- Environmental Protection: Use non-toxic soft-touch paint. Dispose of machining waste (aluminum scraps, plastic chips) properly.
Conclusion
Creating a reliable CNC electric heating hand warmer prototype is a step-by-step process—from design and preparation to machining, post-processing, assembly, and testing. The key is to prioritize safety, use the right materials and tools, and iterate based on test results. You don’t need to be an expert, but attention to detail ensures your prototype is functional, safe, and ready for the next step (design tweaks, market research, or small-batch production). By following this guide, you can turn your hand warmer idea into a real, working prototype without unnecessary delays or mistakes.
FAQ
What’s the best housing material for CNC hand warmers? Aluminum alloy 6061/6063 or ABS/PC alloy. Aluminum is lightweight and conducts heat evenly. ABS/PC is heat-resistant and insulated (prevents electric shock). Both are easy to machine for precise internal structures.
Can CNC prototypes be used for mass production? No. CNC prototypes are for design testing, market research, and small batches (≤100 units). For mass production (>1000 units), use injection molding—it cuts per-unit cost by 60% and speeds up production.
How long does it take to make a CNC hand warmer prototype? A simple prototype (aluminum housing, basic heating) takes 5-7 days: 1-2 days design, 2-3 days machining, 1 day post-processing, 1 day assembly/testing. A complex prototype (ABS/PC, waterproof, rechargeable) takes 8-10 days.
How to ensure the hand warmer is safe to use? Add overheating protection (auto-off at ≥70°C), use insulated materials (ABS/PC or PA66), and test for waterproofing (IPX4) and electric leakage (resistance ≥100MΩ). Ensure no hot spots (regional temperature difference ≤5°C).
Discuss Your Projects with Yigu Rapid Prototyping
At Yigu Rapid Prototyping, we specialize in creating high-quality CNC electric heating hand warmer prototypes. With 10+ years of experience, we handle everything from design optimization to assembly and testing. Whether you need a simple prototype or a custom waterproof model, we tailor our process to your needs. Contact us today to discuss your project—we’ll help you shorten development cycles by 25-30% while keeping safety and quality top priorities.