Creating a reliable CNC machining electric baking pan prototype is a vital step in the modern product development cycle. It acts as the ultimate bridge between a designer’s initial concept and the final, mass-produced product. By building a physical model, engineers can test the form, fit, and functional performance of the device before committing to expensive molds.
This article breaks down the entire development process with clear comparisons, step-by-step guidance, and practical engineering tools. Whether you are a startup founder or a senior product manager, following these steps will ensure your prototype meets industrial standards for accuracy and durability.
How to Prepare for Prototype Success?
The success of your prototype is decided long before the machine starts cutting. Preliminary preparation is the foundation. It focuses on two core tasks: finalizing design drawings and selecting the right materials. These steps directly determine how usable the final model will be.
What Are the Design Drawing Requirements?
Accurate 3D design drawings are non-negotiable in CNC machining. They must detail every single component to avoid costly machining errors. A missing detail, such as an unmarked knob position, can force a total rework. This can increase your costs by 20–30% and delay your timeline by up to two weeks.
Your checklist should include:
- Curvature of covers: Ensure the upper and lower covers have a tolerance of ±0.1mm.
- Heating plate specs: Clearly define the length, width, and thickness.
- Ergonomic handle: Detail the position and shape for a comfortable user grip.
- Functional parts: Map out locations for temperature knobs and indicator lights.
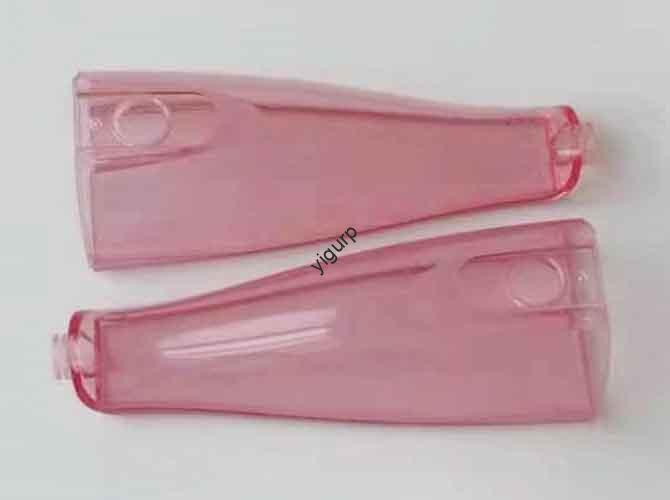
Should You Choose Plastic or Metal?
Choosing the right material depends on the purpose of your prototype. Are you testing the “look” or the “cook”?
| Material Type | Key Advantages | Best For | Cost (per kg) | Machinability |
| ABS Plastic | Low cost, easy to machine. | Appearance & structure. | $2–$5 | Excellent |
| Aluminum Alloy | High heat conductivity, strong. | Performance & heat tests. | $8–$15 | Good |
Practical Example: If your goal is to test how heat distributes across the cooking surface, aluminum alloy is essential. However, if you just need a model to show investors the aesthetic design, ABS plastic is a much more budget-friendly choice.
How Does the CNC Machining Process Work?
The CNC machining phase turns raw blocks of material into precise components. It follows a linear workflow from setup to finishing.
Machine Setup and Programming
First, you must select the right equipment. For small prototypes (under 30cm), a small CNC milling machine is perfect. For larger units (over 50cm), you will need a large machining center.
Once the hardware is set, import your 3D drawings into CAM software like Mastercam. You must set specific parameters based on the material:
- For ABS Plastic: Set the cutting speed to 1500–2000 rpm and the feed rate to 500–800 mm/min.
- For Aluminum Alloy: Use a slower cutting speed of 800–1200 rpm with a feed rate of 300–500 mm/min.
Rough Machining vs. Finishing
The machining process happens in two distinct stages. First, Roughing uses a large tool (like a 10mm end mill) to remove 80–90% of the excess material quickly. Second, Finishing uses a smaller tool (like a 3mm end mill) to ensure the surface is smooth. We aim for a surface roughness of Ra <0.8μm on the outer covers to ensure a premium look.
What Happens During Post-Processing?
After the machine finishes its work, the parts often have minor flaws. Post-processing removes these defects and enhances the prototype’s final appearance.
The Importance of Burr Removal
Burrs are sharp edges left behind after cutting. They are more than just an eyesore; they can scratch users or interfere with the assembly.
- Small burrs: Use 400–600 grit sandpaper for gentle smoothing.
- Large burrs: Start with a flat file, then finish with 200–400 grit sandpaper.
Expert Experience: In a recent project for an electric baking pan handle, we spent 10 minutes removing burrs from the grip area. This small step ensured the prototype felt “market-ready” during a user testing session, preventing a negative ergonomic review.
What Are the Surface Treatment Options?
Depending on your goals, you have several ways to finish the surface:
- Oil Spraying: For ABS plastic, we apply matte or glossy paint in a dust-free room to achieve a professional finish.
- Hot Stamping: This is used for brand logos or “ON/OFF” labels. It offers high wear resistance, lasting through over 1,000 rub tests.
- Electroplating: For aluminum parts, plating with nickel or chrome boosts corrosion resistance. This is vital for heating plates that must resist oxidation for long periods.
How to Assemble and Inspect Your Prototype?
The final steps—assembly and inspection—confirm that the prototype meets all your design standards.
The Assembly Process
Assemble the components in a logical order to avoid damaging the finish:
- Lower Cover: Attach the heating plate using M3 screws.
- Hinge: Install the hinge between the covers and test for smooth rotation.
- Handle: Fix the handle to the upper cover. It should be strong enough to support at least 5kg of weight.
- Pro Tip: Use a torque wrench to tighten screws to 1.5–2.0 N·m. This prevents stripping the plastic threads.
The Inspection Checklist
Test the prototype in these three key areas to ensure quality:
| Inspection Type | Tools Used | Pass Criteria |
| Appearance | Visual check, gloss meter | Uniform color; clear logos. |
| Function | Multimeter, heat sensor | Knob turns smoothly; plate heats up. |
| Accuracy | Calipers, micrometers | Plate size within ±0.05mm. |
Yigu Technology’s Perspective
At Yigu Technology, we believe a CNC machining electric baking pan prototype is more than just a “test model.” It is a powerful tool to reduce project risks. Our team prioritizes material matching—such as using food-grade aluminum—and extreme precision machining (tolerances tighter than 0.03mm).
We have found that investing in a high-quality prototype early on cuts 15–20% of post-production issues. For our clients, this translates to a faster time-to-market and lower overall costs. Whether you need a stunning appearance model for a trade show or a rugged functional unit for the lab, we tailor the process to your specific goals. There are no shortcuts, just reliable results.
FAQ: CNC Baking Pan Prototyping
How long does it take to make a CNC baking pan prototype?
Typically, the process takes 5–7 days. This includes one day for prep, three days for machining, and two days for finishing and assembly.
Can I use materials other than ABS or Aluminum?
Yes. For example, PC plastic is used for high-heat areas, and stainless steel is used for parts needing extra durability. However, these materials often cost 30–50% more than standard options.
What if the prototype fails the accuracy test?
First, we check the CAM program and clamping. If the error is due to tool wear, we adjust the parameters and re-machine the part. Rework usually takes 1–2 days.
Is CNC better than 3D printing for this project?
For functional baking pans, yes. 3D printing often uses materials that cannot handle the heat of a real heating plate. CNC allows you to use production-grade metals.
How do I ensure the handle won’t break?
We recommend CNC machining the handle from a solid block of reinforced plastic or aluminum. This provides much higher structural integrity than a 3D-printed part.
Discuss Your Projects with Yigu Rapid Prototyping
Ready to turn your baking pan design into a high-precision reality? At Yigu Technology, we specialize in complex CNC machining and rapid prototyping. Our engineers provide expert feedback to ensure your design is optimized for both performance and manufacturing.
Would you like me to provide a free DFM (Design for Manufacturing) analysis for your electric baking pan project?