Introduction
Coming up with a great idea is just the beginning. Between that initial spark and a product people can actually buy lies a challenging journey full of uncertainty. You might guess wrong about what users want. You might create designs that do not work. You might waste time and money on the wrong approaches. Without a clear plan, building a product becomes a gamble. Research shows that fixing a design problem after launch costs 100 times more than fixing it during prototyping. This fact alone makes a structured process essential. This guide walks you through seven proven steps that take you from a basic idea to a design ready for production. Follow these steps, and you turn yourself from someone with an idea into someone who builds successful products.
Step 1: Define Requirements and Success Metrics
Trying to build a prototype without clear requirements is like building a house without a plan. You might end up with something, but it probably will not be stable, will not serve its purpose, and will need expensive fixes later. This first step creates the foundation for every decision you will make. It prevents scope creep and ensures your final product solves the right problem.
Functional Requirements
These describe what your product must do. Write down the actions and capabilities your device absolutely needs. Think about inputs and outputs.
Example for a smart water bottle:
- Must track water consumption in milliliters
- Must send data to a phone app via Bluetooth every hour
- Must show battery level with an LED indicator
User Requirements
These describe who you are building for and what they need. Go beyond pure function to consider how people will actually use the product.
Example:
- User must be able to set daily water intake goals
- Device must be easy to clean
- User should only need to charge once per week
Technical Constraints
Every project has limits. These define what you can and cannot do.
Example:
- Must be waterproof to IP67 rating
- Must operate from 0°C to 40°C
- Battery must last 8 hours continuous use
- Total parts cost must not exceed 100 CNY per unit
Requirements Definition Document
Organize everything in a simple table. This becomes your reference for all future decisions.
| ID | Category | Description | Success Metric |
|---|---|---|---|
| FR-01 | Functional | Dispense 1ml liquid per button press | ±5% accuracy over 100 cycles |
| UR-01 | User | Operable with one hand | 9 of 10 users complete core tasks one-handed |
| TC-01 | Technical | Weight under 250g | Final assembly ≤250g |
Step 2: Create Concept Sketches and CAD Models
With requirements defined, you now turn words into visual forms. This stage moves from broad exploration to precise digital models, letting you try many ideas before committing to one.
Low-Fidelity Sketches
The goal here is speed, not art. Grab pen and paper and explore as many shapes and layouts as possible. Quantity matters more than quality at this stage.
Try the “Crazy Eights” method: fold paper into eight sections and sketch eight different ideas in eight minutes. This forces creative thinking and prevents fixation on your first idea.
From Sketch to Digital
Choose the best two or three concepts for further development. For products with screens, create wireframes showing basic layouts and screen flows. For physical products, create more detailed sketches to refine shape and size.
Introduction to CAD
Computer-Aided Design turns your concept into a precise, buildable digital model. This model becomes the source of truth for your product’s physical form. It contains all geometric information needed for 3D printing, machining, or tooling.
| Tool | Best For | Learning Curve |
|---|---|---|
| Fusion 360 | Mechanical design, hobbyists to professionals | Moderate |
| SolidWorks | Professional engineering, complex assemblies | Steep |
| Onshape | Collaborative cloud-based design | Moderate |
| Tinkercad | Absolute beginners, simple models | Easy |
For most entrepreneurs starting out, Fusion 360 offers the best balance of professional power and accessibility.
Step 3: Select Materials and Processes
With a detailed CAD model, you now decide what to make your prototype from and how to make it. This requires balancing three factors: fidelity to final product, speed, and cost. For an early alpha prototype, prioritize speed and cost over perfection.
Prototype Material Selection
Desktop 3D printing has made many plastics available for prototyping. Your choice affects look, feel, and strength.
PLA: The default choice for many. Easy to print, cheap, biodegradable. But brittle with low melting point. Not for functional parts exposed to heat or stress.
ABS: Same material as LEGO bricks. Stronger and more heat-resistant than PLA. Better for functional testing. Harder to print, releases fumes.
PETG: Excellent all-around choice. Balances strength, temperature resistance, and ease of printing. Middle ground between PLA and ABS.
Resin (SLA/DLP) : Produces parts with high detail and smooth surfaces. Standard resins are brittle, but engineering resins can simulate flexibility or high strength.
Prototyping Processes
Additive manufacturing (3D printing) :
- FDM: Melts and extrudes plastic filament. Fast, cheap, great for form and fit tests.
- SLA: UV laser hardens liquid resin. Best for high-detail cosmetic models.
- SLS: Laser melts nylon powder. Strong functional parts without supports. More expensive.
Subtractive manufacturing (CNC machining) :
Computer-controlled cutter carves parts from solid plastic or metal. Preferred for high precision or when you need final production material like aluminum.
Formative manufacturing:
Methods like vacuum forming and injection molding shape material. Typically saved for later stages due to high setup costs.
Decision framework:
- Need high surface detail for a “looks-like” model? Use SLA resin.
- Need strong, low-cost functional part? Use FDM with PETG or ABS.
- Need single metal prototype? Use CNC machining.
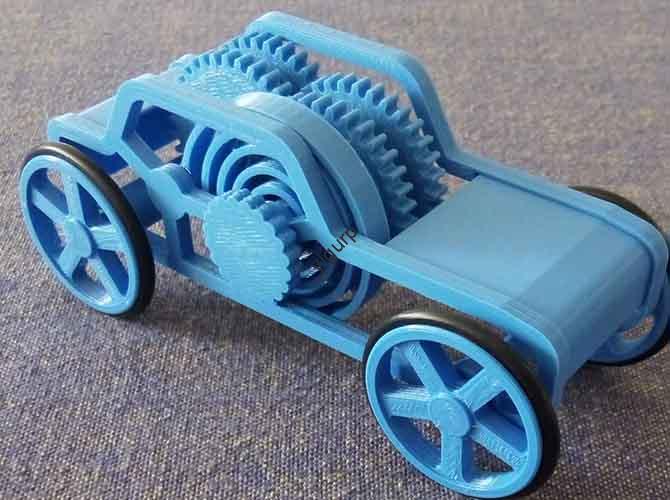
Step 4: Build the Alpha Prototype
This is the moment of truth: turning digital files into physical objects. The alpha prototype is your first attempt to put key components together and test core functionality. It is designed to be imperfect. Its purpose is to answer important questions and expose wrong assumptions quickly and cheaply.
Prepare Digital Files
For 3D printing, “slice” your model to create layer-by-layer instructions (G-code) for the printer. For CNC machining, create toolpaths that direct the cutting tool.
Fabricate the Parts
This automated process takes anywhere from hours to days depending on complexity and technology.
Post-Processing
Raw parts are rarely finished. Remove support material from 3D prints. Sand surfaces to improve finish. Paint if needed. Install threaded inserts for screw assembly.
Assembly and Integration
Bring everything together. Combine custom parts with off-the-shelf components like electronics, batteries, motors, and fasteners. This is often the first time you see how well everything truly fits.
Experience tip: For a recent handheld device, our first 3D-printed case had 1mm walls. It looked fine in CAD but bent when held during testing. Now we add a 50% thickness margin for alpha prints—design for 1.5mm to 2mm walls to ensure structural integrity for handling tests. This small adjustment saves an entire iteration cycle.
Step 5: Test, Measure, and Record Data
Building the prototype is not the end goal. Learning from it is. This step systematically tests your creation to gather meaningful data. Without structure, you collect opinions instead of insights.
Design a Test Plan
Create a test plan before putting the prototype in anyone’s hands. This ensures focused testing and answers to your most important questions.
Test objectives: What specific questions are you answering? Be precise. Instead of “See if users like it,” use “Can a new user complete setup without help?” or “Does battery last 8 hours under simulated use?”
User scenarios: Define specific tasks. For a kitchen gadget: “You want to chop one onion. Show me how you would do that.”
Key metrics: What will you measure? Time on task. Success or failure rate. Number of errors. Subjective ease-of-use rating.
Quantitative vs. Qualitative Data
Great testing captures both the “what” and the “why.”
Quantitative (the what) :
- Task success rate percentage
- Time on task in seconds
- Error count
Qualitative (the why) :
- User quotes: “I could not find the power button.”
- Observed frustrations: Pauses, sighs, confusion
- Body language: Confident or hesitant handling
- Follow-up questions: “What were you thinking there?”
Data Recording Tools
You do not need a fancy lab.
In-person tests: Notebook and smartphone camera. Record sessions to review later.
Software tests: Screen recording software like Loom captures user actions and voice.
Feedback collection: Google Forms works for post-test ratings and comments.
Test Report Table
Structure findings to turn messy observations into clear insights.
| Test Objective | Observation | User Quote | Actionable Insight |
|---|---|---|---|
| Can users change battery? | 3 of 5 struggled with door | “I’m afraid I’ll break it” | Latch needs redesign with visual cue |
| Is device comfortable? | Average rating 2.5/5. Sharp edges noted. | “Corners dig into my palm” | Add 3mm fillets to all external edges |
Step 6: Iterate and Optimize
The alpha prototype’s main job is to be proven wrong as quickly and cheaply as possible. Test data is worthless unless turned into design improvements. Iteration is not failure—it is the engine of progress.
Synthesize Feedback
Review all data and identify patterns. If one of five users has a problem, it might be unusual. If three or four struggle with the same thing, you have found a significant flaw.
Group raw data into insights: “Multiple users struggled with button placement” or “Device feels too heavy after two minutes.”
The Prioritization Matrix
You will have a long list of potential fixes. You cannot tackle them all at once. Use a 2×2 grid to decide what to fix next.
Vertical axis: User impact (low to high)
Horizontal axis: Implementation effort (low to high)
Quadrant 1: High impact, low effort (quick wins) : Do these immediately. They significantly improve experience and are easy to implement. Changing a button shape in CAD. Adjusting a software setting.
Quadrant 2: High impact, high effort (major features) : Plan for your next major prototype version. Redesigning internal layout. Rewriting core firmware.
Quadrant 3: Low impact, low effort (fill-ins) : Tackle if you have spare time after quick wins. Do not let them distract.
Quadrant 4: Low impact, high effort (money pits) : Question if these are needed at all. Often discard or place on long-term backlog.
The Iteration Loop
Modify, rebuild, retest.
Modify CAD: Implement changes identified as quick wins.
Rebuild part: Often you only need to rebuild changed components. If you only changed the battery door, just print a new door, not the whole case.
Retest: Test the new component focusing on the issue it was meant to solve.
Repeat this loop until the prototype meets requirements.
Step 7: Freeze the Design for Production
After several iteration cycles, your prototype reaches maturity. It meets all critical requirements. Major issues are resolved. Testing feedback is consistently positive. This is the point to declare a design freeze.
A design freeze is a formal milestone meaning the design is complete and locked. No further significant changes without formal review. This hands the design from prototyping to manufacturing. Freezing prevents a never-ending cycle of “just one more tweak” and gives manufacturing a stable target.
Pre-Freeze Checklist
Final CAD model complete and validated: All parts fit correctly in digital assembly.
Bill of Materials finalized: Comprehensive list of every component—custom parts, off-the-shelf electronics, screws, packaging. Includes part numbers, suppliers, quantities.
All critical requirements met: Test data verifies the design meets success metrics from Step 1.
Detailed 2D drawings created: Specify critical dimensions, materials, finishes, and tolerances. Manufacturing needs these even with 3D CAD.
After freeze, next steps include Design for Manufacturing analysis, supplier sourcing, tooling, and pre-production pilot runs. The prototyping journey is complete. The production journey begins.
Conclusion
The seven essential steps—Define, Sketch and CAD, Select, Build, Test, Iterate, and Freeze—form a roadmap from idea to reality. This structure enables learning, reduces risk, and dramatically increases success probability.
Remember the core philosophy: prototyping is not about building a perfect first version. It is a journey of discovery designed to help you learn as quickly and cheaply as possible. By embracing this structured approach, you turn uncertainty into insight. You transform your vision into a product that is not only well-designed but validated, de-risked, and ready for market. Now it is time to start building.
Frequently Asked Questions
How many prototype iterations should I plan for?
Most products need three to five major iterations before design freeze. The first alpha proves basic concept. A second round refines functionality. A third addresses usability and polish. Complex products may need more. Budget time and money for at least two to three rounds.
What is the difference between alpha and beta prototypes?
Alpha prototypes test core functionality and feasibility. They are often rough, use prototype materials, and focus on proving the concept works. Beta prototypes come later, closer to final production. They use intended materials, look like the final product, and test manufacturing processes and user acceptance.
How much should I spend on my first prototype?
Spend as little as possible while still learning what you need to know. For simple products, a few hundred CNY on 3D-printed parts may suffice. For complex electronics, you may need to spend thousands on custom PCBs and machined enclosures. The goal is minimum viable learning at minimum cost.
Do I need a working electronic prototype to test with users?
Not always. For early user feedback on physical products, non-functional “looks-like” models often work well. Users can evaluate size, shape, and ergonomics without electronics. Save functional testing for later iterations when you have working prototypes.
What if my prototype fails during testing?
Celebrate. Finding failures during prototyping is the whole point. Each failure teaches you something that would have cost much more to learn after production. Document what failed, analyze why, fix the design, and test again.
How do I know when to stop iterating and start production?
Stop when the prototype consistently meets all critical requirements and user testing shows no major issues. If you keep finding new problems with each round, your design may need fundamental rethinking. If you are polishing minor details while major questions remain unanswered, you are iterating too long.
Discuss Your Projects with Yigu Rapid Prototyping
At Yigu Technology, we help inventors, engineers, and entrepreneurs navigate the seven steps of prototype development. Our capabilities span 3D printing, CNC machining, sheet metal fabrication, and injection molding. We provide DFM feedback to optimize your designs, rigorous quality control, and clear communication throughout every project. Located in Shenzhen’s manufacturing hub, we combine technical expertise with competitive pricing and reliable lead times. If you have an idea ready to become a prototype, or if you need guidance at any stage of development, reach out to us. Let’s discuss how we can help you turn your vision into a working model and eventually into a successful product.