The diameter of your 3D printing filament, typically 1.75mm or 2.85mm/3.0mm, is a critical yet often overlooked specification that dictates compatibility, print quality, and speed. Choosing the wrong size can lead to failed prints, damaged equipment, and wasted material. This guide explains the key differences between the standard sizes, details the importance of precision tolerance, and provides a clear, step-by-step framework to help you select the optimal filament diameter for your specific printer and project goals.
Introduction
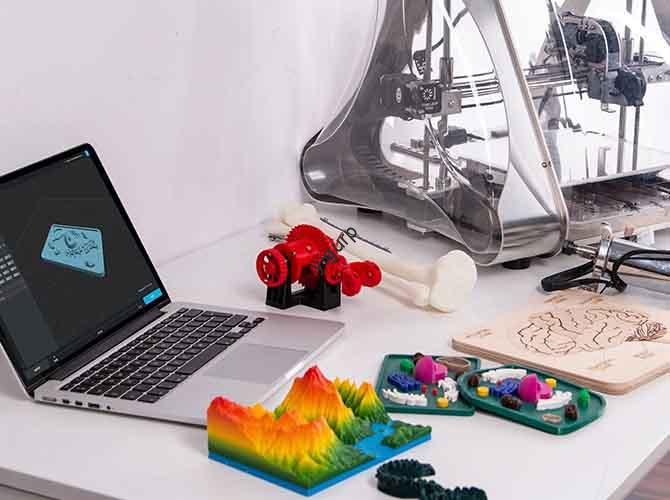
You have your 3D model ready and your printer heated up. You load the spool, start the print, and watch the first layer go down. Then, you notice gaps in the lines or hear a troubling clicking sound from the extruder. Often, the root of these common failures isn’t your design or settings—it’s the physical size of the filament you chose.
In Fused Deposition Modeling (FDM) 3D printing, filament diameter is the “fuel line” for your machine. A consistent, correct diameter ensures smooth material flow to the hot end, where it is melted and deposited. An inconsistent or mismatched diameter disrupts this flow, causing a cascade of print defects. This article will guide you through the two dominant filament diameters, explain why tolerance matters more than you think, and help you make an informed choice that bridges the gap between your printer’s capabilities and your project’s requirements.
What Are the Standard Filament Sizes?
The 3D printing world has largely settled on two primary filament diameters, each serving distinct printer types and applications. Understanding this split is the first step to selecting correctly.
The vast majority of modern desktop printers are engineered for 1.75mm filament. This thinner diameter requires less force to push, making it ideal for printers with lightweight, direct-drive extruders. It allows for precise control over extrusion, which is perfect for capturing fine details.
On the other hand, many professional and industrial-grade machines use 2.85mm filament (often labeled as 3.0mm). The thicker strand is more rigid, which reduces the risk of tangling and buckling, especially in printers where the filament must travel a longer path from the spool. It can also deliver a higher volume of plastic per second, enabling faster print speeds for large objects.
Here is a quick comparison:
| Feature | 1.75mm Filament | 2.85mm / 3.0mm Filament |
|---|---|---|
| Primary Use | Desktop/Hobbyist Printers | Industrial/Professional Printers |
| Key Advantage | High detail, precise extrusion control | Fast print speed, stable in long bowden tubes |
| Extruder Force | Lower force required | Higher force required |
| Common Printers | Creality, Prusa, Bambu Lab | Ultimaker, some older MakerBot, Stratasys |
| Best For | Miniatures, detailed prototypes, general hobby use | Large parts, functional prototypes, production runs |
Why Does Filament Tolerance Matter?
Picking 1.75mm or 2.85mm is just the start. The advertised diameter is a nominal value. The real-world consistency of that diameter—its tolerance—is what separates reliable filament from problematic spools.
Tolerance is the allowed deviation from the nominal size, expressed as a plus/minus value. The industry standard for quality filament is ±0.05 mm or better. For a 1.75mm spool, this means every point along the filament should measure between 1.70mm and 1.80mm.
Why is this so crucial? Your printer’s extruder gear and hot end are calibrated for an expected volume of plastic.
- Under-Extrusion & Gaps: If a section of filament is thinner than expected (e.g., 1.65mm), the extruder pushes less plastic than the slicer assumes. This leads to weak layer adhesion, gaps in top layers, and a structurally weak part.
- Over-Extrusion & Clogs: If a section is too thick (e.g., 1.85mm), it can jam in the Bowden tube or heat break, causing extruder skipping, blobby surfaces, or a complete hot end clog.
A Real-World Example: An engineer once sourced a cheap “1.75mm” ABS filament to print a batch of functional brackets. The prints failed with weak layers. Using digital calipers, they found the filament diameter varied from 1.68mm to 1.88mm (±0.10mm). Switching to a reputable brand with a certified ±0.03mm tolerance resulted in strong, dimensionally accurate parts and zero clogs.
What Factors Guide Your Choice?
Selecting the right diameter isn’t a matter of preference; it’s a technical decision guided by three core factors.
1. Printer Compatibility (The Golden Rule)
This is the non-negotiable starting point. Always check your printer’s manual first. The vast majority of consumer printers today are designed exclusively for 1.75mm filament. Trying to force 2.85mm filament into a 1.75mm system will damage the extruder gear or cause an immediate jam. Some industrial printers can be configured for either size, but this involves changing the extruder drive gear, Bowden tube, and often the hot end—a task for advanced users.
2. Nozzle Size and Print Goals
Your nozzle size and desired outcome work in tandem with filament diameter.
- For Detail and Precision: If you’re using a 0.2mm or 0.4mm nozzle to print miniatures or intricate models, 1.75mm filament is the clear choice. Its smaller cross-section allows for finer control and easier retraction, minimizing stringing on delicate features.
- For Speed and Strength: If you’ve installed a 0.8mm or 1.0mm nozzle to print large, sturdy items like planters or tool holders quickly, 2.85mm filament pairs well. It can deliver the high volumetric flow rate needed to fill that large nozzle opening efficiently.
3. Material Type and Behavior
Some advanced materials have properties that make them better suited to one diameter. Flexible TPU, for instance, is almost universally sold in 1.75mm. The thinner strand is easier for desktop extruders to push without buckling. High-temperature plastics like PEEK or PEI might be found in 2.85mm for industrial systems, as the thicker filament can handle the higher push forces required.
How to Select the Right Diameter: A 4-Step Guide
Follow this structured process to ensure a perfect match every time.
Step 1: Verify Your Printer’s Specs
Locate the official specifications for your printer model. The manual or manufacturer’s website will state the required filament diameter. Do not rely on forum guesses. If you have a Bowden tube setup (the extruder motor is separate from the hot end), it is almost certainly designed for 1.75mm.
Step 2: Define Your Project Priority
Ask yourself the key question for this specific print:
- Is the goal fine visual detail or rapid prototyping of a large form?
- Your answer points you to the ideal diameter and nozzle size pairing.
Step 3: Choose a High-Quality Brand
Invest in filament from reputable manufacturers who guarantee tight tolerances (e.g., ±0.02mm to ±0.05mm). The cost difference is minimal compared to the time and material wasted on a failed print. Look for brands that provide spool-specific diameter verification charts.
Step 4: Validate with Tools
Even with good filament, it’s wise to check. Use a digital caliper to measure the filament diameter at several points along the first meter. Confirm it matches the nominal size and is consistent. This quick check can save hours of frustration.
Real-World Applications and Case Studies
Case Study 1: The Hobbyist’s Detailed Prop
A cosplayer needed to print a highly detailed helmet with intricate embossed patterns. Using a Creality Ender 3 (1.75mm only) with a 0.4mm nozzle, they selected a high-tolerance 1.75mm PLA+ filament. The consistent diameter allowed for perfect extrusion of fine details like chainmail textures and small glyphs, with no clogs during the 40-hour print. The alternative—a cheap, variable-diameter filament—would have blurred the details and risked a mid-print failure.
Case Study 2: The Workshop’s Functional Part
A small machine shop used a Ultimaker S5 (compatible with 2.85mm) to produce large, solid mounting brackets for a client. They loaded 2.85mm ABS and used a 0.8mm nozzle. The thicker filament allowed them to run the printer at a high volumetric flow rate, cutting the print time per bracket from 14 hours (with 1.75mm) to just under 9 hours. The rigidity of the 2.85mm filament also ensured smooth feeding through the long Bowden tube, resulting in a batch of 10 strong, dimensionally accurate parts with no warping.
What About Non-Standard Sizes?
Beyond the two main standards, niche applications use specialized diameters.
- 3mm Filament: Often used interchangeably with 2.85mm, but true 3.00mm filament may not feed correctly in a system designed for 2.85mm. Always verify compatibility.
- Ultra-Fine Filaments (1mm or less): Used in specialized fields like bio-printing or micro-dispensing for electronics. These require completely different hardware and are not relevant to standard FDM printing.
Conclusion
The diameter of your 3D printing filament is a foundational choice that impacts every aspect of your print, from success rate to final quality. By understanding the distinct roles of 1.75mm and 2.85mm filaments, insisting on tight tolerance (±0.05mm or better), and following a selection process that prioritizes printer compatibility and project goals, you can eliminate a major source of print failure. This knowledge empowers you to choose materials that work with your machine, not against it, turning filament selection from a guessing game into a strategic decision for successful 3D printing.
FAQ
– Can I convert my 1.75mm printer to use 2.85mm filament?
While technically possible, it is not recommended. Conversion requires changing the extruder drive gear, hot end, Bowden tube, and firmware settings. The cost and effort typically exceed the value, and reliability is often compromised. It is more effective to use a printer designed for your target filament size.
– My filament says 1.75mm but measures 1.73mm. Is this a problem?
A slight variation like this is usually fine if it is consistent. The critical issue is large swings in diameter (e.g., from 1.70mm to 1.80mm on the same spool). Consistent diameter, even if slightly off nominal, can often be compensated for in your slicer’s filament diameter setting.
– Does filament diameter affect printing temperature?
Indirectly, yes. A thicker filament (2.85mm) may require a slightly higher hot end temperature to ensure the core melts completely at higher flow rates. However, the primary factors for temperature are always the material type (PLA, ABS, etc.) and the printer’s specific hot end design. Always refer to the filament manufacturer’s guidelines as a starting point.
Discuss Your Projects with Yigu Rapid Prototyping
Navigating technical specifications like filament diameter is just one part of successful product development. At Yigu, our engineering team combines deep material science expertise with hands-on printing experience across industries. We can help you select not just the right filament size, but the optimal material, process, and post-processing technique to meet your functional requirements and quality standards.
Let’s optimize your next project from the ground up. Contact Yigu Rapid Prototyping today to discuss how we can transform your designs into high-quality, functional parts with efficiency and reliability.