Every 3D printing project faces the same core challenge. You need parts that are strong enough to work. They must be cheap enough for your budget. And they have to be fast enough to hit your deadline.
This balance between strength, cost, and speed is called the “design triangle.” Every engineer and designer must navigate it. Getting this balance right makes or breaks your print’s success.
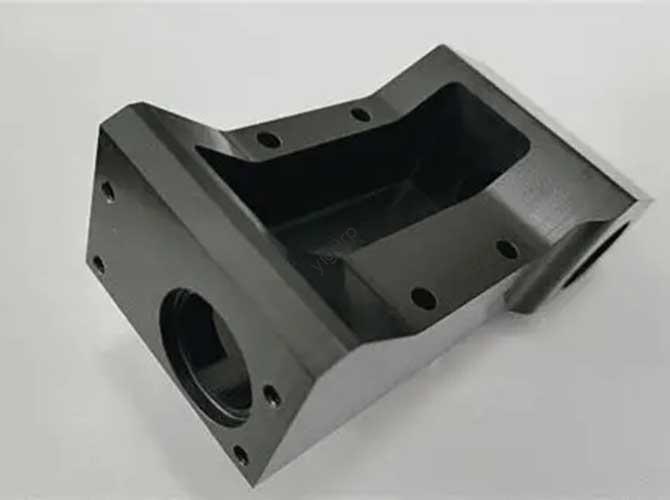
This guide gives you a step-by-step approach to smart design. It goes beyond basic printer settings. We cover six key areas: making parts lighter but stronger, picking the right print angle, following wall/hole rules, planning finishing work, arranging batch prints, and testing results. Use these methods to take control of your part’s performance and efficiency.
What Is the Design Triangle?
The design triangle has three key points: strength, cost, and speed. You can’t maximize all three at once. You have to prioritize.
For example, a super-strong part may cost more and take longer to print. A fast, cheap part may lack strength. Your job is to find the sweet spot for your project.
This guide helps you make intentional choices. It turns trial-and-error into a clear, repeatable process. You’ll get parts that work well without wasting time or money.
How to Make Parts Lighter but Stronger?
Lightweight parts save material and print time. They cut costs too. But they still need to be strong enough for their job. The best way to do this is with topology optimization.
What Is Topology Optimization?
Think of how nature designs bones. Bones are thick where forces hit hardest. They’re thin or hollow where there’s no stress.
Topology optimization copies this with software. It’s a math-based tool that cuts waste. It keeps only the material needed for strength.
Here’s how it works: You start with a solid digital block. You tell the software where forces will act. You mark areas that must stay, like bolt holes.
The software then removes all unneeded material. The result is an organic, skeleton-like shape. It’s perfectly engineered for its job.
Key Benefits
- Better Strength-to-Weight Ratio: Lighter parts that handle more force. Critical for aerospace, cars, and robots.
- Lower Material Costs: Less material used means cheaper parts. A 30% lighter part cuts material costs by 30%.
- Faster Print Times: Less material = shorter print time. You can produce more parts in less time.
Step-by-Step Process
Modern design tools like Autodesk Fusion 360 or SolidWorks have built-in topology tools. Follow these steps:
- Define Design Space: Model the maximum size your part can be. This is your starting solid block.
- Add Loads & Constraints: Mark where the part will be held. Apply forces as it will face in real use.
- Set Goals: Choose your priority. For example, “cut weight by 30% with a safety factor of 2.”
- Generate & Refine: Run the software. Clean up the rough shape. Fix overhangs or thin spots for printing.
Real Case Example
A robotics company needed a arm bracket. The original solid design weighed 200g and cost $8 to print. It took 4 hours to make.
They used topology optimization. The new design weighed 120g (40% lighter). It cost $4.80 and printed in 2.4 hours.
Testing showed it was 15% stronger than the original. It fit the robot perfectly. They saved 40% on cost and time per part.
How to Choose the Right Print Angle?
Your part’s angle on the printer bed changes everything. It affects strength, print time, cost, and surface quality.
Using the default angle from your software is a common mistake. It often leads to weak parts or rough finishes.
Why Layer Weakness Matters
3D printers build parts layer by layer (like stacking paper). The bond between layers is weak.
A part is strong if force hits along the layers (X/Y direction). It breaks easily if force pulls layers apart (Z direction).
Example: A hook printed flat is strong. The same hook printed upright snaps easily along layers.
Decision Framework
Prioritize one goal. This will guide your angle choice:
| Main Goal | Top Priority | Key Action |
|---|---|---|
| Maximum Strength | Align Forces with Layers | Angle part so loads hit X/Y directions. |
| Maximum Speed/Cost Savings | Lowest Height | Angle part to reduce layer count. |
| Best Surface Finish | Hide Support Marks | Face critical surfaces up/vertical. |
Support Type Guide
Supports are needed for complex shapes. But they add time and cost. Choose the right type:
| Support Type | Best For | Pros | Cons |
|---|---|---|---|
| Standard/Grid | Large flat overhangs | Fast to make, strong | Hard to remove, damages surface |
| Tree/Organic | Organic/detailed models | Easy to remove, minimal marks | Slow to make, fragile |
| Soluble | Complex internal shapes | Perfect finish, no marks | Expensive, needs dual-nozzle printer |
What Rules Apply to Walls & Holes?
Walls and holes are where prints often fail. Follow simple rules to avoid weak parts or wrong sizes.
Wall Thickness Rules
Wall thickness should be a multiple of your nozzle size. This ensures solid, strong walls.
For a 0.4mm nozzle (most common), use 0.8mm, 1.2mm, or 1.6mm walls. Avoid 1.0mm walls—they leave weak gaps.
Non-structural parts: At least 2 outer walls. Load-bearing parts: 3-4 outer walls for strength.
Designing Accurate Holes
Holes often print smaller than designed. This is due to material shrinkage and layer squish.
Vertical Holes (Z-Direction)
Make them slightly bigger in your design. Add 0.2-0.3mm to the diameter.
Example: An M5 screw (5mm) needs a 5.2mm hole.
Horizontal Holes (X/Y Direction)
Circular horizontal holes sag during printing. They become out-of-round.
Solution: Use a teardrop or diamond shape instead. These are self-supporting. No extra supports needed.
Small but Critical Details
- Chamfers: Use 45-degree chamfers on bottom edges. They fix “elephant’s foot” (flare on first layers). They make parts easier to remove.
- Fillets: Use rounded fillets on internal corners. They spread stress. They prevent cracking under load.
- Threads: For M6+ screws, print threads directly. Add 45-degree chamfers at thread ends. For smaller screws, use brass heat-set inserts. They are more durable.
How to Plan for Finishing Work?
Finishing work (sanding, support removal) wastes time. Design parts to cut this work down.
Easy Support Removal
The best support is no support. Follow the 45-degree rule: All overhangs should be 45 degrees or less. Most printers handle this without supports.
For 90-degree overhangs: Use a 45-degree chamfer instead of a fillet. Chamfers are self-supporting. Fillets need supports.
Design for Assembly
For multi-part assemblies, tolerances are key. Too little clearance = parts don’t fit. Too much = loose parts.
Starting points for FDM printing:
- Slip fit (slides easy): 0.2mm gap between parts.
- Press fit (tight, fixed): 0.1mm gap between parts.
Test first: Print a small test piece with different gaps. Dial in tolerances for your printer.
Use metal inserts: Design pockets for captive nuts or heat-set inserts. They make strong, reusable connections.
Finish Decision Matrix
| Main Goal | Top Priority | Key Actions |
|---|---|---|
| Maximum Speed | Minimize Supports/Height | Use 45° chamfers; orient for low height; split into self-supporting parts. |
| Best Surface Finish | Hide Seams/Marks | Face critical surfaces up; split model along natural lines; use soluble supports. |
| Strongest Assembly | Optimize Joints | Use heat-set inserts; thicken walls around holes; add alignment keys. |
How to Scale Up for Production?
Printing 1 part is easy. Printing 10, 50, or 100 parts needs a new strategy. Focus on efficiency and consistency.
All-at-Once vs. Sequential Printing
| Method | Pros | Cons |
|---|---|---|
| All-at-Once | Fastest if successful; same layer time for all parts. | High risk: 1 failure ruins the whole batch. |
| Sequential | Low risk: 1 failure doesn’t hurt others. | Slower; needs careful layout to avoid collisions. |
Optimize Plate Layout
- Use a grid with space between parts. This prevents heat warping.
- Minimize long travel moves. This reduces stringing.
- Travel over printed parts. This contains oozing.
Ensure Batch Consistency
Parts in different bed locations may vary. This is due to uneven cooling.
Fix: Place parts symmetrically around the bed center. This ensures uniform airflow. All parts cool at the same rate.
Real Production Example
A startup needed 50 plastic brackets. They first tried all-at-once printing. 1 part failed, ruining 8 hours of work.
They switched to sequential printing. They spaced parts evenly on the bed. Only 2 parts failed. They saved 6 hours and $120 in material.
They also added alignment marks. All 48 good parts fit perfectly. Batch consistency improved by 90%.
How to Test & Validate Parts?
A perfect-looking part may still fail. Testing turns guesswork into certainty. It prevents costly field failures.
Why Visuals Aren’t Enough
Smooth layers don’t mean strength. A part may be the wrong size or weak in key areas. You need to test function, not just looks.
Low-Cost Testing Methods
- Size Check: Use digital calipers. Measure critical dimensions. Aim for +/- 0.2mm tolerance (FDM standard).
- Fitment Test: Assemble the part with its mates. Check if it slides or fits tight as needed. Check bolt hole alignment.
- Destructive Test: For load-bearing parts, add weight until it breaks. Note the failure point. Fix it in the next design.
Validation Checklist
Use this for every new part or revision:
Pre-Print Design Check
- [ ] Critical dimensions marked.
- [ ] Orientation chosen for strength/finish.
- [ ] Wall thickness matches nozzle size.
- [ ] Supports minimized.
Post-Print Inspection
- [ ] No layer shifts or warping.
- [ ] Supports removed cleanly.
- [ ] Critical Dimension 1: Designed ____ / Measured ____ (Pass/Fail).
- [ ] Critical Dimension 2: Designed ____ / Measured ____ (Pass/Fail).
Functional Test
- [ ] Fitment Test: Pass/Fail.
- [ ] Load Test (if needed): Result ____ (Pass/Fail).
Conclusion
Designing great 3D printed parts is about intentional choices. It’s not luck or trial-and-error. This guide covered six key pillars:
Use topology optimization to make parts lighter and stronger. Choose the right print angle for your goal. Follow wall and hole rules for reliability. Design to cut finishing work. Plan batch layouts for production. Test every part to ensure it works.
Each pillar gives you control. You’ll get parts that are stronger, cheaper, and faster to print. You’ll waste less time, money, and material.
Apply these steps to your next project. You’ll turn 3D printing from a hobby tool into a powerful manufacturing asset. The time you spend on design will pay off in better results.
FAQ
What’s the best nozzle size for functional parts? 0.4mm is standard. It balances speed, strength, and detail. Use 0.6mm for faster prints (slightly less detail).
Can I skip topology optimization for simple parts? Yes. For basic parts (like a simple bracket), use solid walls and minimal fill. Save topology for complex, load-bearing parts.
How much clearance do I need for 3D printed parts? Start with 0.2mm for slip fits and 0.1mm for press fits. Test with a small sample first.
Are soluble supports worth the cost? Yes, if surface finish is critical. They’re ideal for complex internal shapes you can’t reach with tools.
How do I fix parts that warp? Use a heated bed (60-100°C). Add chamfers to bottom edges. Ensure even cooling across the bed.
Do I need to test every batch? Test the first 1-2 parts of each batch. This ensures consistency. You don’t need to test every single part.
Discuss Your Projects with Yigu Rapid Prototyping
At Yigu Rapid Prototyping, we help you design 3D printed parts that are stronger, cheaper, and faster. Our team of engineers will guide you through topology optimization, print angle choices, and testing. We’ll help you scale up production and avoid common mistakes. Whether you need prototypes or small-batch parts, contact us today for a custom design consultation and quote.