Introduction
If you’re designing a new product, repairing old equipment, or building a prototype, you’ll eventually face this question: how do I get metal parts made exactly the way I need them?
Customize metal parts isn’t a simple task with one right answer. The best method depends on your part’s shape, the material you need, how many you want, and how precise they must be. Choose wrong, and you’ll waste money or end up with parts that don’t fit.
This guide walks you through everything you need to know about custom metal part manufacturing. We’ll cover 8 key processes, compare their strengths and weaknesses, share real examples from actual projects, and give you a clear framework for making the right choice. Whether you need 5 prototype brackets or 50,000 production components, you’ll find practical answers here.
What Factors Matter When Customizing Metal Parts?
Before looking at any specific process, you need to understand four core factors. These will narrow down your options and help you avoid expensive mistakes.
Design Complexity
How complicated is your part’s shape?
- Simple parts: Flat brackets, round shafts, basic blocks with holes
- Moderate parts: Parts with pockets, ribs, or multiple features
- Complex parts: Parts with internal cavities, lattice structures, curved channels
Some processes handle complexity better than others. Metal 3D printing can create shapes that are impossible to machine. CNC machining handles moderate complexity well. Extrusion only works for parts with constant cross-sections.
Material Choice
What metal does your part need to be made from?
| Material | Key Properties | Common Applications |
|---|---|---|
| Aluminum | Lightweight, good strength, corrosion-resistant | Brackets, enclosures, automotive parts |
| Stainless Steel | Strong, corrosion-resistant, food-safe | Medical tools, food equipment, marine parts |
| Steel | Strong, inexpensive, magnetic | Structural parts, machine frames |
| Titanium | Very strong, lightweight, biocompatible | Aerospace, medical implants, high-end sports |
| Brass | Good conductivity, attractive finish | Electrical components, decorative parts |
| Copper | Excellent conductivity | Electrical bus bars, heat exchangers |
Not all processes work with every metal. For example, die casting only works with low-melting metals like aluminum and zinc. Titanium requires specialized processes like CNC machining or 3D printing.
Production Volume
How many parts do you need?
- Prototype quantities: 1-10 parts
- Small batches: 10-100 parts
- Medium batches: 100-1,000 parts
- Large batches: 1,000-10,000+ parts
- Mass production: 10,000-1,000,000+ parts
Cost per part drops dramatically as volume increases for some processes, while others stay relatively flat. CNC machining has moderate per-part costs across all volumes. Die casting has high upfront costs but very low per-part costs at high volumes.
Tolerance Requirements
How precise does your part need to be?
| Tolerance Class | Typical Range | Example Applications |
|---|---|---|
| Very tight | ±0.025mm | Medical implants, precision gears |
| Tight | ±0.05mm | Bearing housings, mating parts |
| Standard | ±0.1mm | General machined parts |
| Loose | ±0.5mm | Castings, decorative parts |
| Very loose | ±1.0mm+ | Structural parts, weldments |
Tighter tolerances cost more and limit your process options. CNC machining delivers the tightest tolerances. Casting and extrusion have looser tolerances that may require post-machining.
Real Case: A medical device company needed 50 custom surgical tools. They specified titanium material, very tight tolerances (±0.025mm), and moderate complexity. This combination immediately pointed them toward CNC machining as the only viable option—and the parts worked perfectly on the first try.
What Are the 8 Key Processes to Customize Metal Parts?
Now let’s dive into each process. We’ll explain how it works, what it’s best for, and share real examples.
CNC Machining (Best for Precision and Versatility)
How it works: CNC machining is a subtractive process. It starts with a solid block of metal and uses computer-controlled tools to cut away material. Mills create 3D shapes, while lathes handle cylindrical parts. The machine follows G-code generated from your 3D CAD model.
Best for: Parts that need tight tolerances, simple to moderate complexity, and any batch size from 1 to 10,000+ parts. Works with virtually all metals.
Pros and Cons:
| Pros | Cons |
|---|---|
| Very high precision (±0.025mm) | Struggles with complex internal shapes |
| Fast for repeatable parts | Material waste (50-70% of block cut away) |
| Works with all common metals | Setup fees for small batches ($50-200) |
| Excellent surface finish possible | Size limited by machine capacity |
Real-World Case: An aerospace supplier needed 200 custom aluminum brackets for a satellite program. The brackets had tight tolerance holes (±0.05mm) for mounting sensitive equipment. CNC machining delivered consistent parts in 5 days. Each bracket was identical, and inspection showed all holes within spec. The client saved 3 weeks compared to their previous vendor.
Common Uses: Gears, brackets, housings, shafts, medical instruments, prototype parts.
Metal 3D Printing (Best for Complex, Low-Volume Parts)
How it works: Also called additive manufacturing, this process uses a laser to melt metal powder layer by layer. Common technologies include SLM (selective laser melting) and DMLS (direct metal laser sintering). The part builds from the bottom up, with no tooling required.
Best for: Highly complex designs with internal features, low volumes (1-50 parts), and high-value applications like aerospace and medical. Works with titanium, stainless steel, Inconel, and some aluminum alloys.
Pros and Cons:
| Pros | Cons |
|---|---|
| Creates shapes impossible with other processes | Slow for large batches |
| Very low material waste | Expensive per part |
| No setup fees | Lower tolerance than CNC |
| Ideal for prototypes | Surface finish needs post-processing |
Real-World Case: A medical startup needed 5 custom titanium spinal implants. Each implant had a porous lattice structure that promotes bone growth—impossible to machine. They used SLM 3D printing to create the parts in 2 days. The lattice worked perfectly in testing, and the implants passed all strength requirements. Traditional machining couldn’t have made these parts at all.
Common Uses: Medical implants, aerospace components, lightweight structural parts, prototypes with complex geometry.
Metal Casting (Best for Large Batches and Simple Shapes)
How it works: Molten metal pours into a mold cavity, then cools and solidifies. Sand casting uses disposable sand molds for simple shapes. Investment casting uses a wax pattern coated in ceramic for more detail. The mold breaks away to reveal the finished part.
Best for: Simple to moderate designs, large batches (1,000+ parts), and lower-cost metals like aluminum, iron, and copper alloys.
Pros and Cons:
| Pros | Cons |
|---|---|
| Low cost for large batches | Slow setup (1-2 weeks for mold making) |
| Works for very large parts | Rough surface finish |
| Low material waste | Poor tolerance (±0.5mm typical) |
| Wide material choice | Porosity possible in thick sections |
Real-World Case: A pump manufacturer needed 5,000 iron pump housings. The design was simple—a hollow cylinder with mounting flanges. Sand casting produced each housing for $8, compared to $22 for CNC machining. The rougher surface didn’t matter for this application, and the client saved $70,000 total.
Common Uses: Engine blocks, pump housings, machine frames, large brackets, pipes.
Die Casting (Best for High-Volume, Detailed Parts)
How it works: High pressure forces molten metal into a reusable steel mold. The pressure ensures the metal fills every detail of the mold cavity. Parts cool quickly and eject from the mold for the next cycle.
Best for: Moderate to detailed designs, very large batches (10,000+ parts), and low-melting metals like aluminum, zinc, and magnesium.
Pros and Cons:
| Pros | Cons |
|---|---|
| Very fast production | High tooling costs ($10,000-50,000) |
| Smooth surface finish | Only works with low-melting metals |
| Consistent parts | Porosity can be an issue |
| Excellent detail reproduction | Not for complex internal shapes |
Real-World Case: An automotive supplier needed 100,000 small sensor housings for anti-lock brake systems. Each housing had fine threads and a smooth surface finish. Die casting produced them for $1.20 each, with zero defects in the first production run. CNC machining would have cost $4 each, and the client saved $280,000.
Common Uses: Automotive components, consumer electronics housings, power tool parts, small brackets.
Extrusion (Best for Constant Cross-Section Parts)
How it works: Heated metal pushes through a die with the desired cross-section shape. The continuous profile comes out like toothpaste from a tube, then cuts to length. Post-processing adds holes, cutouts, or other features.
Best for: Parts with constant cross-sections (same shape along length), large batches (1,000+ parts), and aluminum (80% of extruded parts).
Pros and Cons:
| Pros | Cons |
|---|---|
| Very low cost per part | Only for constant cross-sections |
| Fast production | Needs post-processing for features |
| Smooth surface finish | Limited to certain alloys |
| Good strength | Die costs for custom shapes |
Real-World Case: A solar panel manufacturer needed 10,000 aluminum mounting rails. The rails had a complex cross-section to hold panels and attach to roofs, but the shape was constant along the length. Extrusion produced them for $3 per meter, compared to $12 per meter for machined equivalents. The parts arrived in 1 week and required only drilling of mounting holes.
Common Uses: Window frames, heat sinks, structural profiles, rails, tubes.
Metal Injection Molding (Best for Small, Detailed Parts)
How it works: Fine metal powder mixes with a plastic binder, then injects into a mold like plastic injection molding. The “green part” goes through a furnace where the binder burns out and the metal particles fuse together (sintering).
Best for: Small parts under 100 grams, very detailed features, large batches (10,000+ parts), and stainless steel or titanium.
Pros and Cons:
| Pros | Cons |
|---|---|
| Makes tiny, detailed parts | High tooling costs |
| Low per-part cost for large batches | Not for large parts |
| High density, strong parts | Slow setup (2-3 weeks) |
| Excellent surface finish | Shrinkage during sintering |
Real-World Case: A firearms manufacturer needed 50,000 small trigger components. Each part was 15mm long with complex internal geometry. Metal injection molding produced them for $0.95 each, with all parts identical. Investment casting quotes came in at $2.50 each, and machining was impossible due to internal features.
Common Uses: Watch components, medical instruments, small gears, firearm parts, dental tools.
Forging (Best for High-Strength Parts)
How it works: Metal heats to a malleable state, then hammers or presses into shape using a die. Unlike casting, the metal never melts—the process preserves and aligns the metal’s grain structure for maximum strength.
Best for: Parts that need maximum strength, simple to moderate shapes, medium to large batches (100-10,000 parts), and steel or stainless steel.
Pros and Cons:
| Pros | Cons |
|---|---|
| 20-30% stronger than cast parts | No complex shapes |
| Low material waste | High tooling costs |
| Excellent fatigue resistance | Rough surface needs finishing |
| Good for high-stress applications | Limited to forgeable alloys |
Real-World Case: A construction equipment maker needed 5,000 excavator bucket teeth. These parts take enormous impact and wear. Forged steel teeth lasted 3x longer than cast iron ones in field testing. The extra $2 per part cost paid for itself in reduced replacement frequency.
Common Uses: Wrenches, hammer heads, connecting rods, crankshafts, structural components.
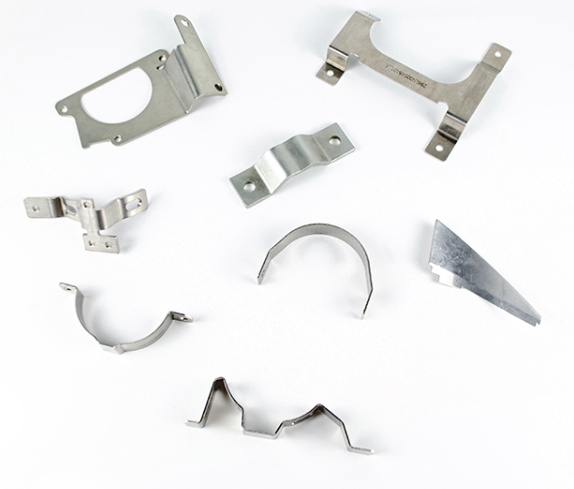
Sheet Metal Fabrication (Best for Flat, High-Volume Parts)
How it works: Flat metal sheets cut to shape using laser, plasma, or punch press, then bend using press brakes. Stamping uses dies to cut and form parts in one quick operation for mass production.
Best for: Flat or formed parts like enclosures and brackets, very large batches (10,000+ parts), and aluminum or steel.
Pros and Cons:
| Pros | Cons |
|---|---|
| Fastest for large batches | Only for flat/bent shapes |
| Very low per-part cost | Limited thickness |
| Lightweight results | Tooling costs for stamping |
| Good for enclosures | Springback in bending |
Real-World Case: A server manufacturer needed 100,000 rack-mount brackets for data center equipment. The parts were simple L-shapes with mounting holes. Stamping produced them at $0.35 each, versus $2.50 each for laser cutting. The 3-week tooling investment paid back in the first month of production.
Common Uses: Enclosures, brackets, panels, chassis components, electrical boxes.
How Do You Compare These Processes Side by Side?
Here’s a direct comparison to help you choose:
| Process | Complexity | Tolerance | Batch Size | Material Range | Cost Per Part (low volume) | Cost Per Part (high volume) |
|---|---|---|---|---|---|---|
| CNC Machining | Moderate | Very high | Any | All metals | Medium | Medium |
| Metal 3D Printing | Very high | Medium | Low only | Limited | High | Very high |
| Sand Casting | Low | Low | High only | Wide | Not suitable | Low |
| Investment Casting | Moderate | Medium | Medium-high | Wide | High | Medium |
| Die Casting | Moderate | Medium | Very high | Limited | Not suitable | Very low |
| Extrusion | Low | Low | High | Limited | Not suitable | Very low |
| Metal Injection Molding | High | Medium | Very high | Limited | Not suitable | Very low |
| Forging | Low | Medium | Medium-high | Limited | Not suitable | Medium |
| Sheet Metal | Low | Medium | High | Wide | Medium | Very low |
Cost Comparison for a Standard Aluminum Part
Let’s compare costs for a simple aluminum bracket (100mm x 50mm x 5mm with 4 holes):
| Process | Cost for 10 Parts | Cost for 1,000 Parts | Cost for 10,000 Parts |
|---|---|---|---|
| CNC Machining | $150 | $5,000 | $30,000 |
| Metal 3D Printing | $200 | $15,000 | Not suitable |
| Sand Casting | Not suitable | $3,000 | $15,000 |
| Die Casting | Not suitable | $8,000 | $12,000 |
| Extrusion | $50 + post-processing | $1,000 + post | $8,000 + post |
| Sheet Metal | $300 (laser cut) | $4,000 | $7,000 (stamping) |
Key Insight: For 10 parts, CNC machining is cheapest. For 1,000 parts, extrusion or sand casting wins if your design allows. For 10,000 parts, stamping or die casting gives the lowest cost.
What Real Projects Teach Us About Process Selection
Case Study 1: The Impossible Geometry
The Problem: A aerospace company needed a fuel nozzle with internal cooling channels. The channels had to follow complex curves impossible to drill.
The Solution: Metal 3D printing created the part as a single piece with internal channels designed into the CAD model.
The Result: The part worked perfectly, weighed 25% less than the previous design, and consolidated 8 separate parts into one. No other process could make this part.
Case Study 2: The Cost-Sensitive Consumer Product
The Problem: A electronics startup needed 50,000 aluminum cases for a new tablet. Budget was tight, and they needed consistent quality.
The Solution: Die casting produced the cases with smooth surfaces ready for painting. The $40,000 tooling cost seemed high but spread over 50,000 parts gave $0.80 per part—far below CNC machining at $4 each.
The Result: The product launched on time and on budget, with cases that matched the premium look they wanted.
Case Study 3: The Emergency Repair
The Problem: A factory’s critical machine broke a gear. The original supplier went out of business, and a new gear would take 8 weeks from casting.
The Solution: CNC machining cut a replacement gear from solid steel bar stock in 3 days.
The Result: The factory resumed production in less than a week, saving an estimated $200,000 in lost production. The machined gear actually outlasted the original.
How Do You Choose the Right Process?
Decision Framework
Ask these questions in order:
- What’s your material? If you need titanium, you’re limited to CNC, 3D printing, or MIM. If aluminum works, you have many options.
- How complex is your part? If it has internal cavities or lattices, 3D printing is your only choice. If it’s a simple shape, casting or extrusion may work.
- How many parts do you need? For low volumes, choose CNC or 3D printing. For high volumes, look at casting, stamping, or extrusion.
- What tolerance do you need? Tight tolerances mean CNC machining. Loose tolerances open up casting and forming options.
- What’s your timeline? Need parts tomorrow? CNC or sheet metal from stock material. Can wait 2-3 weeks for tooling? Casting or MIM become possible.
Common Combinations
- Prototype to Production: Start with CNC or 3D printing for prototypes, then transition to casting or stamping for production
- Hybrid Approach: Use extrusion for the basic shape, then CNC machine the details
- Complex Core + Simple Shell: 3D print the complex internal part, machine the simple external housing
Real Case: A medical device company used this hybrid approach for a surgical instrument. They extruded the aluminum handle profile, then CNC machined the grip texture and connection features. This combined the low cost of extrusion with the precision of machining, saving 40% compared to machining from solid.
Conclusion
Learning to customize metal parts effectively is about matching the process to your specific needs. There’s no single “best” method—only the right method for your part’s material, complexity, quantity, and tolerance requirements.
The key takeaways from this guide:
- CNC machining offers the best combination of precision, material choice, and flexibility for most projects, especially prototypes and small batches
- Metal 3D printing unlocks geometries impossible with any other process, ideal for complex, high-value parts
- Casting processes (sand, investment, die) deliver low costs for large production runs
- Extrusion gives the lowest cost for parts with constant cross-sections
- Metal injection molding excels at tiny, detailed parts in high volumes
- Forging provides maximum strength for load-bearing components
- Sheet metal fabrication is fastest and cheapest for flat or formed parts
Remember that you’re not limited to one process. Many successful projects combine multiple methods—extrude the basic shape, machine the critical features, and stamp the mounting brackets. Work with an experienced manufacturing partner who can guide you through these decisions and help you avoid costly mistakes.
Whether you’re building a one-off prototype or scaling to mass production, understanding these processes puts you in control. You’ll get parts that fit, function, and cost what you expect—the first time.
Frequently Asked Questions
Q: What’s the cheapest way to customize metal parts for small batches (under 100 parts)?
A: CNC machining is almost always cheapest for small batches. Setup costs are moderate ($50-200), and you avoid the high tooling costs of casting or stamping. For very simple parts, sheet metal laser cutting can be even cheaper.
Q: Can I customize titanium parts with any process?
A: No—titanium’s high melting point and reactivity limit your options. CNC machining works well for precision titanium parts. Metal 3D printing (SLM/DMLS) works for complex geometries. Metal injection molding works for small, detailed titanium parts. Die casting and extrusion don’t work with titanium.
Q: How long does it take to get custom metal parts made?
A: Timelines vary by process:
- CNC machining: 3-7 days for small batches
- Metal 3D printing: 2-5 days
- Sheet metal: 3-7 days
- Extrusion: 5-10 days plus post-processing
- Investment casting: 2-4 weeks including tooling
- Die casting: 3-6 weeks including tooling
- Metal injection molding: 4-8 weeks including tooling
Q: What tolerance can I expect from different processes?
A: Typical achievable tolerances:
- CNC machining: ±0.025mm to ±0.05mm
- Metal 3D printing: ±0.1mm to ±0.2mm
- Investment casting: ±0.13mm to ±0.25mm
- Die casting: ±0.1mm to ±0.25mm
- Sand casting: ±0.5mm to ±1.0mm
- Extrusion: ±0.2mm to ±0.5mm
- Sheet metal: ±0.1mm to ±0.5mm
Q: Do I need to finish custom metal parts after manufacturing?
A: Most parts need some finishing. As-machined CNC parts may have visible tool marks. Cast parts have rough surfaces. 3D printed parts have a matte, slightly rough finish. Common finishing options include:
- Sanding and polishing for smooth surfaces
- Painting for color and protection
- Anodizing for aluminum (color + hardness)
- Plating for appearance or conductivity
- Heat treatment for strength
- Powder coating for durability
Q: How do I choose between aluminum and stainless steel?
A: Consider these factors:
- Weight: Aluminum is 1/3 the weight of steel
- Strength: Steel is 2-3x stronger than most aluminum alloys
- Corrosion: Both resist corrosion, but stainless is better for harsh environments
- Cost: Aluminum costs less per part
- Appearance: Stainless looks premium, aluminum can be anodized in colors
- Thermal: Aluminum conducts heat 3x better than steel
- Magnetic: Steel is magnetic, aluminum isn’t
Q: What’s the difference between investment casting and die casting?
A: Investment casting uses a disposable ceramic mold made from a wax pattern. It works for any metal and produces excellent surface finish, but per-part cost is higher. Die casting uses reusable steel molds and high pressure. It’s faster and cheaper for high volumes, but only works with low-melting metals like aluminum and zinc.
Q: Can I modify a design after production starts?
A: Yes, but the cost depends on the process. With CNC machining, design changes are easy and inexpensive. With casting or stamping, design changes require new tooling, which can cost thousands. Always prototype with a flexible process before committing to high-volume tooling.
Discuss Your Projects with Yigu Rapid Prototyping
At Yigu Rapid Prototyping, we’ve helped hundreds of clients customize metal parts for every application—from aerospace components to medical devices to consumer products. Our approach combines technical expertise with practical, cost-conscious advice:
- CNC machining for precision parts with tight tolerances, from prototypes to production quantities
- Metal 3D printing for complex geometries and rapid prototypes in titanium, stainless, and aluminum
- Sheet metal fabrication for enclosures, brackets, and formed parts
- Casting and forging partnerships for high-volume production
- Post-processing services including heat treatment, surface finishing, and coating
- Design for manufacturing review to optimize your parts for cost and quality
We start every project with a consultation to understand your specific needs—material requirements, quantity, timeline, and budget. Then we recommend the best process or combination of processes to get you the parts you need, when you need them.
Whether you’re developing a new product, scaling to production, or need emergency replacement parts, we’re ready to help. Contact Yigu Rapid Prototyping to discuss your custom metal part project. Send us your CAD files or drawings for a free quote and feasibility analysis within 24 hours. Let’s turn your design into reality—with the right process, the right material, and the right price.