Introduction
Turning a digital design into a real, working part is the core challenge for every engineer, designer, and inventor. You have an idea. You have a CAD file. But the path from that file to a finished part in your hand can feel complex and uncertain. This guide walks you through every step of custom parts manufacturing, from the first sketch to final delivery. You will learn how to design for manufacturability, choose the right materials and processes, select a reliable partner, and ensure quality at every stage. Our goal is to give you the practical knowledge to get your custom parts made correctly, on time, and within budget.
Defining Custom Manufacturing
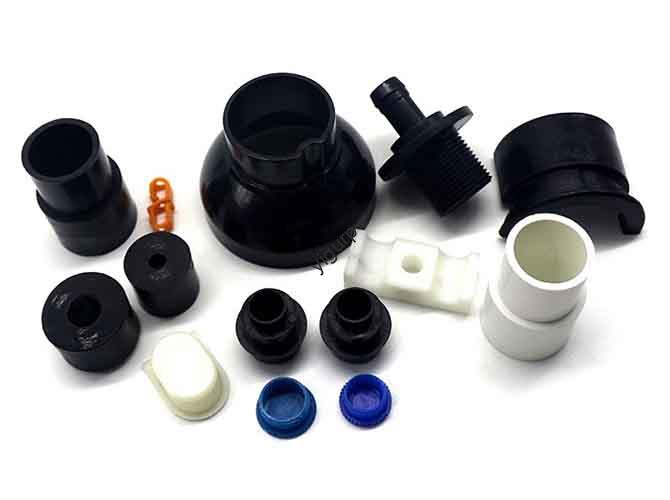
Custom parts manufacturing creates components based on your unique specifications. Unlike mass production, which makes millions of identical standard items, custom manufacturing is flexible and on-demand. It starts with your design—usually a CAD model or technical drawing—and produces a part made exactly for your application.
Think of it as the difference between buying a suit off the rack and having one custom-made. The custom suit fits your exact measurements perfectly. Your custom part fits your exact assembly perfectly.
On-Demand and to Specification
The process adapts to your needs. Whether you need a single prototype for testing fit and function, or a batch of a few thousand units for a pilot production run, the principle remains the same. The manufacturer works from your design files to create components that meet your specified measurements, materials, and precision requirements.
This direct translation from digital blueprint to physical object enables rapid innovation across countless industries.
Key Customization Benefits
Choosing custom parts over standard components offers significant advantages.
Perfect fit and function: Parts are designed specifically for your assembly. No compromises. No adapting standard parts to work in applications they were not meant for.
Design freedom and innovation: You are not limited by catalog listings. You can create unique shapes to solve engineering challenges and develop new products.
Material optimization: You select the ideal material based on strength, weight, heat resistance, or cost. You are not restricted to what is commonly available.
Prototyping and iteration: Custom manufacturing is perfect for single units or small batches. Test, validate, and improve designs before committing to expensive production tooling.
Intellectual property control: By developing a unique part, you maintain ownership and create a competitive advantage that standard parts cannot provide.
The Design Engineering Process
A successful manufactured part begins long before any machine starts cutting. The design and engineering phase is the most critical stage. Careful planning here saves significant time and money later.
Step 1: Conceptualization
This is the idea phase. Start by clearly defining the part’s purpose. What problem does it solve? What function must it perform?
Document all requirements:
- Operating environment—temperature, moisture, chemicals
- Loads it must bear—static, dynamic, impact
- Interactions with other components in the assembly
Simple hand sketches and detailed notes are invaluable at this stage. They translate abstract thoughts into tangible concepts and serve as the foundation for formal design work. Do not underestimate the power of clearly explaining the part’s mission before moving forward.
Step 2: CAD Modeling
Transform your concept into a precise digital model using Computer-Aided Design software. This 2D or 3D file becomes the single source of truth for your part.
Using industry-standard software like SolidWorks, Fusion 360, or CATIA, you define every feature, dimension, and surface with mathematical precision. A detailed CAD model is the universal language of manufacturing. It contains all the information a manufacturer needs to understand your design intent and program the machinery to produce it. Without a clean, well-defined CAD model, manufacturing cannot begin.
Step 3: DFM Analysis
Design for Manufacturability is the practice of designing parts to be easier, faster, and more cost-effective to produce. This critical review step analyzes your design from a manufacturer’s perspective.
A good manufacturing partner provides DFM feedback to help optimize your design. This is where you achieve the most significant savings in cost and lead time.
Key DFM considerations:
- Simplify geometry: Reduce machine time and complexity where possible.
- Use standard tool sizes: Avoid the cost of custom tooling.
- Specify realistic tolerances: Overly tight tolerances dramatically increase cost. Only tighten where function requires it.
- Consider material properties: How will your material behave during machining or molding?
Step 4: Prototyping
A prototype is an early sample used to test form, fit, and function. With technologies like 3D printing, creating cost-effective prototypes is easier than ever.
This step lets you hold a physical version of your part, test it in its real-world application, and gather crucial feedback. You enter a repeating cycle: test the prototype, identify improvements, refine the CAD model, and repeat if needed.
From experience, investing in one or two prototype rounds can prevent thousands of dollars in tooling changes and production errors later. Do not skip this step.
Guide to Material Selection
Choosing the right material is as important as the design itself. Material determines strength, weight, durability, and cost. With thousands of options available, a systematic approach helps you narrow the field to the best candidate for your application.
Material Choice Factors
Before diving into specific materials, rank these factors in order of importance for your project.
Mechanical properties: How strong, hard, or flexible must the part be? Consider tensile strength, impact resistance, and hardness.
Thermal properties: Will the part face extreme temperatures? Consider heat resistance, melting point, and thermal conductivity.
Weight: Is light weight critical, as in aerospace or portable devices? Density is the key property.
Cost: Consider both raw material cost and the cost of machining or processing that material. Some materials are much more difficult to work with.
Corrosion and chemical resistance: Will the part face moisture, chemicals, or corrosive agents?
Manufacturing process compatibility: Is the material suitable for your chosen method—machinable, injectable, printable?
Material Comparison
This table compares common materials used in custom parts manufacturing. Material grades like “6061” for aluminum or “316” for stainless steel refer to specific alloys with defined properties. Understanding grades ensures you get the exact performance you expect.
| Category | Material | Key Characteristics | Best Applications |
|---|---|---|---|
| Metals | Aluminum 6061 | Lightweight, good strength-to-weight ratio, corrosion resistant, excellent machinability | Aerospace components, consumer electronics, fixtures, automotive parts |
| Metals | Stainless Steel 304/316 | High strength, excellent corrosion resistance, high-temperature resistance. 316 offers superior corrosion resistance | Medical devices, food-grade equipment, marine hardware, chemical processing |
| Plastics | ABS | Good impact resistance, toughness, rigidity. Low cost, easy to process | Electronics enclosures, prototypes, consumer products, automotive trim |
| Plastics | Nylon (PA) | Excellent wear resistance, high strength, good flexibility. Low-friction properties | Gears, bearings, bushings, high-wear components |
| Plastics | PEEK | Very high-temperature performance, excellent chemical resistance, high strength, biocompatible | Aerospace, medical implants, demanding industrial applications |
This table provides a starting point. Always consult with a manufacturing expert to validate the best choice for your unique application.
Key Manufacturing Techniques
With finalized design and material, choose the right manufacturing process. The method depends on geometry, material, quantity, and cost targets. Each technique has distinct strengths.
Subtractive: CNC Machining
CNC machining removes material from a solid block to create a part. A computer program derived from your CAD file controls cutting tools.
CNC milling: A rotating tool cuts a stationary workpiece.
CNC turning: The workpiece rotates against a stationary cutting tool.
CNC machining produces parts with extremely high precision and tight tolerances from a wide range of materials, especially metals like aluminum and steel.
Best for: High-precision parts, complex geometries, metal components, low-to-medium volume production.
Additive: 3D Printing
3D printing builds parts layer by layer from a digital model. This additive approach excels at creating complex or organic shapes impossible to machine.
FDM: Fused deposition modeling for cost-effective plastic prototypes.
SLA: Stereolithography for fine details and smooth surface finish.
SLS: Selective laser sintering for strong, functional nylon parts.
Best for: Rapid prototyping, highly complex designs, custom jigs and fixtures, low-volume custom parts.
Sheet Metal Fabrication
Sheet metal fabrication cuts, bends, and assembles parts from flat metal sheets. The process starts with cutting a flat pattern, often with a laser. A press brake then bends the part into its final 3D shape. Multiple pieces can be joined through welding or fasteners.
Best for: Enclosures, brackets, chassis, panels, structural components.
Injection Molding
Injection molding produces high volumes of parts by injecting molten material into a precisely machined mold. The material cools and solidifies in the shape of the mold cavity.
While per-part cost is extremely low at high volumes, injection molding requires significant upfront investment for the hardened steel mold. This high initial cost makes it unsuitable for prototyping or low-volume production.
Best for: High-volume production of plastic parts where lowest possible per-part cost is the goal.
Quality Control Protocols
A part made quickly and cheaply is useless if it does not work. Quality control ensures every part shipped meets the exact specifications in your design.
Why QC Is Non-Negotiable
Effective quality control is planned before production begins. By defining critical dimensions, tolerances, and inspection criteria upfront, you and your manufacturer establish objective standards for acceptable parts.
This prevents disputes, ensures functional integrity, and avoids the immense costs of rework, recalls, or field failures. QC is the final gatekeeper between production and delivery.
Common Inspection Methods
Manufacturers use various tools to verify conformance. Part complexity and tolerance tightness determine which methods are necessary.
Calipers and micrometers: Handheld precision instruments for quick measurement of basic dimensions like length, diameter, and thickness.
Coordinate Measuring Machine (CMM) : The gold standard for precision inspection. A probe measures part geometry in 3D space, comparing hundreds of points against the original CAD model to generate detailed inspection reports.
Visual inspection: Trained inspectors examine parts for cosmetic issues like surface defects, burrs, or color inconsistencies.
Material certification: Verification of documentation from the material supplier confirming the correct grade and required industry standards.
Essential Quality Documents
Formal documentation provides traceable proof that quality standards have been met.
First Article Inspection (FAI) Report: Comprehensive verification of the first part produced from a new setup. Documents every dimension and feature, confirming the initial part is 100% compliant.
Certificate of Conformance (CoC) : Document issued by the manufacturer formally stating the batch of parts meets all required specifications and standards.
Choosing a Manufacturer
Selecting the right manufacturing partner directly impacts quality, cost, and time to market. A great partner is more than a vendor—they are an extension of your team.
Beyond Price Alone
Choosing the supplier with the lowest quote is often short-sighted. The cheapest option can become the most expensive if it results in poor quality, missed deadlines, or communication breakdowns.
A truly great partner is defined by technical expertise, commitment to quality, and reliability. Prioritizing clear communication and proven track record over a few percentage points on price almost always yields better outcomes.
Manufacturer Vetting Checklist
Use this checklist to evaluate potential partners. Thorough vetting reduces risk and sets the foundation for successful long-term relationships.
Technical capabilities and expertise:
- Do they have demonstrable experience with your chosen material and process?
- Can they provide examples or case studies of similar parts they have produced?
- Do they proactively offer DFM feedback? A partner who questions and improves your design is invaluable.
Quality systems:
- Are they ISO 9001 certified or operating under a comparable quality management system?
- What inspection equipment do they have on-site? Do they have a CMM for high-precision parts?
- Will they provide FAI reports and Certificates of Conformance upon request?
Communication and support:
- How responsive are they to inquiries? Do you receive clear, timely answers?
- Do you have a dedicated engineer or project manager as a single point of contact?
A partner who asks clarifying questions about your design is far better than one who blindly accepts it. It shows they are thinking critically about your project’s success.
Logistics and lead time:
- Are quoted lead times realistic and reliable? Ask about on-time delivery rates.
- Where do they manufacture and ship from? Understand total landed cost including shipping, taxes, and duties.
Conclusion
The journey from concept to custom-made part is a systematic process built on critical decisions. Start with a solid, well-documented design and thoughtful DFM analysis. Choose materials that balance performance with cost. Select manufacturing techniques suited to your part’s geometry and volume. Ensure quality through rigorous inspection and documentation. Partner with a reliable manufacturer who brings expertise and clear communication. By following this strategic approach, you can navigate custom parts manufacturing with confidence and successfully bring your ideas to life.
Frequently Asked Questions
What is the difference between custom manufacturing and mass production?
Custom manufacturing creates parts based on unique specifications, typically in small to medium quantities. Mass production makes millions of identical standard items. Custom manufacturing offers flexibility and perfect fit for your application. Mass production offers the lowest per-part cost for high volumes.
How do I know if my design is ready for manufacturing?
Your design is ready when you have a complete CAD model, specified materials and tolerances, and ideally completed a prototype round for validation. A good manufacturing partner will also review your design and provide DFM feedback before production begins.
What information do I need to provide to get a quote?
Provide a complete CAD file in a standard format like STEP or IGES. Include a drawing with critical dimensions, tolerances, and surface finish requirements. Specify material grade and quantity. The more complete your information, the more accurate your quote will be.
How much do custom parts typically cost?
Cost varies widely based on material, complexity, quantity, and process. Simple plastic parts might cost 50 to 500 CNY each. Complex machined metal parts can range from 500 to 5,000 CNY or more. Prototype quantities cost more per part than production runs. Always request quotes from multiple suppliers for comparison.
How long does custom parts manufacturing take?
Lead times depend on complexity and quantity. Simple 3D-printed parts might ship in 3 to 5 days. CNC-machined parts typically take 7 to 14 days. Parts requiring custom molds can take 4 to 8 weeks including tooling production. Always confirm lead times with your manufacturer before ordering.
What is the most common mistake in custom parts manufacturing?
The most common mistake is skipping the prototype stage. Teams rush to production without validating fit and function, only to discover issues after spending thousands on tooling. A simple prototype round can catch these problems early and save significant cost and time.
Discuss Your Projects with Yigu Rapid Prototyping
At Yigu Technology, we help engineers, designers, and inventors turn digital designs into physical parts. Our capabilities span CNC machining, 3D printing, sheet metal fabrication, and injection molding. We provide DFM feedback to optimize your designs, rigorous quality control including CMM inspection, and clear communication throughout every project. Located in Shenzhen’s manufacturing hub, we combine technical expertise with competitive pricing and reliable lead times. If you have a custom part ready to manufacture, or if you need guidance at any stage of development, reach out to us. Let’s discuss how we can bring your design to life.