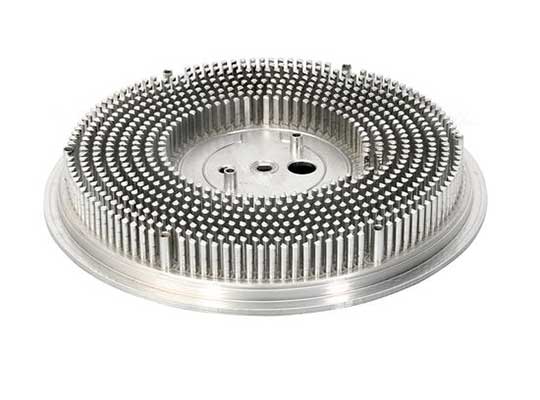
In the modern manufacturing landscape, the ability to turn a highly intricate design into a physical reality is a competitive necessity. The CNC prototype machining process for complex parts has emerged as a game-changer, solving the long-standing challenge of creating accurate, functional prototypes that traditional methods simply cannot handle.
Whether you are developing turbine blades for aerospace, intricate housings for medical devices, or multi-geared transmission parts for the automotive sector, this process ensures your prototype matches every design specification. By leveraging computer numerical control, engineers can save time, reduce material waste, and identify design flaws before committing to expensive mass production. This guide will walk you through the entire lifecycle of a complex prototype, providing professional insights and real-world data to help you optimize your results.
1. Why Is Pre-Processing the Core of Success?
The success of the CNC prototype machining process for complex parts starts long before the machine power button is pressed. The “brain work” done during the CAD and CAM stages sets the ceiling for the final part’s quality.
1.1 CAD Design: Detail Every Complex Feature
The first step is creating a 3D model using CAD software like SolidWorks or Fusion 360. For complex parts involving internal cavities, non-linear curves, or multi-layered structures, you must leave nothing to chance.
- Mark Critical Dimensions: For example, a medical implant might require a 0.5mm tolerance for an internal fluid channel.
- Define Relationships: Specify exactly how a curved bracket must interface with a flat mounting plate.
- Validation Tools: Use built-in software checks to find “un-machinable” features, such as sharp internal corners that a round cutting tool cannot reach.
Real-World Example: An aerospace startup designing a turbine blade used CAD validation to find a hidden 0.3mm mismatch in a curved airfoil. Fixing this digitally saved them from a failed airflow test later, which would have delayed their project by three weeks.
1.2 CAM Programming: Translating Design to Code
CAM software converts your 3D model into G-code, the language the CNC machine speaks. For complex parts, the programmer must be an artist of efficiency.
- Path Optimization: This prevents the tool from hitting walls or fixtures.
- Simulation: Running a digital “dry run” catches 70% of potential errors before they happen.
| CAM Programming Step | Purpose | Error Reduction Rate |
| Path Optimization | Avoid collisions; reduce cycle time | 65% |
| Parameter Setting | Protect tool life and surface finish | 50% |
| Process Simulation | Catch design-to-machining mismatches | 70% |
2. How to Prepare Materials and Tools?
Even a perfect program will fail if the physical setup is flawed. For the CNC prototype machining process for complex parts, you must choose the right “ingredients” and ensure the machine is in peak condition.
2.1 Material Selection: Matching Function to Form
Complex prototypes require materials that balance how easily they can be cut (machinability) with the strength required for testing.
| Material Type | Key Properties | Ideal Complex Part Use | Machinability (1–10) |
| Aluminum 6061 | Light, rust-resistant | Electronic enclosures | 9 |
| Stainless Steel 304 | Durable, sterile | Medical tools | 6 |
| Titanium Alloy | High heat resistance | Aerospace engine parts | 4 |
| ABS Plastic | Low cost, easy shape | Consumer casings | 10 |
2.2 Tool Selection: The Right Edge for the Job
Intricate shapes need specialized “knives.” For example, a ball-nose end mill is essential for smooth, curved surfaces, while micro-drills are needed for sensor holes as small as 0.5mm.
- Pro Tip: Use TiN-coated tools (Titanium Nitride) for harder metals. These coatings reduce friction and help the tool last twice as long, cutting your tool change costs by half.
2.3 Machine Debugging: The Final Check
Before starting, a technician must verify tool alignment. A tiny misalignment of 0.1mm might not matter on a simple block, but it can ruin the interlocking teeth of a complex gear prototype. Always verify your fixture’s stability with a torque wrench to ensure the part doesn’t shift mid-cut.
3. What Happens During Core Machining?
This is where the actual cutting happens. To maintain precision in complex parts, a “divide and conquer” strategy is best.
3.1 Machining Strategy: Roughing vs. Finishing
- Roughing: The goal is to remove 90% of excess material quickly. We use a larger depth of cut (up to 3mm for aluminum) but leave a small “skin” or allowance of 0.2mm.
- Finishing: This is the slow, precise stage. We use tiny cuts (0.05mm) to reach the final dimensions and achieve a smooth surface finish.
3.2 Cutting Parameters: Finding the “Sweet Spot”
Parameters like spindle speed and feed rate must be tailored to the material to prevent heat buildup and vibration.
| Material | Cutting Speed (m/min) | Feed Rate (mm/rev) | Roughing Depth (mm) |
| Aluminum 6061 | 300 – 500 | 0.1 – 0.3 | 1.0 – 3.0 |
| Stainless 304 | 100 – 200 | 0.05 – 0.15 | 0.5 – 1.5 |
| Titanium | 50 – 100 | 0.02 – 0.10 | 0.2 – 0.8 |
4. How to Perfect the Prototype Post-Cut?
The CNC prototype machining process for complex parts doesn’t stop when the spindle stops. Post-processing turns a “raw” machined part into a professional prototype.
4.1 Cleaning and Deburring
First, we use isopropyl alcohol to remove oily coolant. Next, we perform deburring. Complex parts often have sharp edges in hard-to-reach crevices. Removing these is critical for parts that will be handled by users, such as medical tool grips.
4.2 Error Control and Fixing
If a hole is slightly too small due to tool wear, don’t scrap the part. A skilled machinist can use a reamer to widen the hole by 0.05mm manually. For thin-walled aluminum parts that might warp slightly after machining, a heat press can often straighten them without the need for a full re-machine.
Success Story: A consumer electronics brand had a curved phone case prototype that warped by 0.2mm. Instead of starting over, the team used a heat press at 120°C for 5 minutes. This fixed the alignment, allowing the internal electronics to fit perfectly.
5. Which Innovations Are Driving Efficiency?
New technology is making the machining of complex parts faster and more reliable:
- 5-Axis Machining: These machines can move the part and the tool in five different directions at once. This allows us to machine a complex shape in one setup, eliminating the errors that happen when a human has to move the part by hand.
- High-Speed Machining: Spindles running at 20,000+ RPM allow us to cut aluminum prototypes 30% faster than standard machines.
- Digital Twins: Creating a virtual copy of the machine allows us to predict maintenance needs before a breakdown occurs mid-prototype.
Yigu Technology’s View on Complex Prototypes
At Yigu Technology, we have spent over 12 years refining the CNC prototype machining process for complex parts. We believe that precision is not just about the machine; it is about the preparation. By prioritizing CAD/CAM optimization, we typically reduce our clients’ project timelines by 25%.
Our team treats every complex part as a unique challenge. We utilize multi-axis machining for intricate aerospace components and offer specialized surface treatments like anodizing or medical-grade polishing. For us, this process is about more than just cutting metal; it is about helping you turn a complex vision into a viable product as quickly as possible.
FAQ
How long does the CNC prototype machining process for complex parts take? It varies by complexity. A small aluminum sensor housing might take 4 to 6 hours. A large, high-strength titanium engine component can take 12 to 24 hours.
What is the most common mistake made during this process? The biggest error is skipping the CAM simulation. Without a virtual test, you risk tool collisions that can cause thousands of dollars in damage to both the tool and the machine.
Can I use this process for a batch of 50 parts? Absolutely. While we call it “prototyping,” the CNC process is highly scalable. You can move from 1 unit to 100 units easily, which is ideal for “bridge production” before you invest in expensive molds.
Which material is easiest for complex prototypes? Aluminum 6061 is the gold standard. It is easy to cut, holds tight tolerances, and can be finished beautifully.
Why are 5-axis machines better for complex parts? They allow the tool to reach the “back” and “sides” of a part without the operator having to unclamp it. This keeps the datum points perfectly aligned, leading to much higher accuracy.
Discuss Your Projects with Yigu Rapid Prototyping
Do you have a challenging design that requires extreme precision? At Yigu Rapid Prototyping, we specialize in the CNC prototype machining process for complex parts. Our expert engineers are ready to review your CAD files and suggest the most efficient machining paths to bring your project to life.
Would you like me to perform a free DFM (Design for Manufacturing) analysis on your complex part to see if we can optimize its cost and lead time?