If you are a product engineer working on optical parts, glass is a top choice. It offers great transparency and durability. Yet, turning glass into high-quality models is a tough task. Mastering the CNC processing glass prototype model process is vital to success. It helps you avoid breakage and meet tight optical standards. This guide walks you through every step to make your workflow smoother.
What Is CNC Glass Prototyping?
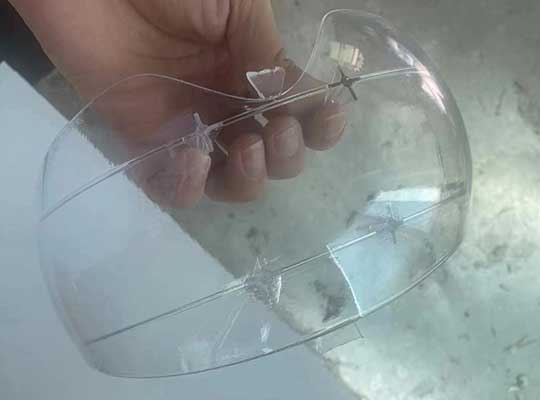
The CNC processing glass prototype model process uses computer-guided machines to shape glass. This method ensures consistent precision that manual work cannot match. Glass is hard, with a Mohs hardness of 5.5 to 6.5. It is also very brittle, which makes it prone to cracking.
This technology is perfect for making parts like:
- Automotive lighting: Light guide tubes and lamp masks.
- Optical lenses: Precision parts for cameras or medical tools.
- Electronic insulators: Thin glass sheets for high-heat devices.
One of our electronics clients once used manual grinding for a lens. They wasted 30% of their material. When they switched to CNC machining, waste dropped to just 5%. They also cut their production time in half.
What Are the Key Machining Stages?
The process involves two main stages of cutting. Each stage has a specific goal for the final part.
How Does Roughing Remove Bulk Glass?
Roughing focuses on speed. You strip away the raw glass to reach a basic shape. You must use diamond-coated end mills because of the material’s hardness. We keep the depth of cut between 0.5mm and 2mm. Going deeper than 3mm increases the risk of a total break. The feed rate stays slow, around 20 to 40 mm/min, to prevent cracks.
How Does Finishing Achieve Optical Quality?
Finishing refines the part for transparency and exact dimensions. We use polished diamond burrs for a smooth surface. The depth of cut is tiny, usually 0.05mm to 0.1mm. A slow feed rate of 5 to 15 mm/min ensures a high-quality finish.
| Stage | Tool Type | Cut Depth | Feed Rate | Goal |
| Roughing | Diamond end mill | 0.5 – 2mm | 20 – 40 mm/min | Remove bulk material |
| Finishing | Polished diamond burr | 0.05 – 0.1mm | 5 – 15 mm/min | High precision & clarity |
How to Improve Transparency After CNC?
CNC cutting alone is not enough for optical clarity. You need post-processing to remove surface flaws.
Polishing is the most important step. We use cerium oxide polishing paste with a 3 to 5 μm particle size. One client needed 90% light transmittance for an auto lamp mask. After two hours of polishing, their part hit 92% transmittance. This was a huge jump from the 75% they had after machining.
After polishing, cleaning is next. Use a lint-free cloth and isopropyl alcohol. This removes any paste that could ruin optical tests. Finally, use a laser interferometer to check the surface. This tool finds tiny errors in curved lenses.
How to Stop Glass From Breaking?
Glass is brittle, making it the biggest challenge in the shop. You can lower your defect rate by following three rules.
First, pick the right tools. Never use high-speed steel (HSS). These tools will chip the glass. Diamond tools are a must. We saw a 40% drop in breakage after making this switch.
Second, control the room. Work in a dust-free room (ISO 8 or better). Small dust grains can scratch the surface during the cut. This leads to cracks that ruin the part.
Third, use the right fixation. Vacuum chucks with soft pads are best. They hold the glass without high pressure. Hard clamps often crack thin glass sheets.
Yigu Technology’s View on Glass Prototyping
At Yigu Technology, we have helped over 300 clients with glass models. We believe the hardest part is balancing speed and yield. Many teams rush the first steps and cause errors later.
We solved this with custom CNC templates for different glass types. These templates pre-set the feed rates for soda-lime or quartz glass. This cuts lead times by 25% and keeps breakage below 4%. We also suggest ultrasonic polishing for the best optical results.
Conclusion
The CNC processing glass prototype model process is a science of precision. By using the right stages and post-processing, you can achieve optical-grade quality. Focus on diamond tools and a clean environment to stop cracks. With these steps, your glass prototypes will meet every standard.
FAQ
What is the typical lead time for a CNC glass prototype?
Simple parts like flat insulators take 5 to 7 days. Complex parts like curved lenses take 10 to 14 days. This includes the time needed for inspection.
Can CNC process all types of glass for prototypes?
Yes. We work with borosilicate, soda-lime, and quartz. Borosilicate is heat-resistant but needs a slower feed rate.
How much does a CNC glass prototype cost?
Price depends on complexity. A small flat part may cost $80 to $120. A complex lens with curved surfaces can cost $300 to $500.
Discuss Your Projects with Yigu Rapid Prototyping
Are you ready to build your next optical prototype? Our engineers are experts in the CNC processing glass prototype model process. We offer the precision and clarity your project needs. Would you like me to provide a custom quote for your specific glass material and dimensions?