PVC, or Polyvinyl Chloride, is a true workhorse in the modern world. You see it everywhere—from the vibrant 3D letters on a storefront to the intricate waterproof panels in a luxury hotel bathroom. It is versatile, lightweight, and surprisingly durable. However, achieving professional results with CNC machining PVC is not as simple as pressing a button.
Many workshops struggle with a few common “pain points.” If your settings are off, the material can melt, the edges can turn out “fuzzy,” or your tools can dull in record time. This guide is designed to solve those issues. Whether you are a small shop owner or an industrial engineer, this comprehensive look at CNC machining PVC will help you boost your efficiency and precision.
What Makes PVC Unique for CNC Machining?
CNC machining offers a massive leap in quality over traditional manual cutting. While a hand-held router might leave uneven edges, a CNC machine acts like a high-precision “cookie cutter.” It creates identical, sharp-edged parts every single time.
The Core Benefits of PVC
- High Precision: For most architectural jobs, you can hit tolerances of ±0.1mm. If you are working on high-end industrial parts, you can even push that to ±0.05mm.
- Massive Efficiency: Once you set your program, the machine does the hard work. In a typical workday, a single CNC unit can produce 50 PVC wall panels, whereas a manual worker might only finish 15.
- Complex Geometry: You aren’t limited to straight lines. CNC machines can handle complex 3D structures, such as concave-convex decorative pieces or intricate brand logos.
| Characteristic | User Advantage | Real-World Impact |
| Precision | Sharp, crisp lines | Perfect text for advertising signage with no blurring. |
| Automation | 60% less manual labor | Lower production costs and 24/7 operation capability. |
| Versatility | Handles 2D and 3D shapes | Custom ceiling molds that traditional tools can’t touch. |
How Do You Navigate the PVC Machining Workflow?
Success in CNC machining PVC depends on a structured process. According to industry data, nearly 70% of failures—like melted edges or broken bits—happen because a step was skipped or the settings were wrong.
1. Programming: The Digital Roadmap
Before the machine moves, you need a plan. Use CAD software like AutoCAD for 2D signs or SolidWorks for 3D parts to create your G-code.
- Optimize for Heat: PVC has a low melting point. Your program should avoid long, continuous cuts in one spot.
- Nesting: Arrange your parts closely on the PVC sheet to reduce material waste.
Case Study: We once worked with an advertising shop that used a “metal-cutting” program on PVC. The tool moved too slowly, the heat built up, and they melted 20 sheets of expensive material. By switching to a PVC-optimized program with faster feed rates, they eliminated the melting and cut their waste by 30%.
2. Tool Selection: Choosing Your “Weapon”
PVC is softer than metal, but it is “gummy.” If your tool is dull, it won’t cut; it will rub. This friction creates heat, and heat is the enemy of PVC.
- High-Speed Steel (HSS): Great for “roughing” or removing large sections of material. It is affordable but needs to be replaced after about 50 to 100 cuts.
- Carbide Tools: These are the gold standard for finishing. They stay sharp for 200 to 300 cuts and leave a much smoother edge.
3. Setting the Parameters: The Secret Sauce
Finding the balance between spindle speed (RPM) and feed rate (how fast the tool moves) is the most important part of the job.
| Parameter | Roughing (Removing Bulk) | Finishing (Smoothing) | Why It Matters |
| Cutting Speed | 1,500 – 2,500 RPM | 3,000 – 4,000 RPM | High RPM helps avoid “gumming.” |
| Feed Rate | 100 – 200 mm/min | 50 – 100 mm/min | Faster feeds prevent heat buildup. |
| Cutting Depth | 2 – 5 mm per pass | 0.5 – 1 mm per pass | Shallow passes give better control. |
Where Does CNC Machined PVC Shine?
Because it is waterproof and easy to shape, PVC is the go-to material for three major industries.
1. Advertising and Signage
This is the most common use for CNC machining PVC. It is used for light boxes, 3D letters, and promotional displays. Since PVC is lightweight, these signs are easy to hang, but they still look high-end.
- Example: A national retail chain recently used CNC-machined 3D letters for 50 storefronts. Because the program was identical, every single store looked exactly the same, maintaining perfect brand consistency.
2. Architectural Decoration
PVC is perfect for wet areas like bathrooms and kitchens because it is 100% waterproof.
- Luxury Hotels: About 60% of luxury hotels now use CNC-machined PVC ceiling panels. They can be carved with beautiful floral designs, but unlike wood, they won’t rot or warp over time.
3. Industrial Manufacturing
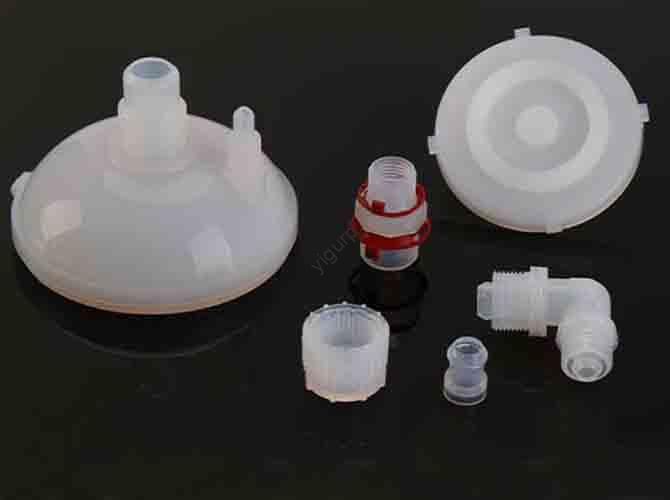
Engineers use PVC for insulation sleeves and chemical storage components. Its chemical stability is a massive plus in harsh industrial environments. CNC machining ensures these parts have consistent dimensions, which is critical for safety.
Critical Precautions to Avoid Costly Mistakes
Even with the best program, small errors can ruin a part. Follow these three rules to keep your production running smoothly.
1. Fix Your Material Properly
PVC sheets are light. If they shift even a millimeter during a cut, the part is ruined.
- Clamps: For thick sheets (over 5mm), use metal clamps with rubber pads to prevent scratches.
- Vacuum Tables: For thin sheets (under 3mm), a vacuum table is best. It provides even pressure across the whole surface.
2. Beat the Heat
PVC starts to melt at around 160°C. You must keep the tool cool.
- Water-Based Coolant: This is the best choice because it won’t react chemically with the PVC. It can reduce tool temperature by up to 40%.
- Compressed Air: For smaller jobs, a steady stream of air can blow away hot chips and keep the surface cool.
3. Focus on Safety
PVC dust can be an irritant. Always wear protective glasses and ensure your workspace is well-ventilated. CNC machines can be loud (up to 85 dB), so don’t forget your earplugs.
Yigu Technology’s Perspective
At Yigu Technology, we see CNC machining PVC as one of the most cost-effective ways to create high-quality products. We often see clients struggle with tool wear, but the fix is usually simple: switch to carbide bits and optimize your feed speeds.
We are currently working on AI-driven presets that automatically choose the best settings for different PVC thicknesses. This technology has already helped our partners cut their setup time by 40% and reduce defects by 35%. As the demand for custom architectural and advertising pieces grows, we are committed to making these professional results accessible to every shop.
FAQ: Common PVC Machining Questions
Can I machine very thin PVC sheets (1mm or less)?
Yes, but you must use a vacuum worktable. Without it, the thin sheet will bend or “flutter,” causing the tool to tear the material. Use a small carbide bit (2mm) and keep your cutting depth very shallow (around 0.2mm per pass).
How do I fix a part that has melted edges?
If the damage is minor, you can sand the edges with 400-mesh sandpaper. To prevent it from happening again, increase your cutting speed by about 500 RPM and boost your feed rate. This reduces the time the hot tool is in contact with the plastic.
Is CNC machining more expensive than manual cutting?
For a single, simple cut, manual is cheaper. However, for any batch of 10 or more parts, CNC is actually more affordable. It reduces labor costs and wastes much less material. Most shops find that CNC costs about $2 to $5 per part, compared to $10 for manual labor.
What is the best way to get a “mirror finish” on PVC edges?
The key is a very sharp, single-flute carbide bit. Use a high spindle speed and a relatively slow finish pass (about 50 mm/min). If you need it even shinier, you can use a quick flame-polishing technique or a specialized polishing paste.
Can PVC dust be recycled?
Yes. PVC is a highly recyclable plastic. Many industrial recyclers will take clean CNC chips and dust to turn them into new PVC pipes or flooring materials.
Discuss Your Projects with Yigu Rapid Prototyping
Are you ready to start your next PVC project? At Yigu Rapid Prototyping, we combine years of engineering experience with the latest CNC technology to deliver parts that exceed expectations. Whether you need a 3D sign for a new brand or custom architectural panels, our team is ready to help you optimize for quality and cost.
Would you like me to help you calculate the best feed and speed settings for your specific PVC thickness and tool type?