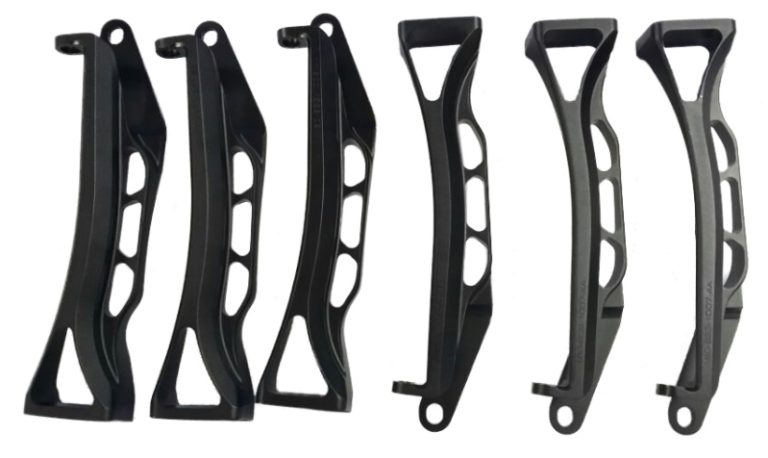
In the fast-paced world of modern manufacturing, CNC machining arc prototypes has become a cornerstone for innovation. From the sleek curves of an automotive wheel arch to the critical tolerances of an aerospace engine bracket, curved geometries define the high-tech products we use every day.
Traditional manual machining often fails when it comes to the fluid, consistent movement needed for a perfect curve. However, Computer Numerical Control (CNC) technology has changed the game. It allows engineers to create ultra-precise, repeatable arcs that fit perfectly every time. Whether you are a product designer refining a new concept or a procurement manager looking to scale up, mastering the nuances of arc prototyping is the key to reducing waste and speeding up your time-to-market. This comprehensive guide will walk you through the professional steps to achieve precision and efficiency in every curve.
Why is Pre-Processing the Foundation of Perfect Arcs?
Before a single chip of metal is cut, the success of CNC machining arc prototypes is decided on a computer screen. This phase, known as pre-processing, involves two critical steps: 3D design and CAM programming.
CAD Design: Modeling Every Curve Detail
The journey begins with CAD (Computer-Aided Design) software. When modeling an arc, “close enough” is never good enough. A 0.1mm error in a radius can lead to a part that won’t fit its housing. Engineers must strictly define:
- Arc Radius: Ensuring the curvature matches the mating parts exactly.
- Arc Length: Crucial for parts that must transition smoothly into straight lines.
- Tangency: The “blend” between a curve and a flat surface must be seamless to avoid stress points.
Industry Case: A high-end furniture designer once faced a 0.2mm radius mismatch on a curved chair arm. By using a CAD “arc validation tool” before production, they caught the error in the digital phase, saving the company 8 hours of wasted machine time and hundreds of dollars in scrap material.
CAM Programming: Translating Design into Motion
Once the model is perfect, CAM (Computer-Aided Manufacturing) software converts the drawing into G-code. For arcs, the CAM program must prioritize a continuous, smooth tool path. Sudden stops or “jerky” movements in the code will leave visible tool marks on the finished arc.
Optimized CAM paths can cut machining time by up to 30%. We recently worked with an automotive supplier who trimmed their wheel arch production from 45 minutes to just 32 minutes simply by refining the tool entry and exit paths in the software.
How Does Material Selection Affect Your Prototype?
The material you choose for CNC machining arc prototypes dictates both the ease of the build and the final cost. Different materials “behave” differently when being cut along a curve.
Common Materials for Arc Prototypes
| Material | Machinability | Key Properties | Ideal Arc Uses | Est. Cost (USD/kg) |
| ABS Plastic | Excellent | Lightweight, low cost | Consumer shells (headphones) | $2.5 – $4.0 |
| Aluminum 6061 | Very Good | Strong, rust-proof | Automotive trim, enclosures | $2.8 – $4.5 |
| Stainless Steel 304 | Good | Durable, sterile | Medical tool handles | $3.8 – $6.5 |
| Titanium Ti-6Al-4V | Fair | Heat-resistant | Aerospace engine brackets | $35 – $50 |
Pro Tip: Always match the material to the prototype’s stage. A medical startup we assisted needed to test three different arc radii for a new device. They chose ABS plastic for the first round. This allowed them to test all three designs in just 3 days for a fraction of the cost of metal. Once the design was locked, they moved to stainless steel for the final functional test.
Are Your Machine and Tools Set for Success?
Even the best code cannot save a part if the physical setup is flawed. The machine and the cutting tool must work in perfect harmony to produce a smooth arc.
Choosing the Right CNC Machine
- 3-Axis Mills: These are the workhorses for “2D arcs,” such as a curved profile on a flat plate. They are fast and cost-effective.
- 5-Axis Machines: These are essential for “3D arcs.” For example, a curved propeller guard that also twists in space requires the tool to move in five directions at once.
A drone manufacturer recently switched to a 5-axis setup for their propeller guards. By cutting the arc in a single pass without repositioning the part, they improved arc precision by 40% and eliminated the “seam marks” often left by 3-axis machines.
Tool Preparation: Sharpness is Key
Dull tools are the leading cause of “chatter marks”—tiny vibrations that ruin the surface of an arc.
- Tool Type: Use ball nose end mills for small radii (≤5mm). Their rounded tips are designed specifically to follow curved paths.
- Tool Inspection: Check tools under a microscope. If the edge has a chip as small as 0.05mm, it must be replaced.
- Stability: Ensure the tool holder is tightened to spec. Even a microscopic wobble will turn a perfect 50mm radius into a 50.2mm radius.
The Core Process: Roughing vs. Finishing
The actual cutting of CNC machining arc prototypes happens in two distinct stages. Mastering the transition between them is where the “art” of machining meets the “science” of engineering.
Roughing: High-Speed Material Removal
In the roughing stage, the goal is to remove bulk material quickly. You want to leave a small “allowance” (usually 0.5mm) for the final pass.
- Depth of Cut: 1–3mm per pass is common for aluminum.
- Feed Rate: Keep it high to save time, but monitor the machine for excessive vibration.
Finishing: The Path to Perfection
Finishing is where the arc becomes smooth and precise.
- Step Down: Reduce the depth of cut to 0.1–0.5mm.
- Slow Down: Lower the feed rate to ensure the tool has time to cut cleanly.
- Coolant Use: Always use coolant for metals. It prevents heat from warping the arc and washes away tiny chips that could scratch the surface.
Success Story: A smartwatch brand struggled with rough edges on their aluminum cases. By switching to a 0.2mm finishing depth and using water-soluble coolant, their surface roughness dropped from Ra 1.6 μm to a glass-smooth Ra 0.8 μm, meeting mass-production standards immediately.
How to Verify and Post-Process Your Arcs?
The work isn’t done just because the machine stops. Post-processing and quality control (QC) ensure the prototype actually works in the real world.
Post-Processing Steps
- Deburring: Removing sharp edges is critical for parts meant for human contact.
- Sanding: For plastic or aluminum, 400-grit sandpaper can provide a professional, matte finish.
- Anodizing: This adds a protective layer to aluminum arcs, improving both durability and color.
Quality Control: The Final Verification
To ensure your CNC machining arc prototypes meet the “Golden Standard,” use these tools:
- Coordinate Measuring Machine (CMM): This is the gold standard for measuring arc radius with ±0.001mm accuracy.
- Profilometer: This measures the Ra (surface roughness). For medical parts, you generally aim for Ra ≤0.4 μm.
- Fit Testing: The ultimate test. Does the curved gear mesh with its partner? Does the curved handle fit the user’s hand?
Embracing Innovation to Avoid Common Errors
Errors in arc machining are often predictable. By understanding the causes, you can implement fixes before they ruin a batch.
Common Arc Troubleshooting
| Error | Likely Cause | Solution |
| Rough Surface | Dull tool or fast feed | Replace tool; slow feed by 15% |
| Wrong Radius | CAM calculation error | Re-run CAM with arc validation |
| Arc Warping | Excessive heat | Increase coolant; reduce speed |
Staying Ahead with New Tech
Modern shops are now using AI-powered CAM software that learns from every job to optimize paths. Additionally, high-speed spindles running at 20,000+ RPM allow for even smoother finishes on difficult materials like titanium.
Yigu Technology’s Perspective on Precision
At Yigu Technology, we have spent over 12 years perfecting the art of CNC machining arc prototypes. We understand that a curve is more than just a line—it’s a critical functional feature. Our facility uses AI-enhanced CAM to reduce machining times by an average of 25%, and every arc we produce is verified by a CMM to ensure ±0.001mm precision.
We pride ourselves on being more than just a machine shop; we are a design partner. Whether it’s advising you on using ABS for early-stage testing or fine-tuning coolant flow to prevent warping in stainless steel, our goal is to help you build a better product.
FAQ: Common Questions About Arc Machining
How long does it typically take to machine an arc prototype?
It depends on the material. A simple ABS plastic arc might take 15–20 minutes. A complex, large-scale titanium arc for an aerospace component could take over an hour.
What is the smallest arc radius possible with CNC?
Most standard CNC mills can handle a 0.5mm radius. For ultra-tiny features (common in micro-medical tools), we use specialized micro-CNC machines that can go down to 0.1mm.
Can I fix a “flat spot” on an arc with sanding?
Minor roughness can be sanded out, but if the machine left a “flat” where it should be a curve, sanding will usually just make the error more obvious. It is almost always better to fix the G-code and re-machine the part to ensure mechanical integrity.
Discuss Your Projects with Yigu Rapid Prototyping
Are you ready to bring your curved designs to life with unmatched precision? At Yigu Technology, we specialize in the high-stakes world of CNC machining arc prototypes. Our expert engineers are ready to review your CAD files and provide a roadmap for manufacturing success.
Would you like a free design-for-manufacturability (DFM) analysis for your curved parts? Contact us today, and let’s turn your vision into a reality.