Machining slender workpieces is one of the toughest tasks in a machine shop. We usually define “slender” parts as those with a length-to-diameter ratio greater than 10:1. Because these parts are long and thin, they lack rigidity. This makes them prone to vibration, bending, and poor precision.
However, you can achieve perfect results by following a disciplined process. Whether you are making long shafts, pins, or thin rods, this guide walks you through the five critical stages of the CNC lathe process to solve these common challenges.
1. Does Your Design Support Easy Machining?
A great part starts on the drawing board. If a design is too complex, even the best CNC lathe will struggle to keep it straight. Your goal is to simplify the part without losing its function.
Fix Common Design Flaws
- Simplify Shapes: Avoid tiny grooves or sharp internal corners. Replace sharp angles with a 0.5mm to 1mm radius. This helps the tool move smoothly.
- Remove Extra Details: Only keep features that are necessary. A decorative cut on a thin shaft might look nice, but it increases the risk of the part bending under pressure.
- Gradual Changes: If the diameter must change, make it gradual. A good rule is to limit shifts to 5% per 10mm of length.
Expert Tip: If your part needs a deep slot, machine the basic slender shape first. Then, use a specialized small tool for the slot. This two-step method keeps the part stable during the heavy work.
2. Are You Programming for Stability?
Programming for slender parts is about control. A single mistake in your code can snap a part or damage the lathe spindle.
Three Vital Programming Rules
- Start with Slow Feed Rates: High speeds cause thin parts to wobble. Start with a feed rate of 50–80mm/min for roughing. This keeps the tool pressure low.
- Add Retraction Pauses: When the tool finishes a cut, pause for 0.5 seconds before it pulls away. This prevents the tool from “yanking” and bending the metal.
- Run a Simulation First: Always use software like Fanuc CNC Simulator or Siemens NX. A simulation catches collisions before they happen, saving you from wasting expensive materials.
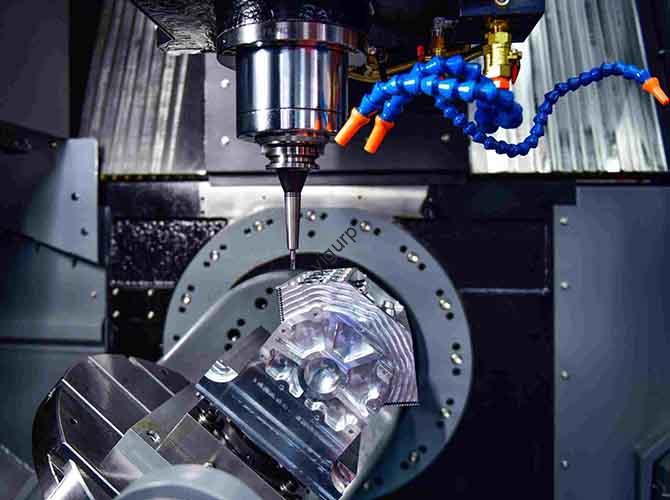
3. Is Your Machine Ready for Precision?
Even with a perfect program, the wrong machine settings will cause failure. You must match your parameters to the workpiece material.
Recommended Settings by Material
| Material | Spindle Speed (RPM) | Cutting Depth (mm) | Coolant Type |
| Aluminum (6061) | 2000 – 3000 | 1.0 – 1.5 | Water-soluble |
| Carbon Steel (1045) | 1200 – 1800 | 0.8 – 1.2 | Oil-based |
| Stainless Steel (304) | 800 – 1200 | 0.5 – 1.0 | High-pressure |
Check Your Tailstock: A misaligned tailstock is a common killer of accuracy. If it is off by just 0.1mm, your part will come out tapered. Use a dial indicator to align it before every new batch.
4. Which Tools Should You Use?
Choosing the right tool is the difference between a mirror finish and a rough surface. You must also replace tools before they get dull.
Tool Selection Guide
- Carbide Inserts: These are best for roughing cuts. They are hard and heat-resistant. Replace them every 20–30 parts.
- High-Speed Steel (HSS): Use these for finishing cuts. They are more flexible and help reduce vibration on very thin sections.
- Anti-Vibration Tools: For parts with a ratio over 15:1, use tools with built-in dampeners. They cost more but prevent workpiece deformation.
5. How to Ensure Consistent Quality?
Quality control should happen while the machine is running, not just at the end.
The 3-Step Quality Process
- In-Process Checks: Measure the diameter every 5 parts with a micrometer. If the part is off by 0.05mm, adjust your speed or feed rate immediately.
- CMM Testing: For critical engine shafts, use a Coordinate Measuring Machine (CMM). It can find errors as small as 0.002mm.
- Log Your Data: Keep a record of the speeds and tools used for every batch. This helps you find the “sweet spot” for future orders.
Conclusion
Machining slender parts requires patience and the right strategy. By simplifying your design, using cautious programming, and keeping your machine aligned, you can overcome vibration and bending. Always remember to monitor tool wear and use high-quality coolant to protect your finish.
FAQ
My slender part bends during the cut—what is wrong?
Check your tailstock pressure. If it is over 50N, it pushes the part and causes it to bow. Try adjusting it to 30–40N for a better balance.
Can I machine a 20:1 ratio part on a standard lathe?
Yes, but you need a steady rest. This device supports the middle of the part so it cannot wobble. You should also use an anti-vibration tool holder.
Why is my stainless steel part coming out rough?
Stainless steel gets very hot. If your coolant flow is too low, the tool will “tear” the metal instead of cutting it. Increase your flow to 8–10L/min.
Discuss Your Projects with Yigu Rapid Prototyping
At Yigu Technology, we specialize in the CNC lathe process for complex, slender workpieces. We use anti-vibration tool holders that reduce chatter by 60%. Our machines also feature a “slender part mode” to auto-adjust speeds for the best results.
Would you like a free review of your slender part design to optimize it for machining?