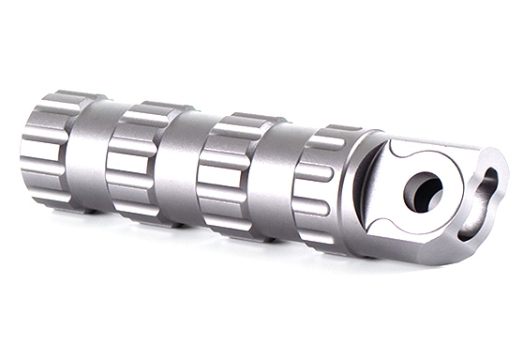
For product engineers, procurement teams, and designers, the pressure to deliver flawless parts is immense. When your project involves fine features or complex geometries, standard manufacturing often hits a wall. This is where CNC dynamic machining prototype models change the game.
This high-precision method uses Computer Numerical Control (CNC) technology to turn digital designs into physical reality with extreme accuracy. By using advanced algorithms to adjust tool paths in real time, it helps you avoid costly errors and slashes your time-to-market. In this comprehensive guide, we will break down every stage of the process, share real-world data, and help you decide if this is the right path for your next innovation.
1. What Are CNC Dynamic Machining Prototype Models?
Before looking at the “how,” we must understand the “what.” Unlike basic CNC machining—which often follows a fixed, linear path—dynamic machining uses intelligent software to adjust tool movements, spindle speeds, and feed rates on the fly.
Why Does “Dynamic” Matter?
This fluid approach to cutting metal or plastic offers three distinct advantages:
- Extreme Precision: It achieves tight tolerances, often between ±0.005 mm and ±0.02 mm. This is vital for tiny holes or ultra-thin walls.
- High Efficiency: The software optimizes the cutting path to keep the tool engaged at the ideal angle, reducing heat and material waste.
- Complex Geometries: It handles curved surfaces and deep undercuts that 3D printing or manual milling simply cannot replicate.
Real-World Case: An aerospace startup recently needed a titanium engine component with 12 cooling channels, each only 0.5 mm wide. While 3D printing failed to provide the smooth internal finish required, dynamic CNC machining delivered the part with perfect internal geometry and structural integrity.
2. A Step-by-Step Guide to the Process
Creating CNC dynamic machining prototype models is a rigorous five-step journey. Each stage requires a blend of engineering expertise and technical precision.
Step 1: Design and Programming
The foundation of a great prototype is a perfect digital blueprint.
- 3D Modeling: Use CAD software like SolidWorks or AutoCAD. For example, a medical device firm spent two days refining a 1 mm gripping surface on a surgical tool model to ensure the machine could “see” the detail.
- G-Code Translation: A programmer converts the model into G-code. This code dictates tool paths, speeds, and feeds.
- Pro Tip: Always have a senior programmer review the code. Overlapping tool paths can lead to “crashes” that damage expensive spindles or scrap your material.
Step 2: Machine Setup and Material Selection
Once the code is ready, the physical setup begins.
- Material Matching: Choose a material that mimics your final product. An automotive supplier used aluminum for a suspension prototype; its low density made it fast to machine while providing the necessary strength for initial fit tests.
- Tooling Choice: Specific features require specific “knives.” We use ball-end mills for smooth curves and carbide-tipped bits for hardened steels.
- Workpiece Mounting: Secure the material using high-pressure clamps or vices. Any movement during the cycle causes vibration, which is the enemy of precision.
Step 3: The Dynamic Machining Cycle
With the press of a button, the machine begins removing material layer by layer.
- Adaptive Clearing: The tool adjusts its path to avoid “burying” itself in too much material, which prevents tool breakage.
- Speed Control: On a recent plastic prototype project, we set the spindle to 10,000 RPM. This allowed for a clean cut without the friction heat that usually melts ABS or PC plastics.
Step 4: Real-Time Monitoring
Great operators never “set it and forget it.”
- Tool Wear Checks: Dull tools leave rough “burrs” on the surface. A furniture design team saved a $200 part by pausing the machine to swap a worn bit halfway through the run.
- Coolant Management: Ensure a steady flow of cutting fluid. Overheating can warp a prototype, causing it to fail dimensional checks later.
Step 5: Post-Processing and Inspection
The final stage turns a “machined part” into a “finished prototype.”
- Cleaning: Use compressed air or ultrasonic baths to remove metal shavings from tiny slots.
- Finishing: This includes sanding, bead blasting, or applying UV-resistant coatings.
- Validation: We use a Coordinate Measuring Machine (CMM) to verify the part. One aerospace part failed when a 2 mm hole was found to be 0.008 mm too small. We adjusted the drill parameters and re-machined it to perfection.
3. How to Master Error Control?
Precision is the result of controlling variables. To get the best CNC dynamic machining prototype models, keep an eye on these factors:
| Error Source | Control Strategy | Impact of Failure |
| Machine Accuracy | Monthly laser calibration | Misaligned holes; 2-day delay |
| Tool Selection | Use sharp carbide tools | Scratches on surface; extra sanding |
| Clamping Pressure | Use torque-limited clamps | Material warping or vibration |
| Program Logic | Run a foam “dummy” test | Tool crash; $500+ in wasted metal |
4. Is Dynamic Machining Right for You?
Choosing the right method depends on your goals for accuracy, time, and budget.
Comparative Analysis
| Method | Best For | Tolerance | Lead Time | Typical Cost |
| CNC Dynamic Machining | Fine features, metal parts | ±0.005 mm | 3–7 Days | $200 – $2,000+ |
| 3D Printing | Rapid “look-and-feel” | ±0.1 mm | 1–2 Days | $50 – $500 |
| Silicone Molding | Small batches (10–50) | ±0.2 mm | 2–5 Days | $100 – $800 |
When to choose CNC: If your prototype involves a robotics joint needing a 0.01 mm fit or a sensor with a 0.5 mm internal gap, CNC is the only way to go.
Yigu Technology’s Perspective
At Yigu Technology, we believe that CNC dynamic machining prototype models are the backbone of high-stakes product development. Our team of 10+ expert programmers has helped automotive startups achieve ±0.007 mm tolerances on engine components, effectively cutting their testing cycles by 30%.
With ISO9001 and IATF16949 certifications, we don’t just “cut metal”—we provide a documented, quality-assured process. Whether you are working with titanium or high-performance plastics, we turn your most complex designs into functional, reliable prototypes.
FAQ
How long does it take to get a CNC dynamic machining prototype? Most projects take 3 to 7 days. A simple plastic bracket might be ready in 3 days, while complex aerospace components requiring multi-axis setups typically take the full 7 days.
What materials can I use? We work with a wide range, including Aluminum (6061/7075), Stainless Steel (304/316), Titanium, and engineering plastics like ABS, PC, and PEEK.
Why is CNC more expensive than 3D printing? CNC involves higher material costs, skilled programming time, and expensive tooling. However, the result is a functional part with the same strength and precision as a production piece, which 3D printing cannot match.
Can you machine very thin walls? Yes. With dynamic tool paths, we can safely machine walls as thin as 0.5 mm in certain metals without the material warping or collapsing.
Discuss Your Projects with Yigu Rapid Prototyping
Do you have a complex design that demands high-precision execution? At Yigu Rapid Prototyping, we specialize in CNC dynamic machining prototype models that bridge the gap between concept and production. Our engineers are ready to review your CAD files and offer a DFM (Design for Manufacturing) analysis to optimize your project.
Would you like me to provide a custom quote or a material recommendation for your next prototype?