Introduction
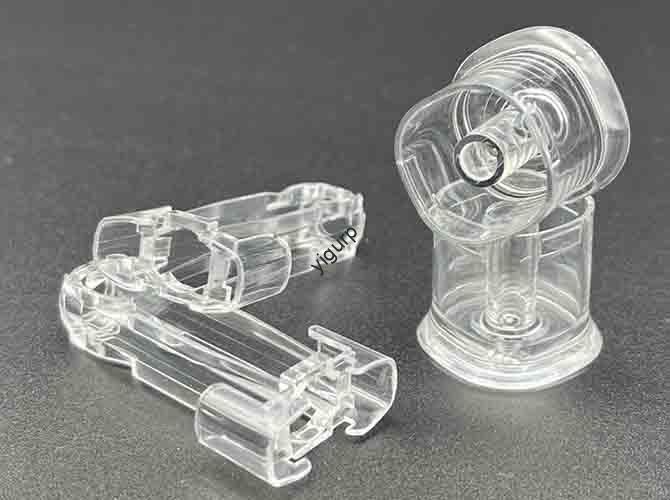
Clear injection molded plastics appear everywhere—medical devices, automotive headlamps, water bottles, electronic displays. But making them perfectly transparent isn’t simple. It requires precision at every step: material selection, mold design, process control, and quality verification.
A cloudy part fails. A part with bubbles fails. A part with yellowing fails. Success comes from understanding why plastics become clear—and what turns them cloudy.
This guide walks through the complete process. You’ll learn the science of transparency, compare material options, master the molding blueprint, and apply quality control that catches defects before they reach customers.
What Makes Plastic Clear?
Amorphous vs. Crystalline: The Molecular Difference
Transparency starts at the molecular level. How polymer chains arrange themselves determines whether light passes through or scatters.
Amorphous plastics have random, jumbled molecular structures—like a plate of spaghetti. Light travels straight through with minimal scattering. Result: high transparency.
Semi-crystalline plastics have ordered regions where chains fold into tight packages called crystallites. These crystallites have different refractive indices than surrounding areas. Light hits these boundaries and scatters in multiple directions. Result: translucent or opaque appearance.
Think of ice versus snow. Ice is clear because its structure is uniform. Snow is white because countless tiny ice crystals scatter light in all directions. The same principle applies to plastics.
Light Transmission, Haze, and Refractive Index
We measure optical quality with specific terms:
- Light transmission: Percentage of light that passes through the part. PMMA achieves 92% —the highest among common plastics.
- Haze: Light scattered as it passes through, creating cloudy appearance. Low haze is essential for clarity.
- Refractive index (RI) : How much light bends when entering the material. For lenses, precise RI matters. For general parts, uniform RI throughout prevents distortion.
Non-uniform cooling or molded-in stress creates RI variations. Even with perfect material, process mistakes destroy clarity.
What Material Options Deliver Clarity?
Comparing Transparent Thermoplastics
Material choice is the most important decision. It affects not just optics but strength, chemical resistance, thermal stability, and cost.
| Material | Optical Clarity | Impact Strength | Chemical Resistance | UV Resistance | Cost | Common Applications |
|---|---|---|---|---|---|---|
| PMMA (Acrylic) | Best (92% transmission) | Low | Good | Excellent | Low | Taillights, lenses, cosmetic packaging |
| Polycarbonate (PC) | Excellent | Very High | Moderate | Poor (needs coating) | Medium-High | Safety glasses, medical devices, headlamps |
| PETG | Very Good | High | Good | Poor | Low-Medium | Displays, food containers, medical trays |
| Tritan™ | Excellent | Very High | Excellent | Good | High | Water bottles, appliances, medical hardware |
| COC | Excellent | Good | Excellent | Good | Very High | Medical vials, diagnostics, high-end optics |
| Polystyrene (PS) | Good | Very Low | Poor | Poor | Very Low | Disposable cups, petri dishes |
| SAN | Very Good | Low | Good | Poor | Low | Blender jars, instrument panels |
How to Choose the Right Material
Ask targeted questions about your application:
What impact resistance is needed? A protective housing needs PC or Tritan™. A decorative display might use PMMA or SAN.
Will it face chemicals or sterilization? Medical applications with gamma or ETO sterilization demand COC or Tritan™. Standard materials may fail.
What’s your cost target? High-volume disposables work with PS or PETG. Durable goods justify PC, Tritan™, or COC.
Is UV exposure a factor? Outdoor parts benefit from PMMA’s inherent UV stability. PC needs secondary UV coatings—adding cost and complexity.
Market trend: The global medical plastics market, heavily reliant on clear materials like PC and COC, is projected to exceed $30 billion by 2028—driven by advanced diagnostics and drug-delivery devices.
What’s the Molding Process Blueprint for Clarity?
It Starts with the Mold
The mold’s surface finish transfers directly to your part. For optical clarity, the mold cavity needs:
- SPI A-2 finish for most clear parts
- SPI A-1 diamond-buffed finish for highest-grade optics
Any microscopic scratch on the mold creates light-scattering defects on every part.
Gate location matters enormously. Poor placement creates weld lines—where two flow fronts meet—in optically sensitive areas. Best practice: use hot runner systems with valve gates or submarine gates positioned in non-critical locations.
Pre-Process: Drying Is Non-Negotiable
Over 80% of clarity issues—splay, silver streaking—trace back to improper material drying.
Many transparent polymers are hygroscopic—they absorb moisture from air. Even 0.02% moisture in polycarbonate turns to steam at processing temperatures, creating visible defects.
Always:
- Verify dryer performance with a dew point monitor
- Follow manufacturer drying time and temperature exactly
- Never skip or shorten this step
Skipping drying is false economy. It guarantees high scrap rates.
The ‘Clarity Triangle’: Temperature, Pressure, Speed
These three parameters are deeply interconnected. Adjusting one affects the others.
Melt temperature:
- Too low: Visible flow lines, high molded-in stress
- Too high: Polymer degradation, yellowing, brown streaks
- Just right: Smooth flow, proper weld line melding
Injection speed:
- Too slow: Hesitation marks, flow lines from premature freezing
- Too fast: Shear heating (burns material), trapped air (bubbles)
- Just right: Balanced fill with proper venting
Packing pressure and time:
- Compensates for shrinkage during cooling
- Eliminates sink marks and internal voids
- Excessive pressure creates molded-in stress → crazing, cracking, optical distortion
The Cooling Factor
Uniform cooling across the entire part is essential. If one area runs hotter or colder, plastic shrinks at different rates. This differential shrinkage induces:
- Internal stress
- Warping
- Optical distortion visible under polarized light
A well-designed mold with turbulent cooling channels maintaining consistent temperature is critical for optical stability.
Where Are Clear Plastics Used Across Industries?
Medical and Life Sciences
Clarity in medical devices often means safety and diagnostic accuracy.
Examples: Diagnostic cuvettes, IV components, surgical instrument housings, inhalers
Key materials: PC, COC, PMMA
Why: Biocompatibility, excellent clarity for fluid visibility, sterilization resistance (gamma, ETO, autoclave). COC offers high purity, low extractables, and moisture barrier—ideal for pre-filled syringes.
Automotive
Clear plastics replace heavier, more fragile glass while enabling complex lighting designs.
Examples: Headlamp and taillight lenses, light pipes, dashboard displays, instrument clusters
Key materials: PC (headlamps), PMMA (taillights, light pipes)
Why: PC provides impact strength and heat resistance (with UV coating). PMMA delivers 92% light transmission, weatherability, and UV stability for striking lighting designs.
Consumer Electronics
Clear plastics enable innovative lighting effects and modern aesthetics.
Examples: LED diffusers, light guides, transparent housings, screen protectors
Key materials: PC, PMMA, SAN
Why: Design flexibility, durability, and precise light management. Light guides channel single LEDs into complex, uniformly lit shapes—essential for branding and user interfaces.
Consumer Goods and Packaging
Transparency conveys quality, cleanliness, and honesty—letting customers see the product.
Examples: Cosmetic jars, food containers, blender jars, water bottles
Key materials: Tritan™, SAN, PETG
Why: Tritan™ combines glass-like clarity, toughness, stain resistance—BPA-free. SAN and PMMA offer premium feel and chemical resistance for cosmetics. PETG works for cost-effective packaging.
How Do You Control Quality for Clear Parts?
Visual Inspection Isn’t Enough
“Looks good” is subjective. It varies between inspectors and shifts. For consistent quality, use objective measurement tools.
Spectrophotometers:
- Measure % light transmission (how much gets through)
- Measure % haze (how much scatters)
- Provide numerical values against specifications—no guesswork
Polariscopes:
- Use polarized light to reveal molded-in stress
- Parts may look perfect but have high internal stress
- Stress appears as rainbow-colored fringe patterns
- Enables process correction before field failures
Creating a Quality Standard
The best approach: create a custom standard agreed upon by molder and customer.
Step 1: Define acceptance criteria. Be specific:
- Is a tiny flow line near a hidden edge acceptable?
- Is a single black speck automatic rejection?
- Where are weld lines permissible? How visible?
Step 2: Create limit samples. Mold parts at process window edges to create borderline defects. Produce sets for each defect type:
- Golden sample: Perfect
- Minimum acceptable: Worst-case still considered good
- Clear reject: Unacceptable
Step 3: Document and train. Photograph samples, create formal quality documents. Use physical samples to train QC inspectors, operators, assembly personnel. Eliminate subjective judgment.
How Do You Troubleshoot Common Clarity Defects?
Quick-Reference Troubleshooter’s Table
| Defect | Most Likely Causes | Solutions (in order to try) |
|---|---|---|
| Yellowing/Brown Streaks | 1. Melt temperature too high 2. Residence time too long 3. Material degradation | 1. Lower barrel temperatures 5°C at a time 2. Reduce cycle time or use smaller-shot machine 3. Purge barrel with cleaning compound |
| Splay/Silver Streaks (silvery lines) | 1. Moisture in material 2. Trapped gas or air 3. Shear heating (injection too fast) | 1. Verify drying per spec (check dryer) 2. Add/improve mold venting 3. Reduce injection speed |
| Weld/Knit Lines (lines where flow meets) | 1. Low melt or mold temperature 2. Slow injection speed 3. Poor gate location | 1. Increase melt and/or mold temperature 2. Increase injection speed 3. Consider moving gate to change flow pattern |
| Haze/Cloudiness (overall lack of clarity) | 1. Mold surface not highly polished 2. Contamination 3. Incompatible additives | 1. Ensure SPI A-1/A-2 mold finish 2. Check hopper/dryer for contamination 3. Verify optical-grade material |
| Voids/Bubbles (internal empty pockets) | 1. Insufficient packing pressure/time 2. Thick wall sections 3. Trapped gas | 1. Increase packing pressure/hold time 2. Core out thick sections in design 3. Ensure proper venting |
Conclusion: Clarity Is Engineered, Not Accidental
Making clear injection molded plastics isn’t magic. It’s the result of deliberate, disciplined choices:
- Material science: Choose amorphous polymers matched to your application’s demands
- Process engineering: Master temperature, pressure, speed, and cooling
- Quality assurance: Use objective measurements and clear standards
Success lives in the details. The mold’s finish. The drying time. The packing pressure. The cooling uniformity. Each factor contributes to—or detracts from—final clarity.
When you combine the right material, the right process, and the right quality checks, you’re not hoping for clear parts. You’re engineering them.
FAQ: Clear Injection Molded Plastics
What’s the clearest plastic for injection molding?
PMMA (acrylic) achieves the highest light transmission at 92% . It’s the standard for applications where maximum clarity is the primary requirement, like optical lenses and light guides. Polycarbonate is also very clear but slightly lower transmission.
Can I make polycarbonate parts as clear as acrylic?
Yes—polycarbonate can be optically clear, but its maximum light transmission is slightly lower than acrylic (around 88–90% vs. 92%). The bigger difference is UV stability: acrylic is inherently UV-stable, while polycarbonate requires protective coatings for outdoor use to prevent yellowing.
Why do my clear parts have silver streaks?
Silver streaks (splay) are almost always moisture in the material. Even small amounts turn to steam during injection, creating surface defects. Check your drying process first—verify temperature, time, and that your dryer is functioning correctly.
How do I prevent weld lines in clear parts?
Weld lines occur where two flow fronts meet. To minimize visibility: increase melt temperature, increase injection speed, and consider relocating the gate to move the weld line to a less visible area. In some cases, mold temperature adjustment helps.
What’s the best mold finish for clear parts?
For most clear parts, SPI A-2 finish (highly polished) works well. For the highest optical requirements—like lenses or transparent medical components—SPI A-1 diamond-buffed finish is necessary. Any mold imperfection transfers directly to parts.
Can I regrind and reuse clear plastic scrap?
Carefully—and only with amorphous materials. Regrind can introduce contaminants and degrade optical properties. If you regrind, use clean, sorted material, blend at low percentages (10–20% max), and test thoroughly before committing to production. Never regrind for high-optical applications.
How do I measure if my part is “clear enough”?
Use a spectrophotometer to measure % light transmission and % haze. These provide objective numbers you can compare against specifications. For stress-related clarity issues, use a polariscope to reveal hidden internal stress that may cause future failure.
Discuss Your Projects with Yigu Rapid Prototyping
At Yigu Technology, we’ve mastered clear injection molded plastics across medical, automotive, consumer, and electronics applications. Our approach combines material expertise, precision mold making, and rigorous process control to deliver optically perfect parts.
For a medical device client, we produced diagnostic cuvettes with <0.5% haze and zero optical distortion—meeting strict ISO 13485 requirements. For an automotive supplier, we optimized cooling channels to eliminate weld lines in complex headlamp lenses.
Got a clear part project? Let’s talk. Contact Yigu’s engineering team to discuss your requirements. We’ll help you navigate material selection, mold design, and process optimization—delivering clarity that meets your exact specifications.