Introduction
If you have ever wondered how manufacturers create precise keyways, splines, or complex internal shapes in metal parts—especially in high-volume production—you are likely thinking about broaching in machining. Whether you are a new machinist learning the ropes, a production manager looking to optimize processes, or an engineer designing parts for industries like automotive or aerospace, this guide will break down everything you need to know. We will start with the basics, move to tools and machines, and even dive into real-world applications and common challenges. By the end, you will have actionable insights, not just theory.
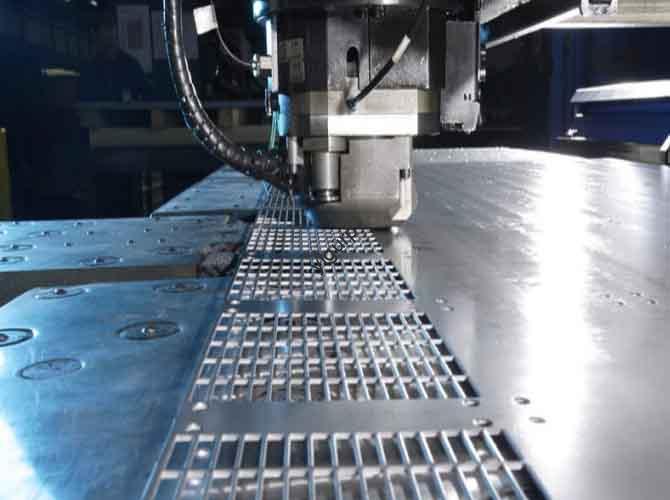
1. What Is Broaching in Machining? The Fundamentals
Let’s start simple. Broaching is a machining process that uses a specialized tool called a broach to remove material in a single, linear stroke. Unlike milling or drilling, which often require multiple passes, broaching gets the job done in one go. This makes it a true workhorse for high-volume jobs where both precision and speed matter.
At its core, broaching relies on a tool with a series of progressively larger teeth. As the tool, or sometimes the workpiece, moves in a straight line in what is called the broaching stroke, each tooth cuts away a small, predetermined amount of material. The first teeth are the smallest and do the rough cutting. The middle teeth are semi-finishing teeth. The final teeth are the finishing teeth, which achieve the desired final shape, size, and surface finish.
The 3 Main Types of Broaching (With Real-World Examples)
Not all broaching is the same. Its application depends on the part’s geometry and whether you are cutting inside or outside the workpiece. Here is how the most common types break down.
| Type of Broaching | How It Works | Key Use Case | Example |
|---|---|---|---|
| Internal Broaching | The broach is pulled or pushed inside a pre-drilled hole to create internal features like keyways or splines. | Creating internal splines in transmission shafts for the automotive industry. | A Tier 1 auto supplier uses pull broaching to add splines to over 500 drive shafts per hour—much faster than milling and with tighter tolerances. |
| External Broaching | The broach cuts on the outside of the workpiece to shape external surfaces like gear teeth or flat edges. | Manufacturing gear blanks for industrial motors. | An aerospace shop uses linear broaching to machine the external profile of turbine blades, ensuring a smooth surface finish that reduces aerodynamic drag. |
| Surface Broaching | The broach skims the top surface of a workpiece to flatten it or add shallow features like slots or serrations. | Adding serrations to tool handles or conveyor belts. | A tool manufacturer uses continuous broaching, where the workpiece moves past a stationary broach, to add serrations to over 1,000 plier handles daily—cutting production time by 40% compared to grinding. |
2. Broaching Tools: Design, Materials, and Maintenance
The broach tool is the star of the show, and its design directly impacts the quality, speed, and cost of your operation. A poorly designed or worn broach can ruin parts, slow down production, and eat into your profits. Let’s break down what makes a broach effective and how to keep it working well.
Key Parts of a Broach Tool
Every broach has three main sections of teeth, each with a specific job.
- Roughing Teeth: This is the first set of teeth. They remove the bulk of the material, sometimes up to 90%. These teeth are spaced farther apart, with a wider tooth pitch, to handle the heavy chip loads without breaking.
- Semi-finishing Teeth: These follow the roughing teeth. They trim away smaller amounts of material to refine the shape. Their pitch is tighter, and their edges are sharper to prepare the part for the final cut.
- Finishing Teeth: This is the last set of teeth. They create the final shape, size, and surface finish. These teeth have the most precise dimensions, with carefully ground rake angles to reduce cutting force and relief angles to prevent the tool from rubbing against the part.
Broach Materials: Choosing the Right One for Your Job
Broaches are made from hard, wear-resistant materials to stand up to repeated cutting. The most common options are:
- High-Speed Steel (HSS) : This is the go-to material for most applications, like machining steel and aluminum. HSS is tough, relatively easy to sharpen, and cost-effective for medium-volume jobs of 10,000 to 50,000 parts.
- Carbide Broach: This is for very hard materials, like titanium or stainless steel, or for extremely high-volume production of 100,000 parts or more. Carbide stays sharp much longer than HSS, but it is more brittle and requires careful handling to avoid chipping.
Maintenance Tip: Sharpening and Regrinding
A dull broach doesn’t just produce bad parts; it also increases cutting forces, which can damage your machine. You should use a dedicated broach sharpener to grind the top of the teeth. Never grind the sides, as this changes the tool’s critical dimensions. Most shops sharpen HSS broaches after every 5,000 to 10,000 strokes. When teeth become too worn for simple sharpening, you can regrind the entire tool to restore its original shape, extending its life by two to three times.
3. Broaching Operations: Applications Across Industries
Broaching truly shines in jobs where precision and speed are non-negotiable. Let’s look at the most common operations and which industries rely on them.
Common Broaching Operations
- Keyway Broaching: This creates slots, called keyways, in shafts and hubs to lock them together, like a motor shaft and a pulley. A lawnmower manufacturer uses keyway broaching to produce over 2,000 shafts daily, ensuring the pulley never slips during use.
- Spline Broaching: This adds multiple parallel slots, or splines, to a shaft or hole for torque transfer, commonly found in automotive transmission shafts. A luxury car brand uses spline broaching to make transmission shafts that handle over 500 lb-ft of torque, with tolerances as tight as ±0.001 inches.
- Gear Broaching: This machines gear teeth directly into a workpiece. It is often faster than hobbing for large gears. A wind turbine company uses gear broaching to make over 100 large gears per month, each with 50 or more teeth and a surface finish of 0.8 Ra.
- Hole Broaching: This enlarges or shapes pre-drilled holes, for example, creating square holes in tooling plates. A tool-and-die shop uses hole broaching to create square holes in over 500 clamping plates—something that is nearly impossible with drilling or milling.
Top Industries Using Broaching
- Automotive: It is estimated that 60% of all broached parts end up in cars, including shafts, gears, and brake components. The high production volumes of over 10,000 parts per day make broaching ideal.
- Aerospace: Broaching is used for turbine blades, engine casings, and landing gear parts, where precision down to ±0.0005 inches and the use of tough materials like titanium and Inconel are critical.
- Heavy Equipment: Manufacturers of tractors, excavators, and trucks use broaching for the large shafts and gears that must handle immense loads.
4. Broaching Machines: Types, Setup, and Workholding
Even the best broach tool won’t work without the right machine. Broaching machines come in different sizes and configurations, each suited to specific jobs.
4 Common Types of Broaching Machines
| Machine Type | Best For | Key Feature | Example Use Case |
|---|---|---|---|
| Vertical Broaching Machine | Internal broaching, like making keyways in small shafts. | The broach moves up and down vertically, which saves valuable floor space. | A small machine shop uses a vertical hydraulic machine to make keyways in over 500 small motor shafts per day. |
| Horizontal Broaching Machine | External broaching or broaching long parts, like gear blanks. | The broach moves left and right horizontally, which can handle longer workpieces. | A large automotive supplier uses a horizontal CNC broaching machine to broach gears up to 3 feet long. |
| Hydraulic Broaching Machine | Heavy-duty jobs, like cutting thick materials. | It uses hydraulic power to provide a consistent, powerful force, ideal for HSS or carbide broaches. | A steel fabricator uses a hydraulic machine to cut splines in 2-inch thick steel shafts. |
| CNC Broaching Machine | Complex, high-precision jobs, like aerospace parts. | It is computer-controlled for perfect repeatability and can automatically adjust speed, feed, and stroke length. | An aerospace contractor uses a CNC broaching machine to machine turbine blades with 5-axis control, ensuring each blade is identical. |
Machine Setup: Critical Steps for Success
Poor setup is one of the biggest causes of broaching errors. Here is a step-by-step checklist to get it right.
- Secure the Workpiece: Use a broaching fixture and proper workholding tools, like clamps or collets, to keep the part absolutely stationary. Even 0.001 inches of movement can ruin the cut.
- Align the Broach: Make sure the broach is perfectly straight and aligned with the workpiece. Using a laser alignment tool is recommended for precision.
- Set the Stroke Length: The stroke must be long enough to cover the entire length of the part. It is good practice to add an extra 1-2 inches for safety.
- Adjust Cutting Speed: Start with the manufacturer’s recommended speed. Increase it slowly if the cut is smooth, and decrease it if you see sparks or hear loud, unusual noises.
5. Broaching Advantages, Limitations, and Optimization Tips
No machining process is perfect. Broaching has clear strengths, but it is not right for every job. Let’s weigh the pros and cons and share how to get the most out of your broaching operations.
Advantages of Broaching
- High Production Rate: It completes a cut in a single stroke, making it up to 10 times faster than milling for simple shapes like keyways.
- Excellent Surface Finish: The finishing teeth create very smooth surfaces, often between 0.4 and 1.6 Ra, which can eliminate the need for secondary grinding.
- Tight Tolerances: It can achieve tolerances of ±0.0005 inches, especially with CNC broaching, which is critical for high-performance parts.
- Consistency: Once the machine is set up, every single part produced is identical, which is perfect for mass production.
Limitations of Broaching
- High Initial Tooling Cost: A custom broach can cost anywhere from $500 to $5,000 or more. This is not cost-effective for low-volume jobs of fewer than 1,000 parts.
- Limited to Specific Geometries: Broaching works best for linear shapes like keyways and splines. It cannot handle curved or complex 3D shapes.
- Chip Removal Challenges: If chips get stuck between the broach and the workpiece, they can scratch the part or even break the tool.
Optimization Tips
- Use the Right Coolant: Coolant reduces friction and heat, which can extend tool life by 30-50%. For steel, use a water-soluble coolant. For aluminum, a mineral oil-based coolant is often better.
- Optimize Feed per Tooth: The amount of material each tooth removes should be between 0.001 and 0.003 inches. Too much will break the tool; too little wastes time.
- Control Vibration: Use a rigid machine and fixture. Vibration causes uneven cuts and accelerates tool wear.
- Monitor Tool Wear: Check the broach regularly for chipping or dullness. Replace or sharpen it early to avoid producing defective parts.
Conclusion
Broaching in machining is a powerful, highly efficient process that is essential for high-volume production of precision parts. By using a specialized broach tool with progressively sized teeth, it can create complex internal and external features like keyways, splines, and gear teeth in a single, fast pass. While the initial cost of tooling can be high, the unmatched speed, consistency, and surface finish make it the go-to choice for industries like automotive and aerospace. Understanding the different types of broaching, the importance of tool maintenance, and the key steps for machine setup will allow you to leverage this process for maximum productivity and quality.
FAQ
Is broaching better than milling for keyways?
For high-volume jobs of 1,000 parts or more, yes. Broaching is 5 to 10 times faster and produces a smoother finish. For low-volume jobs of fewer than 100 parts, milling is usually cheaper because you avoid the high cost of a custom broach.
How long does a broach tool last?
It depends on the material you are cutting and how often you use it. A standard HSS broach can last for 10,000 to 50,000 strokes. A carbide broach can last for 50,000 to 200,000 strokes. Regular sharpening can extend this life by two to three times.
Can broaching be used for non-metallic materials?
Yes, it can. Broaching works for some plastics, composites, and even wood for specialized applications. However, you would need to use a softer broach material like HSS and slower cutting speeds to prevent the material from melting or chipping.
What is the maximum size of a part that can be broached?
Most standard broaching machines can handle parts up to about 6 feet long and 2 feet in diameter. For exceptionally large parts, like those used in wind turbines, custom horizontal broaching machines are available.
Discuss Your Projects with Yigu Rapid Prototyping
Are you considering using broaching for your next high-volume project? At Yigu Rapid Prototyping, we have extensive experience with a wide range of machining processes, including broaching. Our team can help you determine if broaching is the right choice for your part, and we have the expertise to handle everything from tool design to production.
Contact Yigu Rapid Prototyping today to discuss your project. Let’s build something great together.