Introduction
When you need metal prototypes—maybe for a new car bracket or an appliance part—the manufacturing method you choose affects everything. Cost. Speed. Quality. How well the prototype represents the final product. Stamping and forming prototypes offer distinct advantages that make them a top choice for many manufacturers. But they’re not the right fit for every project. This guide breaks down the real benefits, honest limitations, and practical decision factors. Real examples and hard numbers help you determine whether stamping and forming makes sense for your specific prototype needs.
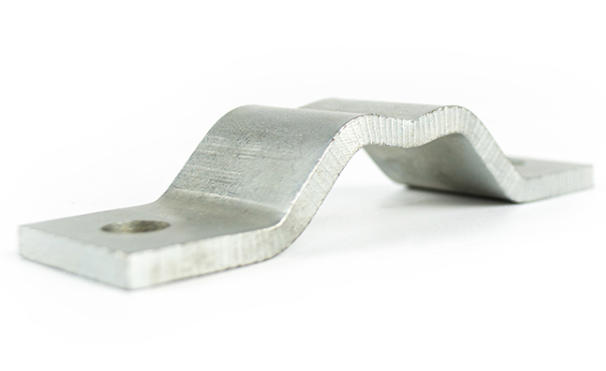
What Makes Stamping and Forming Prototypes So Accurate?
Precision comes from the die
The secret to stamping accuracy is the die—the custom tool that shapes the metal. Unlike manual methods where human skill determines quality, stamping transfers precision to the tooling. Once the die is right, every part comes out identical.
Typical stamping tolerances:
- Simple parts: ±0.1mm
- Precision parts: ±0.02mm
- Fine-blanked parts: ±0.013mm
Consistency across multiple prototypes
Need 50 identical prototypes for testing? Stamping delivers. Each part matches the others within the die’s tolerance. This matters when you’re testing fit with mating components.
Real example: A smartphone manufacturer needed 30 prototype frames for drop testing. They used stamping and forming. Every frame held the screen and battery with the same tight fit. If one frame failed during testing, they knew it was the design, not part variation. Manual methods would have introduced 0.3–0.5mm variation between parts, confusing test results.
No skilled operator variation
With manual fabrication, the best part comes from the most experienced worker at 9 AM. The worst part comes from the same worker at 4 PM when tired. Stamping eliminates this human factor. The machine follows the same cycle regardless of operator fatigue.
How Fast Is Stamping for Prototype Production?
Production speed numbers
Stamping presses run quickly—even for prototypes. Once the die is installed, parts emerge in seconds.
Speed comparison for 100 prototype brackets:
- Manual bending and cutting: 8–10 hours
- Stamping and forming: 1–2 hours
- CNC machining: 6–8 hours
Real cost impact of speed
A furniture startup needed 100 metal brackets for a new chair design. They compared methods:
| Method | Time | Labor Cost | Per-Part Cost |
|---|---|---|---|
| Manual fabrication | 9 hours | $450 | $4.50 |
| Stamping | 2 hours | $100 | $1.00 |
| CNC machining | 7 hours | $350 | $3.50 |
They chose stamping. Total savings: $350 on the prototype run. The parts arrived two days sooner than manual estimates.
Automation potential
Even for small prototype runs, stamping allows partial automation. Automated coil feeders feed metal strips continuously. Sensors detect misfeeds before they damage dies. One operator can run multiple presses simultaneously.
How Much Material Does Stamping Waste?
Chip-free forming saves metal
Stamping shapes metal without cutting chips. Unlike machining, which grinds material into dust, stamping moves material where you want it. Waste happens only at the edges where parts separate from the sheet.
Material utilization rates:
- Stamping: 85–95% of sheet becomes parts
- Machining: 70–80% (simple parts) to 50–60% (complex parts)
- Laser cutting: 75–85% (nesting dependent)
Savings with expensive materials
When your prototype uses costly metals, material savings matter. Stainless steel. Aluminum. Copper. Titanium. Every percent of waste saved adds up.
Case example: A kitchen equipment company prototyped stainless steel sink strainers. Each strainer blank used 92% of the sheet metal—only 8% trimmed as scrap. Machining the same strainer would have wasted 25% of the expensive 304 stainless. On 200 prototypes, stamping saved $840 in material alone.
Recyclable scrap
The scrap stamping does produce is clean, uncontaminated metal. It goes straight to recyclers at near-market rates. Machining chips often mix with cutting fluid, requiring cleaning before recycling—or selling at lower prices.
How Long Do Stamping Dies Last?
Die lifespan for prototypes
Even prototype-level dies last much longer than you might expect. A well-maintained die made from tool steel produces 10,000–100,000 parts before wearing out of tolerance.
Die material options:
- Tool steel dies: 50,000–100,000 parts
- Aluminum dies: 1,000–5,000 parts (lower cost)
- 3D-printed dies: 100–500 parts (quick, cheap prototypes)
Multiple prototype rounds without new tooling
Design rarely gets right on the first try. You’ll likely need multiple prototype iterations. Stamping dies accommodate minor design changes without replacement.
Real scenario: An automotive supplier made a stamping die for a brake caliper prototype. First run: 50 parts for initial testing. After design tweaks (hole size adjustment): another 200 parts. Same die. Total die cost spread across 250 parts instead of 50. If they’d used 3D printing for each iteration, total cost would have been 3× higher.
Die refurbishment extends life
When dies eventually wear, they can be refurbished—ground down, re-polished, or coated—for 30–50% of new die cost. This makes stamping economical for long-running prototype programs.
When Does Stamping Not Make Sense?
Small batch sizes hurt economics
The die cost is real. For very small prototype runs, that upfront investment may not pay back.
Economic breakpoints:
- 1–20 parts: 3D printing or machining usually cheaper
- 20–50 parts: Evaluate carefully—depends on part complexity
- 50+ parts: Stamping becomes competitive
- 200+ parts: Stamping almost always wins
Long lead times for die making
Dies take time to design and machine. Even simplified prototype dies need 2–4 weeks for simple parts, 6–8 weeks for complex ones. If you need prototypes next week, stamping isn’t the answer.
Alternative for speed: Use laser cutting + bending for first-round prototypes while die is in progress. Get parts in days, then use stamping for later rounds once design stabilizes.
Very tight tolerances challenge stamping
Stamping holds excellent tolerances—but not the absolute tightest. For parts needing ±0.005mm or better, precision machining still wins. Think medical device components or certain aerospace parts.
Noise and vibration concerns
Stamping presses are loud. 85–100 decibels during operation. They shake floors. If your shop is in a shared building or residential area, noise complaints are real. Sound enclosures help but add cost.
How Do You Choose the Best Prototype Method?
Decision framework
Use these four questions to guide your choice:
1. How many prototypes do you need?
- Under 50: Consider 3D printing or machining
- 50–200: Stamping worth evaluating
- Over 200: Stamping likely best
2. What tolerance do you need?
- ±0.02mm or looser: Stamping works
- Tighter than ±0.02mm: Precision machining
3. What’s your timeline?
- 1–7 days: Laser cutting + bending, 3D printing
- 2–8 weeks: Stamping (including die making)
- Ongoing need: Stamping (die pays back over time)
4. What material do you need?
- Metal: Stamping excellent
- Plastic: Injection molding or 3D printing
- Rubber: Compression molding
Comparison table for quick reference
| Factor | Stamping | 3D Printing | CNC Machining | Manual Fabrication |
|---|---|---|---|---|
| Per-part cost (50 pcs) | Medium | High | High | Medium |
| Per-part cost (500 pcs) | Low | High | Medium | High |
| Lead time (first part) | 2–8 weeks | 1–3 days | 3–7 days | 1–5 days |
| Material options | Metals only | Plastics, some metals | All | All |
| Accuracy | ±0.02mm | ±0.1–0.2mm | ±0.005mm | ±0.5mm |
| Consistency | Excellent | Good | Excellent | Poor |
What Real Companies Have Learned
Automotive supplier case
A company making engine mounts needed prototypes for three design iterations. They chose stamping with a single die modified between rounds.
Results:
- Total prototypes: 350 parts across 3 rounds
- Die cost: $4,200 (spread across all parts)
- Per-part cost (including die): $12
- Alternative (machining all): $28 per part
- Total savings: $5,600
Startup lesson learned
A hardware startup needed 15 enclosure prototypes for investor demos. They insisted on stamping because “real products use stamping.”
What happened:
- Die cost: $3,800
- Parts made: 15
- Per-part cost including die: $256 each
- Timeline: 5 weeks (missed investor meeting)
What they learned: For very small batches, use rapid methods first. Save stamping for later rounds when design stabilizes and volumes increase.
Medical device decision
A surgical tool company needed 200 titanium prototypes for FDA testing. Material cost was high. Consistency was critical—test results had to be valid across all samples.
Why stamping won:
- Material utilization: 92% (versus 70% machining)
- Part-to-part variation: ±0.02mm (versus ±0.1mm manual)
- Cost per part: $45 (versus $78 machining)
- Testing validity: High confidence all parts represented production intent
What’s the Bottom Line on Stamping Prototypes?
Stamping and forming prototypes deliver real advantages when your volumes, timeline, and requirements align. You get exceptional dimensional accuracy—parts within ±0.02mm consistently. You produce prototypes fast once the die exists—50–200 parts per hour. You waste minimal material—85–95% utilization saves money on expensive metals. Your die lasts through multiple prototype rounds and into early production. But stamping requires upfront die investment and lead time. For very small batches (under 50 parts) or extremely tight timelines (under 2 weeks), other methods make more sense. Match the method to your specific needs, and stamping becomes a powerful tool for prototype development.
FAQ About Stamping and Forming Prototypes
Can stamping work for non-metal prototype materials?
Stamping primarily works with metals—steel, aluminum, copper, titanium. For rigid plastics, it may cause cracking. For rubber or flexible materials, other methods work better. If your prototype must match a production plastic part, consider injection molding or 3D printing instead.
How can I reduce die costs for small prototype runs?
Use prototype dies made from aluminum or 3D-printed materials instead of production-grade tool steel. These cost 30–50% less and work for 100–500 parts—plenty for most prototype programs. At Yigu Technology, we offer these options specifically for clients needing small-batch stampings without full production tooling investment.
Can I modify a stamping die if my design changes?
Minor changes—adjusting hole sizes by 0.1mm, adding small notches—can often be machined into existing dies. Major changes—different part shape, moved bend lines—require new dies. Our engineers evaluate proposed changes and advise whether modification or new tooling makes more economic sense.
Is stamping accurate enough for aerospace prototypes?
For most aerospace applications, yes. Stamping holds ±0.02mm tolerances, which meets requirements for brackets, housings, and many structural components. For flight-critical parts requiring ±0.005mm or tighter, precision machining remains the standard. An aerospace supplier we work with stamps prototype brackets for testing, then machines final flight hardware.
How many prototypes justify stamping over 3D printing?
The crossover point varies by part size and complexity, but generally around 50–100 parts. Below that, 3D printing’s zero-tooling advantage wins. Above that, stamping’s low per-part cost overtakes. A simple bracket might cross over at 50 parts. A complex housing might cross at 200 parts. We help clients calculate exact breakpoints for their specific parts.
What about surface finish on stamped prototypes?
Stamping produces the surface finish of the starting material plus any die characteristics. For most prototypes, this means as-rolled finish from the metal supplier—acceptable for testing. If you need polished or coated surfaces, those operations happen after stamping. The stamping process itself doesn’t degrade surface quality when proper dies and lubrication are used.
Discuss Your Projects with Yigu Rapid Prototyping
Unsure whether stamping and forming fits your prototype needs? At Yigu Rapid Prototyping, we help manufacturers navigate this decision daily. We’ve designed prototype dies for automotive startups needing 200 test parts. We’ve guided medical device companies through material selection for titanium prototypes. We’ve helped consumer electronics brands balance speed and cost across multiple design iterations. Tell us about your part geometry, required quantity, timeline, and budget. We’ll recommend the most efficient approach—whether stamping, machining, 3D printing, or hybrid methods—and provide a detailed quote within 24 hours. Contact our engineering team today to discuss your prototype project.