You can 3D print a stunningly accurate sports car model, from a sleek Lamborghini to a classic Porsche, by mastering a triad of precision printing, strategic customization, and professional-grade finishing. This technology shifts the hobby from assembling pre-made kits to true digital craftsmanship, allowing for unparalleled detail and personalization. Whether you’re a collector, hobbyist, or designer, this guide provides the actionable workflow to navigate common pitfalls and produce museum-quality displays.
Introduction: Beyond the Kit—The Allure of 3D Printed Automotive Models
For car enthusiasts, there’s a unique thrill in holding a perfect miniature replica. Yet, traditional model kits offer limited scales, fixed designs, and often lack the fine details that make a car iconic. 3D printing dismantles these barriers, offering unprecedented creative control. You can replicate a hypercar with microscopic accuracy, create a one-off custom version of your dream car, or even prototype an original design. However, achieving a flawless result requires moving beyond just pressing “print.” It demands a holistic understanding of design sourcing, material science, and meticulous post-processing. This guide is your roadmap through that entire journey, transforming digital files into tangible automotive art.
What Are the Core Advantages of 3D Printing for Car Models?
Why choose 3D printing over a store-bought kit or a commissioned hand-built model? The benefits are transformative for creators at any level.
- Unmatched Precision and Detail Fidelity: Modern resin (SLA/DLP) 3D printers can produce layer heights as fine as 0.01mm, capturing details like mesh grilles, intricate wheel spokes, and engine bay components that are impossible with injection molding at a small scale. This allows for true 1:24, 1:18, or even 1:8 scale accuracy.
- Total Customization and Personalization: This is the core of the appeal. You are not limited to existing designs. Modify a Ferrari 250 GTO to be a roadster, add a custom wide-body kit to a Nissan Skyline GT-R, or create a model of your own project car with accurate colors and decals.
- Access to Rare and Prototype Vehicles: Can’t find a model of the 2025 Tesla Roadster or a concept car like the Audi AI:ME? If you can find or create a 3D model, you can print it. This opens up a world of collecting and displaying vehicles unavailable through commercial channels.
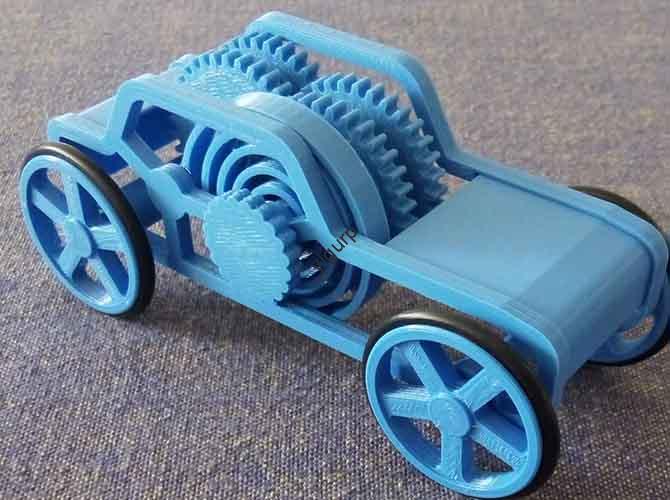
- Functional Integration and Iterative Design: For designers and engineers, 3D printing allows for functional prototyping. You can print models with removable parts (like hoods or doors), test aerodynamic shapes, or create assemblies that demonstrate suspension movement, providing tangible insights beyond a digital render.
How Do You Source or Create a High-Quality 3D Model?
The journey begins with a digital blueprint. The quality of your 3D model dictates the potential of your final print.
- Finding Ready-Made Models (The Fastest Route): Online marketplaces are treasure troves. Thingiverse and Cults3D offer many free files, while CGTrader and MyMiniFactory host premium, highly detailed models from professional designers. Always check reviews and look for images of printed results.
- Modifying Existing Models (The Middle Ground): Use software like Blender or Meshmixer to edit downloaded files. You can easily change wheel designs, add spoilers, or combine elements from different models to create your unique variant.
- Creating from Scratch (The Ultimate Challenge): For original designs or extreme accuracy, 3D modeling is essential. Fusion 360 is excellent for the clean, geometric lines of modern supercars, while Blender excels at organic curves. Start with orthographic blueprints as reference images. A critical tip: Always model at a 1:1 scale in your software and scale down in your slicer to avoid proportion errors.
Which Printing Technology and Material Should You Choose?
Your choice of printer and material is the most critical technical decision, balancing detail, strength, and cost.
Technology Showdown: FDM vs. Resin
| Feature | FDM (Fused Deposition Modeling) | Resin (SLA/DLP) |
|---|---|---|
| Best For | Larger models (1:18+), functional parts, lower cost per print. | Extreme detail (1:43, 1:24), smooth surfaces, intricate features. |
| Surface Finish | Visible layer lines; requires significant sanding for smooth finish. | Glass-like smoothness straight off the printer; minimal sanding needed. |
| Material Options | PLA (easy), ABS (durable), PETG (tough), TPU (flexible for tires). | Standard, Tough, Flexible, and Castable resins. |
| Post-Processing | Support removal, sanding, priming. | Mandatory: IPA washing & UV curing. Support removal, light sanding. |
| Expert Verdict | Ideal for chassis, bases, or large-display models where ultra-fine detail is secondary. | The unanimous choice for high-detail body panels, interiors, and small-scale replicas. |
Material Selection Guide:
- Resin (for Body/Details): Choose a Standard Gray or White Resin for easy painting. Tough Resin is better for thin parts like mirrors or antennas that might snap.
- FDM (for Structural Parts): PLA is fine for static displays. For handling or larger models, PETG offers better layer adhesion and impact resistance. Use TPU (95A Shore hardness) for realistic, flexible tires.
What Does the Professional Post-Processing Workflow Look Like?
This is where a good print becomes a great model. Rushing this stage ruins hours of printing work.
- Support Removal & Cleaning: For resin, remove supports before final curing. Use flush cutters and gently sand nubs. For FDM, carefully cut away supports, then use a deburring tool for clean edges.
- Sanding and Surface Perfection:
- Resin: Start with 400-grit sandpaper to remove support marks, then wet-sand up to 1000+ grit for a perfect finish. A priming spray will reveal any remaining layer lines or imperfections for final touch-ups.
- FDM: This requires more work. Start coarse (220 grit) to eliminate layer lines, moving progressively to 600+ grit. Filler primer is your best friend—spray, let dry, sand, and repeat until the surface is perfectly smooth.
- Painting and Detailing (The Art Stage):
- Priming: Always use a plastic-compatible primer (e.g., Tamiya Surface Primer) as a base coat. This ensures paint adhesion and provides a uniform color base.
- Base Coating: Use high-quality acrylic sprays (like Mr. Hobby or Tamiya) in thin, even coats. For metallics, a gloss black base coat makes colors like gold and silver “pop.”
- Detail Painting: Use fine brushes and acrylic model paints for calipers, interior details, and badges. Panel lining washes (dark enamel washes) are magic for accentuating door seams, hood lines, and grill details.
- Clear Coating: Protect your work with a clear coat. Use Gloss for a showroom finish, Satin for a classic look, or Matte for a modern, aggressive feel.
- Final Assembly and Detailing: Use cyanoacrylate (super glue) or epoxy for strong bonds. Add final details: apply water-slide decals (dipped in water and slid into place), use Bare-Metal Foil for chrome trim, and attach pre-printed photo-etched parts (like grilles or badges) for unmatched realism.
How Can You Solve Common Printing and Finishing Problems?
Even with planning, issues arise. Here’s a quick diagnostics table:
| Problem | Likely Cause | Solution |
|---|---|---|
| Warped Body Panels (FDM) | Insufficient bed adhesion, cooling too fast. | Use a heated bed, enclosure, and brim/raft. Ensure bed is perfectly leveled. |
| Brittle, Breaking Details (Resin) | Insufficient UV curing, or using standard resin for thin parts. | Ensure full curing (2-3 mins per side under a 405nm lamp). Use “Tough” or “ABS-Like” resin for delicate parts. |
| Visible Layer Lines After Painting | Insufficient sanding before priming. | Return to sanding. The surface must be smooth to the touch before the first primer coat. |
| Paint Looks “Orange Peel” | Spray paint applied too thickly, or from too far away. | Spray in light, quick passes 6-8 inches away. Multiple thin coats are always better than one thick coat. |
What Are the Next Frontiers? Lighting, Motion, and Advanced Display
To elevate your model to a masterpiece, consider these advanced techniques:
- Integrated Lighting: Drill micro-holes to embed SMD LEDs for headlights, taillights, and interior dash lighting, powered by a hidden button cell battery.
- Functional Elements: Model axles and bearings to allow rolling wheels. Design suspension that compresses. These features require precise tolerances (a 0.2mm gap for a snap-fit) and careful design.
- Diorama and Presentation: Create a custom base with a printed garage diorama, showroom floor, or race track segment. Proper presentation multiplies the visual impact of your model.
Conclusion: From File to Finish Line
3D printing a sports car model is a deeply rewarding fusion of technology and traditional modeling artistry. It empowers you to build what you can imagine, not just what you can buy. Success hinges on a deliberate process: selecting the right high-detail technology (resin), committing to the meticulous sanding and priming stages, and mastering scale model painting techniques. Start with a small, simple model to learn the workflow. As your skills grow, you’ll be equipped to tackle increasingly complex projects, each one a testament to your growing expertise and a stunning tribute to automotive design.
FAQ: Your Top 3D Printed Car Model Questions Answered
Q: What is the ideal scale for a first-time 3D printed car model?
A: A 1:43 or 1:24 scale model is perfect to start. It’s large enough to see and handle details but small enough to manage print time and material cost. Avoid extremely detailed 1:8 scale models for your first attempt.
Q: Can I legally sell 3D printed models of copyrighted cars?
A: This is a complex area of intellectual property. Printing a model of a Ferrari for personal use is generally acceptable. However, selling copies of a designer’s 3D model file or selling physical prints of a copyrighted design (like an exact replica of a 2024 McLaren) without licensing may infringe on trademarks and design patents. It is safest to sell your own original designs or obtain proper licenses.
Q: How do I achieve a perfect, glossy showroom paint finish?
A: The secret is in the preparation and final clear coat. After perfect sanding and a smooth primer, apply your color coat. Then, apply 2-3 light coats of a high-gloss clear coat (like Mr. Super Clear). Once fully cured for 24-48 hours, you can polish it with a fine modeling compound for a deep, mirror-like shine.
Q: My resin print feels sticky even after washing and curing. Why?
A: This is often due to insufficient washing. Uncured resin residue remains on the surface. Ensure you wash prints in fresh, clean isopropyl alcohol (99% is best) with gentle agitation. Consider a two-bath wash system: a dirty wash first, then a clean rinse. Ensure they are fully dry before UV curing.
Discuss Your Projects with Yigu Rapid Prototyping
Pushing the limits of what’s possible in a 3D printed model? When your project demands microscopic accuracy for a 1:8 scale hypercar interior, requires custom-engineered resins for specific flexibility or color, or involves complex multi-part assemblies that need precise jigs and fixtures, our engineering team can help. We specialize in high-resolution prototyping using industrial-grade PolyJet and SLA systems that capture details beyond desktop machines. From design for manufacturability (DFM) analysis to professional painting and finishing services, we provide an end-to-end solution for collectors, designers, and brands looking to create impeccable display models or functional prototypes. [Contact us] to discuss how we can bring your most ambitious automotive model project to life with precision and artistry.