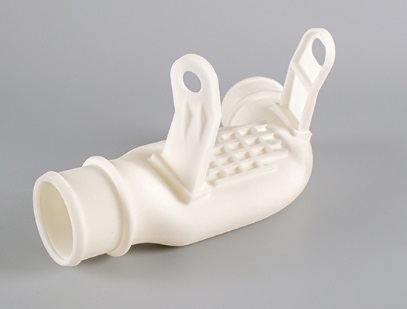
Stereolithography (SLA) 3D printing is renowned for its ability to produce parts with exceptional detail, smooth surface finishes, and high dimensional accuracy. It’s the go-to technology for intricate prototypes, jewelry masters, and dental applications. However, the path from a flawless digital model to a perfect physical part is paved with specific, non-negotiable precautions. Unlike more forgiving processes, SLA demands a disciplined, end-to-end approach where a single misstep—in design, resin handling, or post-processing—can lead to failed prints, wasted material, and frustrated users. This guide moves beyond basic setup instructions to deliver a professional-grade framework for SLA success. We’ll walk through the critical precautions that ensure print reliability, user safety, and optimal part quality, transforming this precise technology from a finicky tool into a predictable and powerful asset in your prototyping arsenal.
What Are the Non-Negotiable Rules for SLA-Ready 3D Design?
Designing for SLA isn’t the same as designing for FDM or SLS. It requires anticipating how liquid resin cures and how forces act on the model during and after printing.
How Do You Design Models That Won’t Warp or Break?
The core principle is managing internal stresses. As resin cures, it shrinks slightly. Uncontrolled, this shrinkage causes warping, cracking, or delamination.
- Wall Thickness is Paramount: The standard minimum wall thickness of 0.6mm is a starting point. For functional parts or those with large, flat surfaces, this is insufficient.
- For Load-Bearing or Large Flat Areas: Increase thickness to 2.5mm to 4mm. This provides rigidity and prevents “pillowing” or center sag. For example, a prototype housing for an electronic device should have walls of at least 2.0mm to withstand handling and assembly stress.
- Incorporate Gentle Fillets: Sharp 90-degree internal corners are stress concentrators. Adding a fillet radius of at least 1-2mm at these corners distributes stress and drastically reduces the risk of cracks originating from these points.
- Robust Feature Design:
- Columns and Pins: The 1mm minimum diameter rule is critical for features that are isolated. For pins that need strength, such as a hinge pin, increase the diameter to 2mm or more and consider adding a supporting gusset at the base.
- Holes and Voids: Horizontal holes smaller than 0.5mm in diameter may not print cleanly, as resin surface tension can bridge the opening. Design holes with a minimum diameter of 1.0mm for reliability.
Why is Orientation More Critical in SLA Than in FDM?
In FDM, orientation primarily affects strength due to layer adhesion. In SLA, it critically affects surface quality, support needs, and print success.
- The 45-Degree Rule (Revisited): Tilting the model at a 20-45 degree angle on the build plate isn’t just to reduce the cross-sectional area of each layer (minimizing peel forces), but also to improve the surface finish on critical faces. The “upward-facing” surfaces will be near-mirror smooth, while the “downward-facing” surfaces contacting supports will be rougher.
- Strategic Orientation for Function: A client needed a fluidic flow channel prototype with internal channels. Printing it vertically would have trapped uncured resin inside. We oriented it at 30 degrees with strategic drainage holes, ensuring all internal cavities could be fully cleaned and cured post-print. Always consider resin drainage paths when orienting hollow parts.
How Do You Select and Handle SLA Resins Like a Pro?
Choosing a resin is not just about “clear” or “tough.” It’s a materials science decision.
What’s the Real Difference Between Standard, Engineering, and Castable Resins?
| Resin Category | Key Properties & Chemistry | Ideal Applications | Critical Precaution |
|---|---|---|---|
| Standard/Visual | Fast-curing, low viscosity, high gloss. Typically Acrylate-based. | Display models, figurines, conceptual prototypes. | Brittle. Not for functional testing. Prone to yellowing with UV exposure over time. |
| Engineering (Tough/Durable) | Modified for higher impact resistance and elongation at break. Often urethane-acrylate hybrids. | Snap-fit enclosures, hinges, functional assemblies. | Requires longer exposure times and often heated printing environments (~30-40°C) for optimal properties. |
| High-Temp | Filled or formulated to have a High Heat Deflection Temperature (HDT), often >200°C. | Hot air/fluid fixtures, molds for low-temp casting. | Extremely brittle. Handle with care. Post-cure in a temperature-controlled oven is mandatory to achieve stated HDT. |
| Dental & Bio-Compatible | Certified (Class I/IIa), non-toxic post-curing. | Surgical guides, dental models, biocompatible prototypes. | Strictly follow manufacturer’s post-processing protocol (specific wash & cure cycles) to guarantee compliance. |
| Castable | Designed to burn out completely with zero ash residue at specific temperatures. | Jewelry investment casting, fine art metal casting. | Avoid water-based washing. Use only pure isopropyl alcohol. Any residue will cause casting defects. |
Why is Resin Handling and Storage a Safety and Quality Issue?
SLA resins are photopolymer chemicals, not simple plastics.
- Safety First – PPE is Mandatory: Always wear nitrile gloves (latex is permeable), safety goggles, and a lab coat/apron. Work in a well-ventilated area or, ideally, with a fume extractor. Many resins contain compounds that can cause contact dermatitis or respiratory irritation.
- Material Consistency is Key: Resin properties change with exposure and temperature.
- Shake, Don’t Stir: Before pouring, gently shake the resin bottle to re-mix any settled components. Avoid vigorous shaking to prevent air bubbles.
- Control Temperature: Ideal resin temperature is 25-30°C (77-86°F). Cold resin is viscous, leading to poor layer recoating and failed prints. Use a resin heater or warm the bottle in a warm water bath before use.
- Filter Used Resin: After a print, always filter uncured resin from the vat through a fine mesh filter (100-150 micron) back into the bottle to remove any cured debris that could scratch the FEP film or block the laser.
What are the Advanced Secrets to Flawless Printing & Post-Processing?
The machine settings and cleanup steps are where precision is won or lost.
How Do You Dial in Perfect Exposure Settings?
Calibration is not a one-time event. It’s required for each new resin, and even different colors of the same resin brand.
- Run the AmeraLabs Town or Cones of Calibration Test: These are industry-standard print tests. Don’t rely on generic printer profiles. Print a calibration model to determine:
- Normal Layer Exposure: The time needed to cure a standard layer to the correct depth.
- Bottom Layer Exposure: Typically 4-8 times longer than normal exposure to ensure a strong bond to the build plate. Too little causes detachment; too much makes removal difficult and can damage the FEP.
- Understand the “Burn-In Layers”: The first 4-10 layers use the extended bottom exposure. Ensure your slicer is correctly configured for this. A real-world example: For a tough resin requiring 8s normal exposure, we set bottom exposure to 45s for 6 layers to guarantee adhesion on a high-resolution build plate.
What Does a Fail-Safe Post-Processing Protocol Look Like?
Skipping or rushing post-processing is the most common reason for sticky, weak, or discolored prints.
- The Two-Stage Wash:
- First Wash (Dirty Bath): Remove supports before washing. Submerge the print in a primary IPA bath for 2-3 minutes with gentle agitation. This removes the bulk of uncured resin.
- Second Wash (Clean Bath): Transfer the print to a second, clean IPA bath for another 2-3 minutes. This ensures no resin film remains. For water-washable resins, use clean, distilled water to prevent contamination.
- Forced-Air Drying: Do not let parts air-dry. Use compressed air or a dedicated parts dryer to blow out resin from holes and crevices. Any trapped, uncured resin will weep out later and remain tacky.
- The Science of Curing: Post-cure under UV light is what gives the part its final mechanical properties.
- Use a Rotating Turntable: Ensures even exposure on all sides.
- Cure in Water: For clear or complex parts, submerging the part in water during curing (in a clear container) reduces surface oxygen inhibition, leading to a harder, fully cured surface. This technique, known as “water curing,” can cut cure times in half and improve surface quality.
- Avoid Over-Curing: Follow resin manufacturer times. Over-curing makes parts increasingly brittle. A typical range is 5-15 minutes per side in a 405nm UV curing station.
How Do You Maintain Your SLA Printer for Long-Term Reliability?
Preventive maintenance is cheaper than repair and catastrophic failure.
- FEP Film Management: The FEP is a consumable. Its clarity and tension dictate print quality.
- Inspect Before Every Print: Look for scratches, cloudiness, or imprints from previous prints.
- Replace Proactively: Change the FEP after 30-50 printing hours, or immediately if you notice consistent print failures or surface artifacts. A slack FEP causes “blooming” and dimensional inaccuracy.
- Laser/LCD Health Check: For laser-based SLAs, periodically check spot size and power. For LCD/MSLA printers, perform an LCD exposure test (without the vat) to check for dead pixels or uneven light. A single dead pixel will create a column of failed prints.
Conclusion
Achieving consistent, high-quality results with SLA 3D printing is a testament to disciplined process control. It transcends simply loading a file and pressing print. It’s about designing with resin behavior in mind, selecting materials based on engineered properties, and executing a meticulous, safety-conscious workflow from tank preparation to final UV curing. By internalizing these precautions—treating resin as a chemical, orientation as a strategic tool, and post-processing as a non-negotiable final step—you unlock the full potential of SLA. It becomes a reliable method for producing parts that are not just visually impressive, but also dimensionally precise and functionally robust, bridging the gap between prototype and end-use part with remarkable fidelity.
FAQ
What are the key size limits for SLA model design?
Beyond the standard 0.6mm wall, focus on feature robustness. Large flat areas need >2mm thickness, holes should be >1mm in diameter, and pins/columns require >1mm diameter with gussets for strength. Always add 1-2mm fillets to internal corners to prevent stress cracking.
How do I choose the right SLA resin for my project?
Match the resin’s chemical formulation to your part’s functional demands and post-processing environment. Use engineering resins for snap-fits, high-temp resins for thermal applications, and castables only for investment casting. Never use a standard resin for a functional test.
Why is post-processing so important for SLA prints?
Incomplete post-processing leaves uncured resin on and inside the part, leading to surface tackiness, weak mechanical properties, potential biocompatibility issues, and resin leaching over time. Proper washing and curing are not optional; they are the final, critical manufacturing steps.
My prints keep sticking to the FEP instead of the build plate. What should I check?
This is typically a bottom exposure or leveling issue. First, ensure your build plate is perfectly level. Then, increase your bottom layer exposure time by 5-10 second increments. Also, check that your FEP tension is correct and not overly worn.
How can I achieve the smoothest possible surface finish on my SLA prints?
Start with optimal orientation to minimize supports on cosmetic faces. After washing and before curing, consider light sanding with 600-800 grit wet sandpaper. For the ultimate finish, apply a thin coat of a clear, UV-resistant gloss or matte spray after curing. The water curing method also significantly enhances surface hardness and clarity.
Discuss Your Projects with Yigu Rapid Prototyping
Mastering SLA printing in-house requires a significant investment in time, equipment calibration, and material inventory. For critical prototypes or production runs where failure is not an option, partnering with experts can accelerate your timeline and guarantee results.
At Yigu Rapid Prototyping, our SLA production floor is a controlled environment. We don’t just run printers; we manage a precision manufacturing process:
- Material Science Expertise: Our engineers help you navigate our extensive resin library—from ABS-like and PP-like engineering resins for functional testing to specialized ceramics and high-temp materials—selecting the optimal one for your application’s mechanical, thermal, and aesthetic requirements.
- Process Precision: Every print benefits from our standardized workflow: pre-print file analysis for optimal orientation and support, temperature-controlled printing environments, and a rigorous, multi-stage post-processing protocol that includes ultrasonic washing and programmable UV curing.
- Finish with Finesse: We offer professional finishing services, including precision sanding, priming, painting, and even clear coating to deliver prototypes that look and feel like injection-molded products.
Need a perfect SLA part, guaranteed? Upload your 3D model to our secure platform for a free, detailed manufacturability analysis and instant quote. Let our expertise in precision additive manufacturing bring your most detailed designs to life.