Introduction
If you’re designing a bracket, an enclosure, or a surgical guide, circular openings are often critical for assembly, ventilation, or mechanical function. Getting these holes right in a prototype can be the difference between a successful test fit and a costly redesign cycle. Traditional methods like post-print drilling introduce error, while 3D printing builds the hole directly into the part. But how do you leverage this technology effectively? This guide cuts through the complexity. We’ll explore how to design for accuracy, tackle real-world applications, and solve common printing issues—equipping you to produce high-fidelity round hole prototypes that accelerate your development timeline.
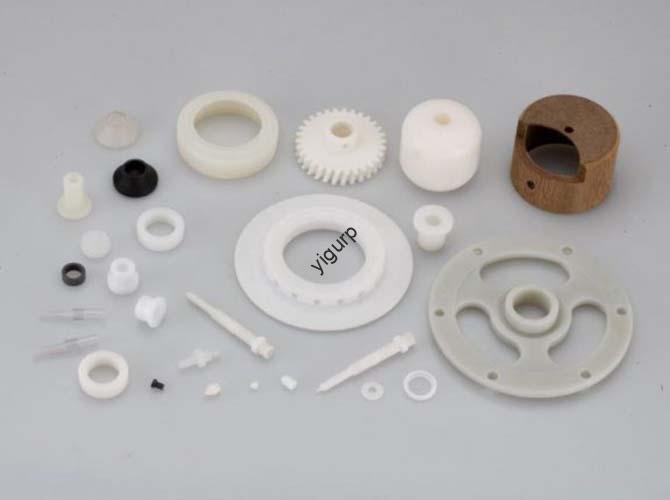
What Exactly Is a 3D Printed Round Hole Prototype?
A 3D printed round hole prototype is a functional or form-test model, manufactured additively layer by layer, that incorporates precisely defined cylindrical cavities or through-holes as an integral part of its geometry. Unlike subtractive methods, the hole is created during the build process by the printer’s toolpath, which omits material in the specified areas.
Think of it like constructing a brick wall with a window. Instead of building a solid wall and then laboriously cutting out the window (risking structural damage and misalignment), you simply leave the window space open as you lay each course of bricks. This “design-as-you-build” approach, driven by your digital CAD model, ensures the hole’s location, diameter, and orientation are exactly as intended from the first layer.
Why Choose 3D Printing for Round Hole Prototypes? Key Benefits Unveiled
Why has additive manufacturing become the go-to for prototyping components with holes? The advantages address the core trifecta of prototyping needs: speed, cost, and design fidelity. The following table contrasts 3D printing with conventional methods.
| Benefit | 3D Printed Round Hole Prototypes | Traditional Prototypes (Machining/Casting) | How It Solves Your Problem |
|---|---|---|---|
| Precision & Accuracy | Holes are built directly from the digital model, achieving tolerances as tight as ±0.1 mm with modern SLA/DLP printers. | Drilling can cause tool walk or misalignment (±0.5mm); casting may create flash or uneven edges requiring secondary machining. | Eliminates fit-test failures. A pin or bearing slides in as designed, saving hours of rework and uncertainty. |
| Development Speed | From CAD to part in hours to 2 days. Design iterations require only a software change and a new print job. | Requires tooling setup (molds, jigs) and machine scheduling, often taking 3-7 days per iteration. | Compresses design cycles. You can test a 10mm hole, find it needs to be 10.5mm, and have a new part in hand the next day. |
| Cost-Effectiveness | Near-zero setup cost and minimal material waste. Ideal for one-offs and small batches. | High upfront tooling costs (e.g., custom drill fixtures, molds) and significant material removal waste. | Democratizes prototyping. Startups and R&D teams can explore more design variants without blowing their budget. |
| Design Complexity | Enables complex hole geometries impossible with drills: internal channels, non-orthogonal angles, and holes in hard-to-reach areas. | Limited to holes accessible to drill bits or milling tools. Internal features often require part to be split and assembled. | Unlocks innovation. Prototype a single-part housing with integrated cooling channels or labyrinthine fluid paths for true functional testing. |
How Do You Design a Round Hole for 3D Printing? (Actionable Guidelines)
Merely drawing a circle in CAD isn’t enough. To ensure a hole prints accurately, you must design for the additive process. Here’s a breakdown of critical considerations.
What Are the Critical Design Parameters?
Four key parameters dictate the success of your printed hole:
- Hole Diameter: This is the nominal size. Always refer to your printer and material’s specification sheet for minimum feasible feature size.
- Hole Orientation: How the hole axis aligns with the build plate matters.
- Vertical Holes (Z-axis): Often have the best accuracy. The printer creates smooth, continuous perimeters.
- Horizontal Holes (parallel to build plate): Risk of sagging or elliptical distortion on the underside. Support structures may be needed, affecting surface finish.
- Wall Thickness (Annuius): The material thickness surrounding the hole. For load-bearing holes, ensure this is sufficient to prevent cracking. A common rule is to maintain a wall thickness at least equal to the hole’s diameter.
- Tolerance & Compensation (The “Hole Expansion” Trick): Fused Filament Fabrication (FFF/FDM) materials shrink as they cool. A 5.0mm designed hole may print at 4.8mm. Proactively oversize the hole in your CAD model by 0.1-0.3mm (a “horizontal expansion” compensation). Calibrate this value by printing a test block with holes of varying sizes.
Which 3D Printing Technology is Best for Holes?
Your choice of technology profoundly impacts the outcome.
| Technology | Best For Hole Sizes | Surface Finish | Key Consideration |
|---|---|---|---|
| FDM/FFF | ≥ 1 mm | Visible layer lines; may require post-processing. | Excellent for functional, load-testing prototypes. Use high-resolution settings and consider vase mode for clean through-holes. |
| SLA/DLP/LCD | Down to 0.2 mm | Exceptionally smooth, straight from the printer. | Ideal for high-detail prototypes (e.g., microfluidic channels, jig and fixture bushings). |
| SLS | ≥ 0.8 mm | Slightly grainy but isotropic (uniform in all orientations). | Perfect for complex, nested internal holes without supports, as the surrounding powder acts as natural support. |
What Are the Most Common Problems and How Do You Fix Them?
Even with good design, issues can arise. Here’s a troubleshooting guide based on real shop-floor experience.
Why Are My Holes Rough or Misshapen?
- Problem: Ragged edges, ellipsoidal holes (not round), or “stair-stepping” artifacts.
- Root Cause: Incorrect orientation, excessive layer height, or vibration during printing.
- Solutions:
- Reorient the Part: If strength allows, orient the hole axis vertically.
- Adjust Slicer Settings: Reduce layer height (e.g., to 0.1mm for FDM, 0.05mm for SLA). Enable “hole smoothing” or “arc welding” features if your slicer has them.
- Post-Process: For FDM parts, a light pass with a reamer or tumbling can smooth the interior. For resin parts, a quick wet sanding works wonders.
Why Did My Hole Shrink or Close Up?
- Problem: The printed hole is smaller than designed, or bridging fails on top of a horizontal hole.
- Root Cause: Material shrinkage (FDM cooling, resin curing) or insufficient cooling for bridging.
- Solutions:
- Design Compensation: As discussed, systematically oversize holes in your CAD model after calibration.
- Optimize Cooling: For FDM, ensure 100% fan speed when printing the layers that bridge the hole.
- Adjust Exposure (Resin): For resin printers, slightly reduce exposure time to limit overcuring and swelling of features.
How Can I Improve the Strength of a Hole?
- Problem: The area around the hole cracks under mechanical or fastener load.
- Root Cause: Stress concentration at sharp corners and anisotropic layer adhesion.
- Solutions:
- Add Fillets: Use a small fillet (0.5-1mm) where the hole meets the surface to distribute stress.
- Increase Perimeter Count: In your slicer, add 2-3 extra perimeters around the hole to create a stronger annulus.
- Consider Grain Direction (FDM): Print the part so that layer lines are not perpendicular to the expected tensile load on the hole.
How Are Industries Using These Prototypes Today? (Real Cases)
Beyond theoretical benefits, here’s how leading companies apply this technology.
- Automotive R&D: A tier-one supplier prototyped a composite battery tray with integrated cooling line ports. 3D printing allowed them to test 15 different hole geometries and gasket interfaces in two weeks, a process that would have taken months with machined aluminum prototypes. The final design improved coolant flow by 22%.
- Consumer Electronics: When designing a new high-end router housing, engineers needed to validate airflow and aesthetic alignment of numerous ventilation holes. Using SLA printing, they produced cosmetic prototypes where the honeycomb grill and mounting holes were perfectly formed, enabling both wind tunnel testing and focus group reviews with identical parts.
- Medical Device Development: For a minimally invasive surgical tool, developers printed prototypes with angled guide holes for sutures. The ability to iterate on hole angle and diameter weekly allowed for rapid surgeon feedback integration, leading to a 30% reduction in procedure time in simulated trials.
Conclusion
Mastering the 3D printed round hole prototype is more than a technical skill—it’s a strategic accelerator for product development. By understanding the interplay between design intention, printing technology, and material behavior, you can transform these critical features from sources of frustration into benchmarks of precision. The key takeaways are to always design with your specific additive process in mind, calibrate for shrinkage, and leverage the unique geometric freedom 3D printing offers. Embracing these principles ensures that your prototypes will not only look right on screen but will function perfectly in the real world, getting you to market faster and with greater confidence.
FAQ: 3D Printed Round Hole Prototypes
Q: What is the smallest reliable hole size I can 3D print?
A: It depends heavily on the technology. SLA/DLP resin printers can reliably produce holes down to 0.2 – 0.3 mm in diameter. Industrial FDM with a fine nozzle (0.25mm) can manage ~0.8-1.0mm holes, while desktop FDM is best kept at 1.2mm and above for consistency. SLS can handle sub-millimeter holes well due to its fine powder.
Q: How do I prevent bolts from loosening in 3D printed holes?
A: For functional testing with fasteners, avoid relying on the plastic’s thread-forming ability. Instead, design the hole to accept a threaded insert (heat-set, ultrasonic, or press-in). Alternatively, model a clearance hole for a bolt and nut combination. For permanent assemblies, use thread-forming screws designed for plastics and ensure adequate wall thickness.
Q: Can I tap threads directly into a 3D printed hole?
A: You can, but with caveats. Resin (SLA) parts are brittle and prone to cracking. FDM parts can be tapped if printed with high infill and a material like ABS or Nylon. The best practice is to oversize the pilot hole by 0.1-0.2mm versus the standard tap drill size to account for material compression and layer adhesion issues. For repeated assembly/disassembly, inserts are far superior.
Q: Are holes stronger in one print orientation vs. another?
A: Yes, due to anisotropy. A hole printed vertically (axis parallel to build plate) has its circumference made of continuous layers, which is strong against radial compression. However, its shear strength between layers may be weaker. A hole printed horizontally has layers running through its cross-section, which can better withstand certain shear loads but may split along layer lines under radial stress. Choose orientation based on the primary load case.
Discuss Your Projects with Yigu Rapid Prototyping
Struggling with a complex design featuring critical alignment holes or internal channels? At Yigu Rapid Prototyping, we combine industry-leading 3D printing technologies with deep design for additive manufacturing (DfAM) expertise. Our engineers can review your model, recommend optimal orientation and compensation values, and deliver a prototype that meets your exact functional specifications. From micro-detail resin parts to tough, load-bearing FDM components, we provide the precision and insight to de-risk your development process. Contact us today for a free design review and project quote.