Introduction
You need a prototype that’s more than a visual placeholder—it’s a functional, load-bearing component for a drone, a surgical guide, or a complex assembly jig. Dimensional accuracy, fine detail, and structural integrity are non-negotiable. While FDM plastics can feel “good enough,” their layer lines and anisotropic weakness are often unacceptable. This is where rigid photopolymer resins step into the spotlight, promising industrial-grade precision and strength. But is “rigid resin” a single solution, or a category with critical sub-types? How do you navigate the pitfalls of brittleness and post-processing to achieve reliable parts? This guide provides a technical, application-focused deep dive into 3D printing with rigid resins, moving beyond marketing claims to deliver a practical framework for selecting, processing, and troubleshooting these powerful materials.
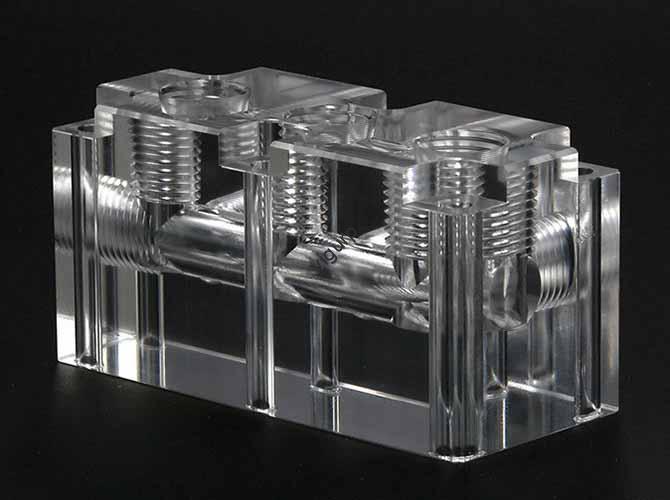
What Exactly is “Rigid Resin” in Technical Terms?
“Rigid resin” is a broad category of UV-curable photopolymers formulated for vat photopolymerization processes (SLA, DLP, LCD/MSLA). Unlike standard “castable” or “flexible” resins, rigid formulations are engineered to maximize elastic modulus (stiffness), tensile strength, and heat deflection temperature (HDT) after curing. The “rigid” designation primarily refers to a high Shore D hardness (typically >80D).
Think of it as the difference between window glass and safety glass. Both are rigid, but their molecular structure dictates how they fail under stress. Similarly, a “standard” rigid resin might be stiff but brittle, while an “engineering” or “tough” rigid resin incorporates chemical modifiers to improve impact resistance and elongation at break while maintaining high stiffness.
How Do You Choose the Right Rigid Resin for Your Application?
The term “rigid” is just the starting point. Performance varies dramatically based on chemistry. This comparison table is based on datasheets from leading industrial resin manufacturers like Liqcreate, Formlabs, and BASF.
| Resin Sub-Type | Key Performance Metrics (Typical) | Primary Application Sweet Spot | Critical Considerations |
|---|---|---|---|
| Standard Rigid (General Purpose) | Tensile Strength: 50-65 MPa HDT @ 0.45 MPa: 50-70°C Elongation at Break: 4-8% Izod Impact: 15-25 J/m | Visual and form-fit prototypes, masters for molding, architectural models. Good for parts that need to hold shape but not endure high stress. | Most cost-effective, but often the most brittle. Prone to cracking at thin wall sections or sharp internal corners. |
| High-Temperature / Heat Resistant | HDT @ 0.45 MPa: 120-220°C+ Tensile Strength: 45-60 MPa Often higher thermal stability. | Functional prototypes for hot environments: under-hood automotive ducts, lighting fixtures, heat-resistant jigs, mold inserts for short-run urethane casting. | May require specific, longer post-cure cycles (often at elevated temperature) to achieve stated HDT. Print parameters can be more sensitive. |
| Tough / Durable / Engineering | Tensile Strength: 40-55 MPa Elongation at Break: 20-50% Izod Impact: 50-80+ J/m | Functional assemblies: snap-fits, living hinges, enclosures, drill guides, load-bearing brackets. Combines stiffness with the ability to absorb energy. | The optimal choice for most functional prototypes. Sacrifices ultimate stiffness for much-needed toughness, dramatically reducing catastrophic failure. |
| Glass-Filled or Ceramic-Filled | Higher stiffness (Modulus), lower shrinkage, improved wear resistance. Surface feels more like a composite. | Stiff fixtures, wear pads, high-detail models needing exceptional dimensional stability. | Abrasive to tanks and FEP films. Requires more frequent FEP replacement. Can have a distinctive, slightly rough surface finish. |
What is the Critical End-to-End Workflow for Success?
Achieving consistent, high-quality parts requires a disciplined process that extends far beyond the printer.
How Do You Design for Rigid Resin’s Behavior?
Design rules differ from FDM. Key principles include:
- Avoid Stress Concentrators: Always fillet sharp internal corners. A 0.5-1mm radius can prevent cracks from propagating. This is the single most important DfAM rule for rigid resins.
- Manage Wall Thickness: Uniform wall thickness (recommended 2-3mm minimum for structural parts) prevents differential curing and shrinkage. For large flat surfaces, add ribs or gussets rather than making the entire wall thick.
- Optimize Orientation for Strength and Supports: Orient the part to:
- Minimize the cross-sectional area of each layer to reduce peel forces.
- Place critical, cosmetic, or load-bearing surfaces away from supports to avoid blemishes.
- Align the direction of expected tensile load along the XY plane (parallel to layers), not the Z-axis.
What Are the Non-Negotiable Post-Processing Steps?
Post-curing isn’t optional; it’s where the material achieves its final properties.
- Washing: A two-stage wash is best. First, a dirty IPA bath to remove bulk resin, then a clean IPA bath for a final rinse. For tough resins, consider an ultrasonic cleaner for complex geometries.
- Drying: Ensure the part is completely dry before curing. Residual solvent can inhibit full curing.
- Post-Curing: Use a controlled UV curing station (wavelength matched to the resin’s photoinitiator, typically 405nm). Rotating the part during curing ensures uniformity. Follow the manufacturer’s recommended time and temperature; some high-temp resins require a thermal post-cure in an oven to reach their full HDT.
- Post-Cure Annealing (Optional but Powerful): For high-temp resins, placing the cured part in an oven at a temperature just below its Tg for 1-2 hours can relieve internal stresses and increase crystallinity, improving heat resistance and dimensional stability.
What Are the Most Common Failures and Professional Solutions?
Even with good resin, failures occur. Here’s a diagnostic guide.
Why Do Parts Crack or Delaminate After Printing?
- Cause 1: Insufficient Supports / Incorrect Orientation. Large, flat layers create massive suction and peel forces, tearing the part from supports or separating layers.
- Solution: Reorient to reduce cross-section. Increase support density and contact point diameter. Use heavy supports strategically.
- Cause 2: Incomplete or Incorrect Post-Curing. The part has a “green state” weak core.
- Solution: Verify your UV cure chamber’s intensity and wavelength. Extend cure time. For thick parts (>10mm), cure in stages, flipping the part halfway.
Why is the Part Warping or Dimensions Inaccurate?
- Cause: Uncontrolled Curing Shrinkage. All resins shrink during polymerization (typically 2-4%). This is anisotropic—more shrinkage occurs within the layer (XY) than between layers (Z).
- Solution: This is a material property. Compensate in your CAD model if precision is critical. Use datasheet shrinkage values to scale the model. For production, a dialed-in process with a specific resin is needed to predict and compensate consistently.
How Do You Improve the Poor Surface Finish on Supported Surfaces?
- Cause: Support contact points leave “dimples” or roughness.
- Solution: In your slicer, reduce the support contact tip diameter (e.g., to 0.3mm) and increase the support contact depth slightly. This creates a smaller, more precise breakaway point. Sanding and priming is often still required for cosmetic surfaces.
Can You Share Real-World Use Cases?
Industry: Robotics & Automation
Challenge: A robotics integrator needed a custom end-of-arm tooling (EOAT) gripper to handle fragile glass panels. It required extreme precision to align with suction cups, high stiffness to prevent deflection, and light weight to maximize payload.
Solution:
- Material: A glass-filled rigid resin was chosen for its high modulus and low creep.
- Process: The gripper arm was printed on a large-format SLA printer, oriented vertically to maximize Z-axis strength for cantilevered loads. Critical mounting surfaces were designed to be support-free.
- Post-Processing: After washing, the part underwent an extended, heated post-cure to maximize mechanical properties. Mounting holes were tapped directly into the cured resin.
Outcome: The 3D printed gripper was 60% lighter than a machined aluminum alternative, reduced lead time from 3 weeks to 3 days, and performed flawlessly on the production line, validating the design for a subsequent metal version.
Conclusion
3D printing with rigid resin is a transformative technology for producing high-fidelity, functional prototypes and end-use parts that demand a combination of precision, stiffness, and fine detail unattainable with filament-based processes. Success, however, hinges on strategic material selection—choosing a “tough” resin over a “standard” one can mean the difference between a working prototype and a pile of shattered pieces. It demands respect for the unique constraints of photopolymer chemistry through smart design (fillet those corners!), meticulous process control, and thorough post-processing. When you match the resin’s inherent properties to the application’s mechanical requirements and follow a disciplined workflow, rigid resin printing moves from a promising technology to a reliable, industrial-grade manufacturing solution.
FAQ: 3D Printing with Rigid Resin
Q: How does the long-term UV stability of rigid resins compare to thermoplastics?
A: Most standard rigid resins have poor UV stability and will yellow and become more brittle with prolonged exposure to sunlight, as the UV light continues to drive unwanted polymerization and degradation. For outdoor applications, you must either: 1) Use a specifically formulated UV-stable resin (often marketed for dental or outdoor use), or 2) Apply a full-coverage, opaque paint or a UV-protective clear coat (e.g., a marine-grade spar varnish). ASA or PETG filaments generally offer better inherent UV resistance.
Q: Can rigid resin parts be tapped for threads or used with heat-set inserts?
A: Yes, but with important caveats. Tapping works well in tough/durable resins, creating clean, strong threads. In brittle resins, taps can cause cracking. Heat-set inserts are the superior method for durable, reusable threads. Use a low-temperature soldering iron tip (~200-250°C) and insert quickly to minimize the heat-affected zone. The resin must have sufficient heat deflection temperature to withstand the process without deforming.
Q: Is it possible to achieve a truly transparent/optical quality finish with rigid resin?
A: It is challenging and process-intensive. While “clear” resins exist, the layer-by-layer printing process, along with microscopic bubbles and light scattering from filler particles, prevents true optical clarity straight from the printer. To approach transparency, the part requires extensive post-processing: wet sanding through progressively finer grits (up to 2000+), followed by polishing with a progressive plastic polish and potentially a dip in a clear resin or coating. For true optical parts, CNC machining of acrylic or polycarbonate is often more reliable.
Q: What is the best way to bond rigid resin parts together or to other materials?
**A: For bonding resin-to-resin, a *specialized cyanoacrylate (CA) “plastic bonder”* or a two-part epoxy designed for plastics works best. Surface prep is key: lightly sand and clean with IPA. For bonding to metals or other plastics, a flexible, gap-filling epoxy is recommended to account for different coefficients of thermal expansion. Solvent welding (like with acetone for ABS) does not work with cured thermoset resins.
Discuss Your Projects with Yigu Rapid Prototyping
Navigating the world of high-performance resins requires more than just a printer; it requires material science expertise and process mastery. At Yigu Rapid Prototyping, we maintain a library of characterized rigid and engineering resins and have optimized print and cure parameters for each. We provide Design for Additive Manufacturing (DfAM) analysis to ensure your parts are oriented and supported for maximum strength and surface quality. Our post-processing lab includes industrial wash stations, controlled UV/thermal cure ovens, and finishing services to deliver parts that meet exacting specifications. Contact us for a consultation to determine if a rigid, tough, or high-temperature resin is the right solution for your next precision prototype or functional part.