If you’re moving beyond prototypes into functional, end-use parts, you’ve likely hit a wall with standard 3D printing plastics. PLA is too brittle. ABS warps and can’t handle chemicals. PETG lacks the stiffness. For parts that must survive on a factory floor, inside an engine bay, or in a demanding consumer product, 3D printing PA6 (Polyamide 6) is the engineered solution you need. This industrial-grade nylon bridges the gap between rapid prototyping and true manufacturing, offering a unique combination of strength, durability, and chemical resistance that other thermoplastics simply can’t match. Let’s dive into what makes PA6 a game-changer and how to harness its full potential.
Introduction
PA6, commonly known as Nylon 6, is a workhorse polymer in traditional manufacturing, used for everything from gears and bearings to electrical components. Bringing this material into the additive manufacturing space was a significant leap forward. 3D printing PA6 isn’t just about making a shape; it’s about producing a part that meets or exceeds the performance of its injection-molded counterpart. This guide is for engineers, product designers, and manufacturers who need parts that endure real-world stress. We’ll explore its superior properties, demystify the printing process, showcase transformative applications, and provide the hands-on knowledge to overcome its key challenge: moisture management.
What Makes PA6 the Superior Choice for Industrial 3D Printing?
The value of 3D printing PA6 lies in its balanced portfolio of mechanical and chemical properties. It’s engineered to perform under stress, not just look good on a shelf.
How Does PA6 Compare to Common 3D Printing Plastics?
To understand its advantage, a direct comparison is essential. PA6 occupies a unique position in the material property landscape.
| Property | 3D Printing PA6 (Nylon 6) | ABS | PETG | PLA |
|---|---|---|---|---|
| Tensile Strength | High (~60 MPa) | Moderate (~40 MPa) | Moderate (~50 MPa) | Low (~50 MPa, but brittle) |
| Impact Resistance | Excellent (High Toughness) | Good | Moderate | Poor (Brittle) |
| Heat Deflection Temp | High (~120°C @ 0.45 MPa) | Moderate (~100°C) | Low (~70°C) | Very Low (~55°C) |
| Chemical & Oil Resistance | Excellent | Poor (Attacked by oils) | Good | Poor |
| Wear & Friction | Excellent (Low Coefficient) | Moderate | Moderate | Poor |
| Dimensional Stability | Good (Shrinkage ~1.5%) | Poor (High Warp) | Good | Very Good |
| Primary Advantage | All-Round Durability | Cost & Ease of Print | Chemical & Clarity | Ease of Printing |
Key Takeaway: PA6 doesn’t have a single “best” property; it has no weak properties. This balance makes it uniquely suited for functional applications where multiple stresses (mechanical, thermal, chemical) are present simultaneously.
What Are the Core Mechanical and Chemical Advantages?
Let’s break down the specific advantages that translate to real-world performance:
- High Strength-to-Weight Ratio: PA6 parts are strong yet lightweight, a critical advantage for automotive and aerospace components where reducing mass directly improves efficiency. A 3D printed PA6 bracket can often replace a machined aluminum one at a fraction of the weight.
- Outstanding Toughness and Fatigue Resistance: Unlike brittle materials, PA6 can absorb impact and flex repeatedly without cracking. This makes it ideal for living hinges, snap-fit closures, and vibration-dampening mounts. It withstands the cyclic loading that would cause other printed plastics to fail.
- Superior Wear Resistance and Low Friction: PA6 has a naturally low coefficient of friction and resists abrasion. This is why it’s the traditional choice for gears, bushings, rollers, and conveyor components. A 3D printed PA6 gear will outlast an ABS gear by orders of magnitude.
- Resistance to Oils, Fuels, and Chemicals: This is a decisive factor for industrial and automotive use. PA6 parts can be used in lubricated assemblies, near hydraulic fluids, and in environments with mild solvents without degrading or swelling, unlike many other thermoplastics.
How Do You Successfully 3D Print with PA6?
Printing with PA6 requires more attention than standard filaments, but the process is straightforward with the right setup and knowledge.
Which 3D Printing Processes Are Compatible?
PA6 is versatile, but the process defines the part’s characteristics.
- Fused Deposition Modeling (FDM): The most accessible method.
- Requirements: An all-metal hotend (capable of 260-280°C) and a heated bed (85-100°C) are non-negotiable. An enclosed chamber is highly recommended to minimize warping from drafts and maintain a consistent ambient temperature.
- Best For: Functional prototypes, jigs, fixtures, and end-use parts that benefit from layer adhesion strength and ease of use.
- Selective Laser Sintering (SLS): The industrial gold standard for PA6.
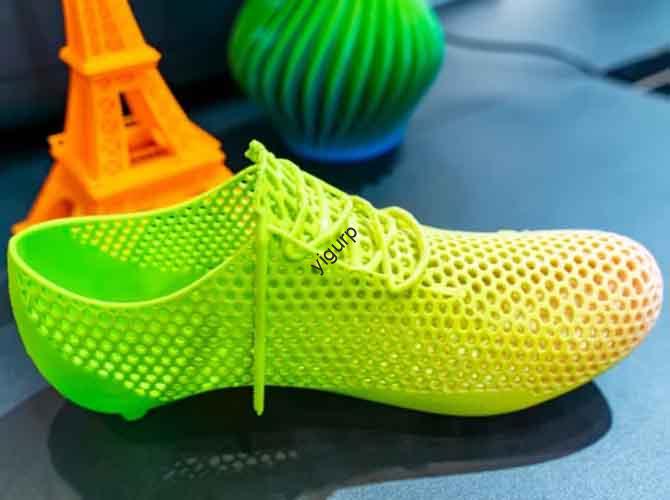
- How it Works: A laser fuses PA6 powder into solid parts. The unsintered powder acts as a natural support, enabling incredibly complex, monolithic geometries impossible with FDM.
- Best For: Production runs of complex parts, ducts, housings with integrated lattices, and components requiring isotropic strength (equal strength in all directions).
What Are the Critical Printing Parameters and Post-Processing Steps?
For FDM Printing, follow this checklist:
- Material Drying (THE MOST IMPORTANT STEP): PA6 is hygroscopic. Printing with wet filament guarantees weak, bubbly parts. Dry virgin or exposed spools at 80°C for 6-8 hours in a dedicated filament dryer. Store in a sealed container with desiccant.
- Bed Adhesion: Use a garolite (G10/FR4) or PEI spring steel sheet. These surfaces, when clean and heated to 90°C, provide excellent adhesion for PA6. A light application of PVA-based glue stick can act as a release agent for tricky parts.
- Print Settings:
- Nozzle Temp: 260-275°C
- Bed Temp: 85-100°C
- Enclosure Temp: 40-50°C (if adjustable)
- Print Speed: 40-60 mm/s for quality
- Cooling Fan: 0% for the first 5+ layers, then 30% max. Too much cooling kills layer adhesion and promotes warping.
Post-Processing for Performance:
- Annealing: To relieve internal stresses and improve heat resistance, parts can be annealed in an oven. Slowly heat to 150°C in a low-temperature oven, hold for 1 hour per 1mm of wall thickness, and allow to cool slowly inside the oven. This can increase the HDT by 10-20°C.
- Conditioning: For maximum impact resistance, some users “condition” parts by submerging them in water for a few days. This allows the PA6 to reach equilibrium moisture content, increasing its toughness.
Where Does 3D Printing PA6 Excel? Real-World Use Cases.
The proof is in the application. Here’s where 3D printing PA6 is solving real engineering challenges.
Case Study 1: Automotive Under-Hood Component
- Problem: A luxury car manufacturer needed a custom engine bay cable management clip. The clip had to withstand sustained temperatures of 110°C, exposure to motor oil, and constant vibration.
- Solution: They switched from a multi-part assembled clip to a single, complex-geometry clip printed via SLS in PA6.
- Outcome: The 3D printed PA6 part reduced assembly time, survived validation testing (thermal cycling, chemical exposure, vibration), and cut the per-part cost by 40% compared to the low-volume injection molding alternative. The chemical resistance of PA6 prevented degradation from oil splatter.
Case Study 2: Custom Industrial Tooling
- Problem: A factory producing composite panels needed a custom, curved vacuum-forming mold. Traditional aluminum machining was prohibitively expensive and time-consuming for a short production run.
- Solution: A large-format FDM printer was used to print the mold tool in carbon-fiber reinforced PA6.
- Outcome: The mold was printed in 72 hours, post-processed, and put directly into service. The high heat deflection temperature and rigidity of reinforced PA6 allowed it to withstand the 130°C forming cycles for over 500 parts, paying for itself after the first 50 panels.
Application Matrix by Industry:
| Industry | Typical Parts | Why PA6 is the Best Fit |
|---|---|---|
| Automotive & Motorsports | Ducts, brackets, fluid reservoirs, cable guides | Heat & oil resistance, high strength-to-weight ratio. |
| Industrial Machinery | Gears, wear pads, guides, housings, clamps | Superior wear resistance, durability, and chemical stability. |
| Consumer Goods | Power tool housings, sporting goods, high-stress mounts | Excellent impact toughness and fatigue resistance for long product life. |
| Aerospace & Drones | Ducting, unmanned vehicle components, interior brackets | Lightweight, strong, and capable of meeting stringent performance specs. |
What Are the Challenges and How Do You Solve Them?
The primary challenge with PA6 is its hygroscopic nature. However, this is a manageable engineering problem, not a deal-breaker.
The Moisture Management Protocol:
Think of PA6 as a technical material that requires a controlled workflow:
- Supply Chain Control: Source from reputable suppliers who vacuum-seal their filament with desiccant. Upon arrival, immediately transfer to a climate-controlled dry storage.
- In-Line Drying: For critical prints, use a dryer that feeds directly into the printer’s extruder. Devices like the “PrintDry” or “EIBOS” series maintain filament at 70-80°C during the entire print, eliminating mid-print moisture absorption.
- Post-Print Storage: For parts used in dimensional-critical applications, note that they will absorb ambient moisture and grow very slightly (typically <0.5%). If absolute dimensional stability is required, store finished parts in a controlled environment or apply a protective coating.
Other Considerations:
- Warping: Mitigated by using an enclosure, a proper build surface, and ensuring the first layer is perfectly laid down.
- Cost: PA6 filament is 2-3x the cost of PLA. However, this is a total cost equation. When you factor in the performance, longevity, and potential to consolidate assemblies into single printed parts, the value proposition becomes clear for functional applications.
The Future and Professional Perspective on PA6
3D printing PA6 represents the maturation of additive manufacturing into a true production technology. The future lies in advanced composites (PA6 with carbon, glass, or aramid fibers) and tailored material grades (flame-retardant, FDA-compliant, or ESD-safe versions) specifically formulated for 3D printing.
At Yigu Rapid Prototyping, we view PA6 not as a material, but as a manufacturing strategy. We’ve deployed it to solve client problems ranging from low-volume production of end-use aerospace brackets to custom, high-wear guides for packaging machinery. Our industrial SLS systems produce parts with the isotropic strength and complex geometries that fully leverage PA6’s potential, while our advanced FDM capabilities allow for large-format, reinforced tooling and fixtures. We manage the entire ecosystem—from material sourcing and drying to optimized print parameter development and post-processing—to deliver parts that are truly production-ready.
Conclusion
Choosing 3D printing PA6 is a decision to build for the real world. It moves your projects out of the realm of demonstration models and into the domain of functional, reliable components. By understanding its superior balance of properties, respecting its need for a controlled printing process, and applying it to the right challenges—from under-hood automotive parts to rugged industrial tooling—you unlock a new tier of capability in additive manufacturing. It demands more expertise than standard filaments, but the reward is a part you can trust to perform when it matters most.
FAQ
Q: Is 3D printed PA6 as strong as injection-molded PA6?
A: SLS-printed PA6 can achieve nearly identical mechanical properties to molded PA6, especially after post-processing like thermal annealing. FDM-printed PA6 is generally slightly weaker, particularly in the Z-axis (layer adhesion), but with optimal printing conditions and annealing, it can reach 85-90% of the strength of molded parts, which is sufficient for a vast range of functional applications.
Q: Can I print PA6 on my standard Ender 3 printer?
A: It is possible but requires significant upgrades. You must install an all-metal hotend, a capricious bowden tube or direct drive system rated for high temps, and ideally build an enclosure. The stock PTFE-lined hotend will off-gas toxic fumes above 240°C and is unsafe for PA6’s required temperatures. A robust printer like a Prusa i3 MK3/S (with an enclosure) or a dedicated engineering printer (like a Qidi Tech X-Max) is a more reliable starting point.
Q: How does carbon fiber or glass fiber reinforcement change PA6?
A: Reinforcements transform the material profile. Carbon Fiber (CF) increases stiffness (modulus), reduces weight, minimizes warping, and improves dimensional stability, but can reduce impact toughness slightly. Glass Fiber (GF) increases tensile strength and heat deflection temperature significantly. Both reinforcements create abrasive filament that requires a hardened steel or ruby nozzle to prevent rapid wear of a standard brass nozzle.
Q: Is PA6 food-safe or biocompatible for medical use?
A: Virgin, unfilled PA6 resin can be certified as food-safe and is used in food processing equipment. However, 3D printing introduces complications: layer lines can harbor bacteria, and colorants/additives may not be certified. For medical implants, specific grades of PA (like PA12) are more common and require stringent biocompatibility certification (ISO 10993). Never assume a 3D printing filament is food-safe or biocompatible without explicit certification from the manufacturer.
Q: What’s the difference between PA6 and PA12 (Nylon 12) for 3D printing?
A: PA12 is generally easier to print (lower moisture absorption, less warping) and has better elongation at break (toughness), making it great for snap-fits and living hinges. PA6 typically offers higher tensile strength, stiffness, and a higher melting point, making it better for rigid, load-bearing parts in hot environments. PA12 is often the default for SLS, while PA6 is a high-performance choice for demanding FDM and SLS applications.
Discuss Your Projects with Yigu Rapid Prototyping
Pushing the limits of what a 3D printed part can do requires the right material and the right partner. If your project demands the strength, thermal resistance, and durability of industrial-grade PA6, our engineering team is equipped to guide you from design to delivery. We specialize in high-performance SLS and advanced FDM printing with PA6 and its composites, ensuring optimal parameters for your specific application. Whether you need a short-run production of end-use components, complex jigs and fixtures, or a prototype that can withstand real-world testing, we provide the material expertise and manufacturing precision to make it a reality. Contact us today for a consultation and see how PA6 can solve your toughest design challenges.