Introduction
You’re designing a fluid manifold, an electronics enclosure, or a surgical guide. Your design isn’t just a solid block; it’s a network of critical apertures—holes for bolts, vents, wiring, or fluid paths. Getting these holes right in a prototype is often the make-or-break factor for fit, function, and assembly. Traditional methods like post-print drilling are fraught with risks: misalignment, breakout burrs, and induced stress. Additive manufacturing promises to build these complex, perforated geometries in one go. But how do you move from promise to reliable, repeatable results? This guide provides a manufacturing-focused deep dive into the design principles, process nuances, and proven solutions for creating flawless, functional multi-hole prototypes that accelerate your development cycle.
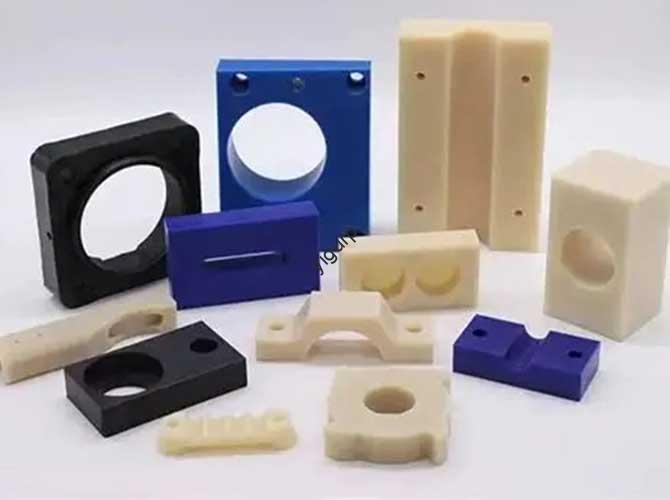
What Defines a Functional Multi-Hole Prototype?
A 3D printed multi-hole prototype is more than a part with several openings. It’s a pre-production validation model where the positional accuracy, dimensional consistency, and cylindrical integrity of multiple holes are as critical as the part’s overall geometry. These holes serve distinct, high-stakes purposes:
- Assembly Interfaces: Holes for fasteners, pins, or bearings that must align with mating parts within tight tolerances (often ±0.1mm or better).
- Fluid or Airflow Management: Holes acting as nozzles, vents, or channels where surface finish and diameter consistency directly impact performance (e.g., pressure drop, flow rate).
- Electrical and Mechanical Pass-Throughs: Holes for wiring, shafts, or sensors that require specific clearance fits and smooth edges to prevent wire chafing or binding.
- Weight Reduction & Structural Lattices: An array of holes forming a lightweight, optimized structure where the pattern’s fidelity affects mechanical properties.
The shift from subtractive to additive creation of these features eliminates secondary operations but introduces new design-for-manufacturability (DfAM) challenges unique to layer-based fabrication.
How Should You Design for Multi-Hole Accuracy from the Start?
Success is determined at the CAD stage. Generic modeling often fails; you need hole-optimized design strategies.
What Are the Critical Design Parameters for Holes?
Every hole in your design should be defined by a checklist of intent:
- Hole Type: Through-hole vs. Blind Hole. Blind holes need special attention to bottom flatness and depth accuracy, which can be affected by resin meniscus or FDM nozzle pressure.
- Diameter & Tolerance: Never use the nominal size. For a press-fit pin, you might design with a 0.05mm interference. For a sliding fit, you need a 0.1-0.2mm clearance. Always reference material-specific shrinkage data.
- Edge Treatment: A simple 90-degree edge is a stress concentor and prone to chipping. Always add a slight chamfer (0.2-0.5mm) or fillet at hole entries and exits. This dramatically improves durability and aids in post-processing.
- Wall Thickness Between Holes: The “web” or “bridge” of material between adjacent holes must be sufficient. A good rule of thumb is to maintain a minimum wall thickness equal to the hole’s diameter or 1.5mm, whichever is greater. This prevents cracking and ensures structural integrity.
How Does Print Orientation Dictate Hole Quality?
The orientation of the hole axis relative to the build plate is the single most important manufacturing decision.
- Vertical Holes (Hole axis parallel to Z/build direction):
- Advantage: Best cylindrical accuracy. The hole is formed by the perimeter of each layer, like stacking washers.
- Disadvantage: “Stair-stepping” on the inner wall. While the diameter is accurate, the surface may have fine ridges.
- Best for: Holes where dimensional fit is more critical than a perfectly smooth bore.
- Horizontal Holes (Hole axis parallel to build plate):
- Advantage: Smoinner internal surface. The curved roof of the hole is formed in a continuous arc within a single layer.
- Disadvantage: Potential for sagging or elliptical distortion on the bottom half of the hole, and requires supports which leave blemishes.
- Best for: Holes where low-friction fluid flow is critical, and you are willing to remove supports and possibly ream the hole.
Pro Tip: For a critical through-hole, orient the part so the hole prints vertically. For a critical blind hole, orient it so the closed end is at the top, avoiding pooled uncured resin or a drooping “roof.”
Which Materials and Processes Deliver the Best Results?
Your choice of technology and material is a trade-off between precision, strength, and cost.
| Process | Best Suited For Hole Type | Key Advantages for Holes | Primary Challenge & Mitigation |
|---|---|---|---|
| FDM/FFF (with PLA, ABS, PETG, Nylon) | Holes > 1.5mm diameter. Functional prototypes needing toughness. | Low cost, good mechanical properties. Excellent for thread-forming and load-bearing fastener holes. | Dimensional Shrinkage & Warping. Mitigate by: Designing with horizontal expansion compensation (e.g., +0.2mm), using an enclosure for even heat, and choosing low-warp materials like PETG. |
| SLA/DLP/LCD (with Standard, Tough, or Castable Resins) | Holes down to 0.3mm diameter. High-detail models, casting patterns, visual masters. | Superior surface finish, exceptional feature resolution. Holes are smooth and accurate right off the build plate. | Support Removal & Brittleness. Mitigate by: Using miniature supports and hot water for removal; applying a flexible resin coating to edges to prevent chipping during use. |
| SLS (with Nylon 11/12) | Complex, internal, or interlocking holes without supports. Deep blind holes. | No supports needed. Isotropic strength means holes are equally strong in all directions. Ideal for lattice structures and conformal channels. | Grainy Surface Finish. The sintered powder texture can increase friction. Mitigate by: Vibratory tumbling or abrasive flow machining to smooth bore interiors. |
| Metal (SLM/DMLS) (with Aluminum, Stainless) | End-use parts. Holes for high heat, pressure, or precision bearings. | Full metal strength and thermal properties. Holes can be finished to a mirror polish or directly tapped. | Thermal Stress & Support Removal. Mitigate by: Designing with oversized diameters to allow for CNC reaming or honing as a standard post-process. Supports are welded metal and require EDM removal. |
What Are the Most Common Failures and How Do You Fix Them?
Even with good design, issues occur. Here’s a troubleshooting guide based on production floor experience.
Why Are My Holes Elliptical or Out-of-Round?
- Cause: For FDM, this is often inadequate cooling or vibration (ringing). For resin, it can be peel forces during layer separation.
- Diagnostic: Measure the hole with calipers in the X and Y axes of the printer.
- Solution:
- Increase Cooling (FDM): Max out your part cooling fan for all layers. Consider a minimum layer time to ensure small holes cool.
- Reduce Acceleration/Jerk (FDM): Lower these settings in your slicer to minimize vibration.
- Adjust Lift Speeds (Resin): Slower lift speeds can reduce peel forces on delicate hole perimeters.
Why Do Small Holes Keep Clogging or Failing to Print?
- Cause: The bridging over the hole fails, or in resin printing, suction forces trap uncured resin inside.
- Solution:
- Design Aid: For holes smaller than 2mm, consider designing them as hexagons or teardrops in the model. The flat edges bridge more easily.
- Slicer Settings (FDM): Enable “bridge settings” with slower speed and higher cooling. Ensure “hole horizontal expansion” is not making the hole too small.
- Resin Printing: Add a tiny “vent” or “drain” hole (0.5mm) connecting the blind hole to the outside or build plate to break suction.
How Do You Manage Threads in 3D Printed Holes?
- Best Practice: Do not rely on 3D printed threads for functional prototypes. They are weak and wear quickly.
- Professional Solutions:
- Print a Clearance Hole and use a nut and bolt.
- Design for a Heat-Set or Ultrasonic Insert. Print the hole to the insert manufacturer’s recommended size (often requires a pilot hole and a counterbore).
- Tap the Hole Post-Print. This works well for SLA resins and SLS Nylon. Use standard tap drill sizes, but be prepared for chips in FDM parts.
Can You Share a Real-World Application Case?
Industry: Aerospace Fluid Manifold
Challenge: A manufacturer needed to prototype a fuel manifold with 12 intersecting fluid ports of varying diameters (3mm to 8mm). The internal channels were complex, and leak-proof integrity at each port interface was critical.
Solution & Workflow:
- Design: The part was designed in CAD with chamfered port entries and alignment features. Holes were oversized by 0.15mm to account for resin shrinkage.
- Process: Printed on a large-format SLA printer using a tough, chemically resistant resin. The part was oriented to print all major ports vertically.
- Post-Processing: After washing and curing, the ports were lightly reamed with a precision tool to ensure perfect roundness and remove any residual support marks. The part was then pressure tested successfully to 200 PSI.
Outcome: The 3D printed prototype validated the design’s hydraulic performance and assembly fit in 5 days, compared to 4 weeks for a machined aluminum prototype, saving over $15,000 in tooling and machining costs for the iteration.
Conclusion
Mastering 3D printed multi-hole prototypes is a cornerstone of modern rapid product development. It requires a mindset shift from designing for machining to designing for additive layer adhesion, thermal effects, and support-free geometries. By strategically orienting your part, compensating for material behavior, selecting the right technology, and implementing smart post-processing, you can transform these challenging features from points of failure into testaments to precision. The goal is no longer just to make a hole, but to produce a functional interface that accelerates testing, reduces iteration time, and delivers unwavering confidence in your final design.
FAQ: 3D Printing Multi-Hole Prototypes
Q: What is the smallest reliable hole size I can 3D print?
A: It depends entirely on the process. High-resolution SLA/DLP can produce clean, open holes as small as 0.3mm. FDM can manage ~0.8mm holes with a 0.25mm nozzle, but reliability drops due to bridging issues. SLS can do ~1mm holes, but powder may partially sinter inside, requiring cleaning. Always conduct a test print with a calibration model for your specific machine and material.
Q: How do I ensure multiple holes align perfectly between two separate printed parts?
A: Design in datums and alignment features. Do not rely solely on hole patterns. Add dowel pin holes or interlocking tongue-and-groove features to your CAD model. Print these alignment features as part of both components. This ensures that even if there is minor hole shrinkage, the parts will align correctly, and the fasteners will pass through.
Q: Can I print a hole that is perfectly smooth without post-processing?
A: For most processes, no. SLA offers the smoothest “as-printed” finish, but may still have micro-ridges. For a true polished bore (e.g., for a pneumatic cylinder), you must plan for post-processing. Reaming (for straight holes) or ball burnishing are effective for plastics and resins. For metals, honing is standard.
Q: How does infill affect the strength of a hole’s surrounding material?
A: Significantly. A hole is a stress concentrator. If the infill is low (e.g., 20%), the thin shells around the hole can easily crush or deform under load from a fastener. For any hole that will bear mechanical load, use a high infill density (80-100%) or, better yet, use slicer settings to add extra perimeters (5-6) around the hole. Some advanced slicers allow you to create localized reinforcement zones around specific features.
Discuss Your Projects with Yigu Rapid Prototyping
Navigating the intricacies of multi-hole prototype design and production requires expertise. At Yigu Rapid Prototyping, we combine advanced manufacturing technology with deep DfAM engineering insight. We can analyze your design for potential hole-related issues, recommend the optimal orientation and material, and execute the print with calibrated parameters to ensure first-time success. Our capabilities include micro-resolution SLA for tiny, precise holes, industrial FDM for tough, functional parts, and comprehensive post-processing services like precision reaming and threading. Let us help you turn your perforated designs into flawless, functional prototypes. Contact us for a design review and project quote today.