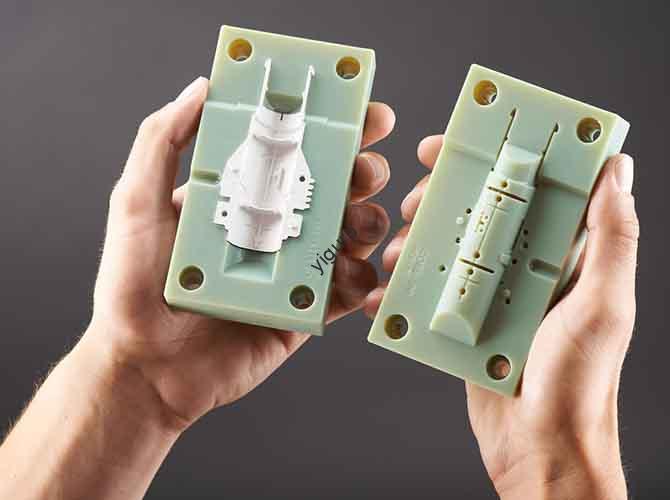
In today’s fast-paced manufacturing world, how can businesses cut production time, reduce costs, and still meet high customization demands? The answer lies in 3D printing fixtures—specialized tools made via 3D printing to support, hold, and position workpieces during industrial processes. Unlike traditional fixtures, these tools combine precision, flexibility, and efficiency, making them indispensable in key sectors like aerospace and medical manufacturing. Below is a comprehensive guide to understanding, designing, and leveraging 3D printing fixtures.
1. What Are 3D Printing Fixtures, and Why Do You Need Them?
At their core, 3D printing fixtures are custom-manufactured tools created using 3D printing technology for specific industrial operations (e.g., sintering, assembly, or inspection). They solve three critical pain points of traditional fixtures:
| Pain Point of Traditional Fixtures | Solution from 3D Printing Fixtures |
| Long production cycles (4–8 weeks) | Shortened lead time (3–7 days) |
| High cost for small-batch orders | 30–50% lower manufacturing costs |
| Rigid design (hard to modify) | Fully customizable for unique workpieces |
For example, a medical device manufacturer once struggled to produce small-batch fixtures for orthopedic implant sintering. By switching to 3D printing, they reduced fixture production time from 6 weeks to 5 days and cut costs by 40%—all while ensuring the fixtures matched the implants’ exact shapes.
2. Step-by-Step Workflow: From Design to Deployment
Creating effective 3D printing fixtures follows a linear, four-stage process. Each step is critical to ensuring the final fixture meets performance and precision requirements.
Stage 1: Custom Design & Optimization
- Needs Analysis: First, define the fixture’s purpose (e.g., high-temperature sintering or delicate electronic assembly) and the workpiece’s specs (size, material, weight).
- CAD Modeling: Use software like SolidWorks or AutoCAD to build a 3D model tailored to the workpiece. For instance, a fixture for a titanium aerospace part would include grooves to match the part’s curved surface.
- Model Optimization: Adjust the design to fit 3D printing constraints—add fillets to reduce stress, optimize wall thickness (usually 2–5mm for durability), and avoid overhangs that require extra support.
Stage 2: Material Selection (The Make-or-Break Choice)
Choosing the right material ensures the fixture performs in its intended environment. Key factors include thermal stability, wear resistance, and compatibility with the workpiece.
| Material Type | Key Properties | Ideal Applications |
| Ceramic | High-temperature resistance (up to 1,600°C), low thermal expansion | Powder metallurgy sintering |
| Metal (e.g., aluminum, stainless steel) | High strength, wear resistance | Aerospace part assembly, heavy-load holding |
| Graphite | Excellent thermal conductivity, chemical inertness | High-precision electronic component processing |
Pro Tip: Always match the fixture’s thermal expansion coefficient to the workpiece. For example, if the workpiece is made of stainless steel (thermal expansion coefficient: 17.3 × 10⁻⁶/°C), choose a stainless steel fixture to avoid warping during heating.
Stage 3: 3D Printing Execution
- Print Preparation: Import the optimized CAD model into slicing software (e.g., Cura). Set parameters:
- Layer height: 0.1–0.2mm (for high precision)
- Fill density: 50–80% (balances weight and strength)
- Printing speed: 30–60mm/s (avoids layer separation)
- Printing: Start the 3D printer (FDM for plastics, SLS for metals). The printer builds the fixture layer by layer—no molds or tooling needed.
Stage 4: Post-Processing & Quality Check
| Step | Purpose | How to Do It |
| Remove Support Structures | Eliminate extra material used during printing | Use pliers for FDM parts; sandblasting for SLS parts |
| Surface Treatment | Improve smoothness and durability | Sand with 200–400 grit sandpaper; polish with a buffer for metal parts |
| Quality Inspection | Ensure compliance with design specs | Use a caliper to check dimensions; use a coordinate measuring machine (CMM) for high-precision parts |
3. Key Applications: Where 3D Printing Fixtures Shine
3D printing fixtures are not one-size-fits-all—they excel in sectors where customization and performance are non-negotiable. Here are four major use cases:
- Aerospace: Hold lightweight, complex parts (e.g., turbine blades) during drilling. Fixtures are made of aluminum for strength and low weight.
- Medical: Support custom orthopedic implants (e.g., hip replacements) during sintering. Ceramic fixtures withstand high temperatures without contaminating the implant.
- Electronics: Position tiny circuit boards during soldering. Plastic fixtures (e.g., PLA) are non-conductive and protect sensitive components.
- Powder Metallurgy: Shape metal powders into finished parts. Graphite fixtures ensure even heat distribution during sintering.
4. Yigu Technology’s Perspective on 3D Printing Fixtures
At Yigu Technology, we’ve seen firsthand how 3D printing fixtures transform manufacturing. Many clients initially hesitate to switch from traditional fixtures, worried about cost or performance—but after testing, they’re amazed by the 30–50% cost reduction and 70% faster lead times. We recommend starting small: use 3D printing for low-volume, high-customization fixtures (e.g., medical device prototypes) before scaling up. Our team also helps optimize designs and select materials, ensuring fixtures meet even the strictest industry standards (e.g., aerospace AS9100).
FAQ: Your Top 3D Printing Fixture Questions Answered
Q1: Can 3D printing fixtures replace all traditional fixtures?
No—for high-volume production (10,000+ units), traditional fixtures (e.g., CNC-machined metal) may still be cheaper. But for small batches, prototypes, or custom parts, 3D printing fixtures are far more cost-effective.
Q2: How long does a 3D printing fixture last?
It depends on the material and usage. Metal fixtures can last 2–5 years (for regular use), while ceramic fixtures last 3–7 years in high-temperature environments. Plastic fixtures (e.g., PLA) are best for short-term projects (6–12 months).
Q3: Do I need special software to design 3D printing fixtures?
Basic CAD software (e.g., Fusion 360) works for simple fixtures. For complex designs (e.g., aerospace parts), use specialized software like ANSYS to simulate stress and thermal performance before printing.
