The aerospace industry thrives on innovation but is bound by the most rigorous standards of safety, performance, and reliability. In this high-stakes environment, 3D printed aerospace prototype models have become indispensable. They drastically compress development cycles, enable rapid iteration, and provide critical validation data. However, creating a prototype that is both useful and credible is not a simple print job. It requires a disciplined, systems-level approach that aligns advanced additive technologies, flight-grade materials, and stringent testing protocols from the outset. This guide provides a practical, step-by-step framework for engineers to navigate this complex process, transforming a digital concept into a physical prototype that delivers actionable insights and accelerates the path to certification and flight.
Why Are 3D Printed Prototypes Transformative?
Traditional aerospace prototyping, often reliant on CNC machining or custom tooling, is prohibitively expensive and slow for complex parts. A single prototype can take months and cost hundreds of thousands of dollars. 3D printing disrupts this by offering:
- Unprecedented Speed: Concepts move from CAD to a physical part in days, not months.
- Radical Design Freedom: Complex internal channels, lattice structures, and topology-optimized geometries are possible, enabling performance gains impossible with machining.
- Cost-Effective Iteration: Engineers can test multiple design variants for the cost of one traditionally machined part, fostering true innovation.
- Part Consolidation: Assemblies of dozens of parts can be redesigned as a single, integrated component, reducing weight, assembly time, and potential failure points.
How Do You Choose the Right Manufacturing Technology?
The first critical decision is selecting the 3D printing process. The choice hinges on the prototype’s primary objective: Form, Fit, or Function.
| Technology | Best For | Key Aerospace Materials | Strengths | Limitations |
|---|---|---|---|---|
| Fused Deposition Modeling (FDM) | Large-scale form/fit models, ducting, non-structural housings. | ULTEM™ (PEI), PEEK, PEKK, high-temp Nylon. | Low-cost large parts, excellent chemical/thermal resistance with engineering materials. | Anisotropic strength, visible layer lines, lower dimensional accuracy. |
| Stereolithography (SLA) | High-detail visual models, aerodynamic surface studies, master patterns for tooling. | High-temp, castable, or durable resins. | Exceptional surface finish and feature resolution. | Brittle material properties, UV degradation, small build volumes. |
| Selective Laser Sintering (SLS) | Functional, ductile prototypes, housings, ductwork, jigs & fixtures. | Nylon PA12, PA11 (glass or carbon filled). | Isotropic strength, no support structures, good chemical resistance. | Powdery surface finish, moderate feature detail. |
| Multi Jet Fusion (MJF) | High-volume functional prototypes, complex end-use parts. | Nylon PA12, PA11. | Faster than SLS, excellent batch production, consistent mechanical properties. | Limited material palette, similar finish to SLS. |
| Direct Metal Laser Sintering (DMLS) | High-strength, high-temperature functional prototypes, structural brackets, engine components. | Ti-6Al-4V, Inconel 718, AlSi10Mg, Cobalt Chrome. | Flight-certifiable materials, extreme strength-to-weight ratios. | Very high cost, extensive post-processing (HIP, heat treat), support removal is difficult. |
Case in Point: UAV Development
A team designing a new unmanned aerial vehicle (UAV) used a multi-technology approach:
- Form/Fit: The fuselage shell was printed in large-format FDM using ULTEM to validate assembly and component placement.
- Aerodynamics: Wing surfaces were printed in SLA for wind tunnel testing, leveraging its smooth finish for accurate airflow data.
- Function: Internal structural brackets and landing gear were printed via DMLS in Ti-6Al-4V for load testing, simulating final material performance.
What Are the Non-Negotiable Aerospace Requirements?
Aerospace prototypes are not just models; they are test articles. Their value depends on how well they simulate the final part’s behavior under operational conditions.
How Do You Select and Qualify Materials?
Material selection is paramount. The chosen 3D printing material must be justified against the operational environment.
- Thermal Performance: Will the part be in the engine bay (150°C+) or the airframe (-55°C to 80°C)? PEEK/ULTEM for high temps, Nylon for ambient.
- Mechanical Loads: Is the part load-bearing or structural? DMLS metals or continuous fiber-reinforced composites are necessary.
- Environmental Exposure: Will it face fuel, hydraulic fluid, or UV radiation? Material data sheets must certify chemical compatibility.
- Outgassing & Flammability: For space applications, materials must meet NASA or ESA outgassing (ASTM E595) and flammability (FAR 25.853) standards.
Critical Step: Material Testing. Never assume a 3D printed material matches its raw stock properties. Print and test coupon samples (tensile, flexural, impact) in the intended print orientation to establish a statistically valid design allowables database for your specific printer and process parameters.
How Do You Integrate with Systems and Certification?
A prototype must prove its integration into the larger system.
- Avionics & EMI: Prototypes for avionics enclosures may need EMI/RFI shielding. This can be achieved with conductive coatings or using carbon-fiber filled materials that offer some inherent shielding.
- Aerodynamic & Fluidic Testing: Prototypes for wind tunnel or fluid flow testing must have a surface finish and dimensional accuracy suitable for the test. SLA or highly polished DMLS are often required.
- Path to Certification: Even for prototypes, adopting a certification-minded approach is wise. This means documenting the entire process: material lot, machine parameters, post-processing steps, and test results. This data is invaluable if the prototype evolves into a certified part.
What Does a Structured Development Process Look Like?
Ad-hoc prototyping wastes resources. A phased, gated process ensures each stage delivers maximum learning.
What is the Conceptual Design & Simulation Phase?
This is the most cost-effective phase to make changes.
- Define Requirements: Create a formal prototype requirements document. What question must this prototype answer? (e.g., “Does the bracket survive 2x limit load?” “What is the drag coefficient of this intake?”)
- Generative Design & Topology Optimization: Use software (like nTopology, Ansys) to create mass-optimized, organic shapes that meet load cases. These designs are often only manufacturable via 3D printing.
- High-Fidelity Simulation: Run Finite Element Analysis (FEA) for stress and Computational Fluid Dynamics (CFD) for airflow. Critically, use anisotropic material properties for processes like FDM. Simulate not just the load, but also the build process to predict warping and residual stress.
How Do You Execute the Build & Validation Phase?
This is where digital meets physical.
- Design for Additive Manufacturing (DfAM): Optimize the CAD model for the chosen process. This includes:
- Orientating for optimal strength and minimal supports.
- Hollowing with internal lattices to save weight and material.
- Adding necessary tolerances and clearances for mating parts.
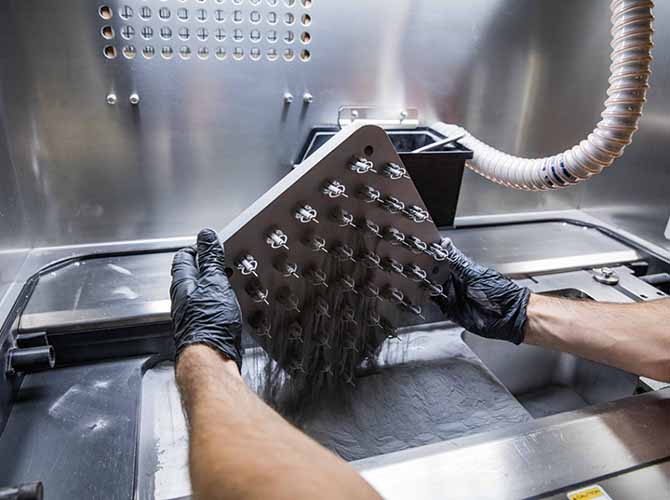
- Managed Build: Partner with a specialized aerospace additive manufacturer. They provide controlled, repeatable processes, material traceability, and essential post-processing like Hot Isostatic Pressing (HIP) for metals or thermal annealing for plastics to relieve stress.
- Rigorous Testing: The prototype must answer the requirement. Testing may include:
- Dimensional Inspection (CMM scanning).
- Static and Fatigue Load Testing.
- Thermal Cycle Testing.
- Functional Testing in a rig or subsystem.
Real-World Example: Rocket Engine Injector
A propulsion company needed to test a new injector design with complex internal channels. Using DMLS with Inconel 718, they printed a functional prototype in three weeks. They subjected it to hot-fire testing, collecting data on combustion efficiency and thermal performance. The rapid iteration allowed by 3D printing led to an optimized design validated at a fraction of the traditional cost and time.
What Are Common Pitfalls and How to Avoid Them?
- Ignoring Anisotropy: Assuming an FDM part is as strong vertically as horizontally is a common failure. Design and test with orientation in mind.
- Overlooking Post-Processing: A DMLS part straight from the machine is not ready for testing. Budget for and plan support removal, stress relief, HIP, and surface machining of critical features.
- Underestimating Cost of Quality: The cheapest quote may not include material certification, process documentation, or rigorous inspection. For aerospace, these are not optional.
- Skipping the “Why”: Printing a part “because we can” is wasteful. Every prototype must have a clear, stated objective tied to a key project risk or decision.
Conclusion
Developing a 3D printed aerospace prototype is a sophisticated engineering endeavor that blends cutting-edge manufacturing with disciplined systems engineering. Success is not measured by the speed of the print, but by the quality and actionability of the data the prototype generates. By strategically selecting the right technology for the right purpose, rigorously applying aerospace-grade material and process controls, and following a structured, simulation-driven development cycle, engineering teams can leverage additive manufacturing to its fullest potential. This approach transforms 3D printing from a rapid prototyping tool into a core competency for accelerating innovation, de-risking development, and paving a clearer path to flight certification in the modern aerospace industry.
FAQ
Can a 3D printed prototype be used for flight certification?
Yes, but it is a formal, rigorous path. The prototype itself is rarely certified; rather, the process used to create it can be. If a prototype performs excellently and the team wishes to use the same 3D printing process for the final part, they must embark on a full qualification program with the aviation authority (FAA, EASA). This involves extensive material testing, process validation, and building of a thorough technical data package. Many DMLS materials (Ti-6Al-4V, Inconel 718) and processes are now pre-qualified under standards like AMS7000 series, streamlining this path.
What is the biggest cost driver in aerospace 3D printing?
For polymers (FDM, SLS), the primary costs are high-performance materials (PEEK, ULTEM) and engineering labor for design and post-processing. For metals (DMLS), the largest costs are the raw material powder (aerospace-grade Ti-6Al-4V is very expensive) and the mandatory post-processing, which includes stress relief, Hot Isostatic Pressing (HIP), support removal, and often CNC machining of critical features. The machine time itself is also a significant factor.
How do you handle large prototypes that exceed the build volume?
Large prototypes (e.g., full-scale fuselage sections) are typically produced via large-format FDM (printers with 1m+ build volumes) or by segmenting the design. Segmentation involves slicing the CAD model into printable sections with integrated alignment and bonding features. The parts are then printed and professionally bonded using aerospace-grade adhesives or mechanical fasteners, followed by surface finishing to hide the seams. This requires careful design for assembly (DfA).
Are there specific software tools for aerospace additive manufacturing?
Beyond standard CAD (CATIA, Siemens NX, SolidWorks), specialized tools are essential:
- Topology Optimization & Generative Design: nTopology, Ansys Discovery, Altair Inspire.
- Build Simulation & Support Generation: Materialise Magics, Ansys Additive Suite, 3Dxpert.
- Lattice Generation & Lightweighting: nTopology, Materialise 3-matic.
These tools help predict and mitigate build issues and create high-performance, lightweight structures unique to additive manufacturing.
Discuss Your Projects with Yigu Rapid Prototyping
Bringing an aerospace prototype from concept to validated test article demands a partner with deep technical expertise and aerospace-grade process rigor. At Yigu Rapid Prototyping, we specialize in high-performance additive manufacturing for the aerospace sector. Our capabilities span from flight-certifiable DMLS metals to advanced engineering thermoplastics, supported by in-house CNC post-processing, CMM inspection, and non-destructive testing (NDT). Our engineering team works with you from the simulation phase through to testing, ensuring your prototype is not just a model, but a credible, data-generating asset that accelerates your program.
Contact us today for a technical consultation. Let’s discuss how to structure your prototype development for maximum technical insight and programmatic efficiency.