Developing a mixer prototype model requires a precise CNC machining process to validate design rationality, проверка соответствия компонента (НАПРИМЕР., blade assembly, transmission structures), and evaluate user-centric details (НАПРИМЕР., non-slip base, button responsiveness). Unlike simple appliances, mixers have compact, high-functionality structures—from curved stirring 刀组 (knife sets) to transparent mixing cups—that demand tailored machining strategies. This guide breaks down the full workflow, from preliminary design to final assembly, with key parameters, выбор материала, и практические советы, которые помогут обеспечить успех прототипа.
1. Предварительная подготовка: Заложите основу для механической обработки
Успех обработки на станках с ЧПУ начинается с тщательной подготовки., включая 3D моделирование, выбор материала, и готовность оборудования/инструмента. This stage avoids rework and ensures alignment with design goals.
(1) 3D Моделирование: Define Mixer Structure with Precision
Используйте профессиональное программное обеспечение CAD (НАПРИМЕР., Солидворкс, и, Вкус) to create a detailed 3D model covering all critical components. The model must balance aesthetic design, functional logic, и возможность механической обработки.
| Component Category | Ключевые детали дизайна | Точные требования | Цель |
| Основная часть (Shell) | Streamlined contour, non-slip base (groove depth 2mm), button mounting holes (Φ8mm) | Shell dimensional error ±0.2mm; допуск положения отверстия ±0,1 мм | Ensure structural stability; fit control buttons and motor components |
| Mixing Cup (Прозрачный) | Inner cavity volume (НАПРИМЕР., 600mL), feeding port (Φ60mm), discharge outlet (Φ20mm) | Cavity roundness error ≤0.1mm; wall thickness uniformity ±0.05mm | Ensure smooth material mixing; avoid leakage at connections |
| Knife Set & Tool Holder | Blade curve (radius 5mm), mounting slot (depth 6mm), gear cavity (for POM gears) | Slot depth tolerance ±0.05mm; gear cavity clearance 0.1mm | Fit rotating components; ensure smooth blade operation |
Советы по оптимизации модели:
- Component Splitting: Split integrated structures (НАПРИМЕР., cup body + крышка) на независимые части, чтобы избежать взаимодействия инструментов. Например, чашку для смешивания и ее крышку обработайте отдельно, затем собрать с уплотнительным кольцом.
- Маркировка процесса: Маркируйте важные функции (НАПРИМЕР., “отполировать внутреннюю стенку стакана для смешивания”) и справочные данные (НАПРИМЕР., нижняя часть основания в качестве начала координат) для руководства программированием ЧПУ.
- Проверка помех: Используйте программное обеспечение для моделирования вращения лезвия — обеспечьте зазор 0,5 мм между лезвием и стенкой чашки, чтобы предотвратить трение и застревание материала..
(2) Выбор материала: Сопоставьте производительность с ролями компонентов
Компоненты микшера имеют различные функциональные потребности. (прозрачность, износостойкость, сила), поэтому выбор материала имеет решающее значение. Ниже подробное сравнение подходящих вариантов.:
| Тип материала | Применимые компоненты | Ключевые свойства | Преимущества обрабатываемости |
| ABS Пластик | Main shell, база, крышка | Высокая ударная стойкость (Izod strength 20 KJ /), легко окрасить, бюджетный | Низкий износ инструмента; machinable at 8,000–12,000 rpm (fast and efficient) |
| ПК Пластик | Transparent mixing cup, смотровое окно | Высокая прозрачность (светопропускание ≥88%), воздействие (10x сильнее стекла) | Возможна прецизионная резка; minimal edge chipping (≤0.1mm) |
| Пома (Полиоксиметилен) | Передачи, tool holder (износостойкие детали) | Низкий коэффициент трения (0.15), устойчивость к износу, Хорошая стабильность | No deformation during machining; suitable for small transmission parts |
| Алюминиевый сплав (6061) | Motor brackets, metal decorative parts | Высокая жесткость (предел прочности 276 МПА), коррозионная устойчивость | Fast cutting speed; surface can be anodized for enhanced texture |
| Нержавеющая сталь (304) | Simulation knife shafts (необязательный) | Высокая сила, коррозионная устойчивость, износостойкий | Suitable for high-precision cutting; maintains shape under stress |
Подготовка заготовки материала:
- Cut blanks with 5–10mm machining allowance on all sides to accommodate roughing and finishing:
- A PC mixing cup (окончательный размер: Φ90mm×150mm) needs a Φ100mm×160mm blank.
- An ABS main shell (220mm×160mm×90mm) requires a 230mm×170mm×100mm blank.
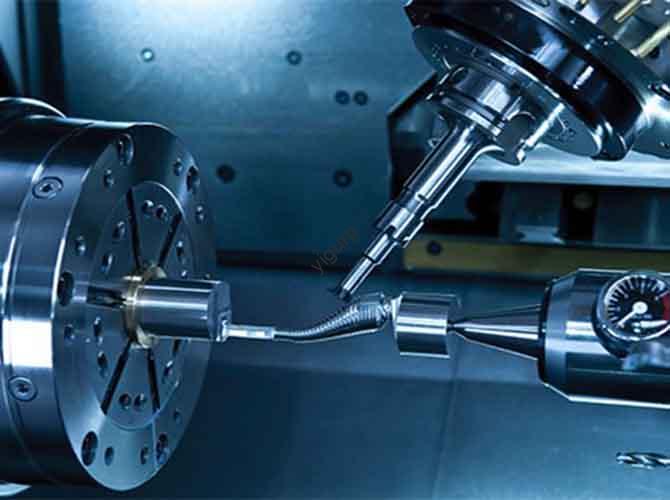
(3) Оборудование & Подготовка инструмента: Обеспечьте точность обработки
Select CNC equipment and tools based on component complexity and material properties to avoid defects like tool marks or dimensional deviations.
| Тип оборудования/инструмента | Критерии выбора | Рекомендуемые характеристики |
| Обрабатывающий центр с ЧПУ | 3-axis for flat parts; 5-axis for curved surfaces (НАПРИМЕР., blade curves) | Точность позиционирования ±0,005 мм; диапазон скоростей шпинделя 8000–24000 об/мин. |
| Фрезеры | Solid carbide for plastics; Высокоскоростная сталь (HSS) для металла | – Грубая: Φ8–Φ12mm flat-bottom mills (быстрое удаление материала)- Отделка: Φ2–Φ6mm ball-head mills (Изогнутые поверхности); Φ0.5–2mm small mills (logo/buttons) |
| Special Tools | Taper cutters (chamfering cup edges); diamond polishers (PC transparency) | Taper angle 45°; diamond polisher grit 1,200# (for PC surface refinement) |
| Светильники | Vacuum suction cups (flat ABS/PC parts); precision vises (Металлические компоненты) | Vacuum pressure ≥0.8 MPa; vise clamping force ≥3 kN (prevents workpiece displacement) |
2. Исполнение обработки с ЧПУ: From Blank to Prototype Components
This stage divides machining into roughing and finishing to balance efficiency and precision—critical for mixer components with diverse structures.
(1) Грубая обработка: Shape the Foundation
Черновая обработка удаляет большую часть лишнего материала, чтобы приблизить заготовку к окончательной форме., приоритет скорости, избегая повреждения инструмента.
| Тип компонента | Черновая обработка | Ключевые операции & Параметры |
| ABS Main Shell | Machine outer contour, base grooves, button holes | Use Φ10mm flat-bottom mill; Скорость резки 10,000 об/мин, скорость корма 1,200 мм/мин; layer depth 3mm |
| PC Mixing Cup | Mill outer wall and inner cavity; pre-drill feeding/discharge outlets | Используйте концевую фрезу Φ8 мм.; Скорость резки 9,000 об/мин, скорость корма 800 мм/мин; retain 0.5mm finishing allowance |
| POM Gear Cavity | Machine cavity outline and mounting holes | Use Φ6mm end mill; Скорость резки 8,000 об/мин, скорость корма 600 мм/мин; Избегайте перегрева (POM melts at 160°C) |
Контроль после черновой обработки:
- Use a digital caliper to check key dimensions (НАПРИМЕР., mixing cup diameter, высота корпуса) and ensure they are within ±0.5mm of the design value.
- Clean chips with compressed air—especially critical for PC parts (chips left on surfaces cause scratches during finishing).
(2) Отделка: Достичь точности & Качество поверхности
Finishing refines components to meet final design requirements, focusing on transparency (ПК), smoothness (АБС), и точность размеров (POM/metal).
| Тип компонента | Finishing Focus | Ключевые операции & Параметры |
| PC Mixing Cup | Polish inner/outer walls (прозрачность); chamfer edges (prevent sharpness) | Используйте шаровую мельницу диаметром 4 мм. (inner wall); Скорость резки 15,000 об/мин, скорость корма 500 мм/мин; then diamond polish (light transmittance ≥85%) |
| ABS Main Shell | Smooth shell surface; engrave logo/button labels (depth 0.3mm) | Use Φ2mm ball-head mill; Скорость резки 12,000 об/мин, скорость корма 700 мм/мин; шероховатость поверхности Ra ≤0,8 мкм |
| POM Gear Cavity | Refine cavity walls; ensure gear clearance (0.1мм) | Use Φ3mm end mill; Скорость резки 9,000 об/мин, скорость корма 500 мм/мин; dimensional tolerance ±0.05mm |
| Aluminum Motor Bracket | Smooth mounting surfaces; drill precision holes (Φ5mm) | Use Φ5mm twist drill; Скорость резки 18,000 об/мин, скорость корма 1,000 мм/мин; hole roundness error ≤0.02mm |
Завершение проверок качества:
- For PC parts: Use a spectrophotometer to verify transparency (≥85%) and a surface roughness tester to confirm Ra ≤0.4μm.
- For POM gear cavities: Use a feeler gauge to check clearance (0.1мм) and ensure gears rotate smoothly without jamming.
3. Пост-обработка: Улучшить эстетику & Функциональность
Post-processing bridges the gap between machined components and a realistic mixer prototype, focusing on surface refinement and assembly readiness.
(1) Поверхностная обработка: Портной к материалу & Component Role
| Material/Component | Этапы обработки поверхности | Ожидаемый результат |
| ABS Main Shell | 1. Sand with 400#→800#→1200# sandpaper (удалить следы инструмента)2. Обезжирить изопропиловым спиртом3. Spray matte/gloss paint (50толщина мкм) | Адгезия краски ≥4B (Нет пилинга); surface gloss 30–70 GU (за дизайн) |
| PC Mixing Cup | 1. Diamond polishing (1,200#→2,000# grit)2. Очистите средством для чистки линз3. Нанесите покрытие против царапин | Нет видимых царапин; уровень защиты от царапин ≥3H (карандашный тест) |
| Aluminum Brackets | 1. Обезжирить щелочным очистителем2.. Анодировать (серебристо-серый, 8– пленка 10 мкм)3. Пескоструйная обработка (матовая отделка) | Коррозионная стойкость: Отсутствие ржавчины после 48-часового испытания в солевом тумане.; коэффициент трения ≤0,15 |
| POM Gear Parts | Никакого дополнительного лечения (naturally smooth surface) | Friction coefficient remains 0.15; no wear after 1,000 rotation tests |
(2) Сборка & Функциональная отладка
Proper assembly ensures components work together seamlessly, while functional tests validate the prototype’s usability.
Сборные шаги:
- Проверка перед сборкой: Verify all parts meet dimensional requirements (НАПРИМЕР., mixing cup fits shell with 0.5mm clearance).
- Component Fixing:
- Bond PC mixing cup to ABS shell with food-grade adhesive (ensure no leakage).
- Screw aluminum motor brackets to the base (крутящий момент 5 N · m, avoid thread damage).
- Install POM gears and 3D-printed resin simulation blades (replace real metal blades for safety).
- Тест на герметичность: Pour 300mL water into the mixing cup—check for leakage at connections (no water seepage within 10 минуты).
Функциональная отладка:
- Button Operation: Test switch/pulse buttons 100 times—stroke 2mm ±0.2mm, feedback force 5–8N (comfortable for users).
- Blade Rotation: Simulate mixing with a motor (600 об/мин)—ensure blade rotates smoothly, no friction with cup wall.
- Материал поток: Pour simulated ingredients (НАПРИМЕР., вода + flour mixture) through the feeding port—check flow rate (≥80mL/min) and no residue in the cup.
4. Контроль качества & Оптимизация процесса
Strict quality control ensures the prototype meets design standards, while optimization reduces costs for future iterations.
(1) Ключевые стандарты контроля качества
| Control Item | Acceptance Criteria | Inspection Method |
| Точность размеров | – Mixing cup: ± 0,1 мм- Shell: ± 0,2 мм- Gear cavity: ± 0,05 мм | ШМ (critical components); цифровой суппорт (Общие части) |
| Качество поверхности | – ПК: Ra ≤0.4μm, transparency ≥85%- АБС: Ра ≤0,8 мкм, Нет отметок инструмента | Surface roughness tester; spectrophotometer; Визуальный осмотр (500lux light) |
| Functional Performance | – No leakage (10-minute water test)- Blade rotation: 600 rpm ±50 rpm | Water leakage test; tachometer (blade speed) |
(2) Советы по оптимизации процессов
- Material Saving: Design hollow structures for ABS parts (НАПРИМЕР., base with 3mm thick walls) to reduce blank size—saves 20–30% material cost.
- Эффективность обработки: Combine roughing and semi-finishing for simple parts (НАПРИМЕР., decorative strips) to cut tool change time by 15%.
- Post-Processing Simplification: Для скрытых частей (НАПРИМЕР., motor brackets), skip anodizing—use natural aluminum finish to save 10–15% of treatment cost.
Yigu Technology’s Perspective on CNC Machining Mixer Prototype Models
В Yigu Technology, Мы верим functional precision and cost balance are the core of mixer prototype machining. Many clients overcomplicate processes—for example, using 5-axis machines for flat ABS shells when 3-axis works, or over-polishing hidden POM parts. Our team optimizes for both quality and efficiency: We use PC with diamond polishing for mixing cups (ensuring transparency ≥85%) and 3-axis machines for most components to cut 20% of machining time. We also simplify blade simulation (3D-printed resin instead of metal) for safety and cost. For batch prototypes, we use multi-cavity fixtures to machine 2–3 mixing cups at once, сокращение времени производства 30%. Our goal is to deliver prototypes that validate design and user needs at the lowest cost.
Часто задаваемые вопросы
- Why is POM preferred for mixer gear components instead of ABS?
POM has a lower friction coefficient (0.15 против. 0.3 для пресса) and higher wear resistance, making it ideal for transmission gears that require smooth rotation and long-term use. ABS is prone to wear and deformation under repeated friction, which would cause gear jamming in mixers.
- How to prevent PC mixing cups from scratching during CNC machining?
We take three key steps: 1) Используйте Sharp, high-quality solid carbide tools to minimize cutting force; 2) Apply a protective film to the cup surface before machining; 3) Clean chips with compressed air (not cloth) to avoid abrasive scratches. These measures keep the PC surface scratch-free.
- What is the total time required to machine a single mixer prototype?
Total time is ~4–7 days: 1 day for 3D modeling/material prep, 1–2 days for CNC machining (грубая + отделка), 1–2 дня на постобработку (polishing/painting), and 1–2 days for assembly/debugging. Batch production (10+ прототипы) can be shortened to 3–5 days with parallel processing.