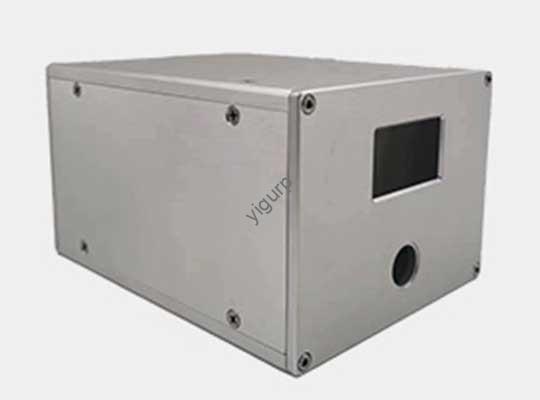
Полировка Прототипы изготовления листового металла это больше, чем просто заставлять их выглядеть хорошо - он удаляет заусеницы, сглаживает грубые края, и повышает долговечность, что имеет решающее значение для тестирования функциональности и впечатления заинтересованных сторон. Работаете ли вы со сталью, алюминий, или медные прототипы, Следуя правильным шагам и использованию правильных инструментов сэкономит вам время и избегают дорогостоящих ошибок. Ниже, Мы разбиваем весь процесс полировки с четкими советами, данные, и лучшие практики.
1. Предварительная подготовка: Соберите инструменты & Материалы
Прежде чем начать полировку, Наличие правильных инструментов и материалов обеспечивает плавное, эффективный процесс. Пропуск этого шага часто приводит к неравномерным результатам или поврежденным прототипам.
Основные инструменты & Материалы
- Наждачная бумага: Разные крупы (грубо, чтобы хорошо) Для постепенного сглаживания (См. Раздел 2 Для получения подробной информации).
- Инструменты шлифования: Электрические Сандерс (Для больших поверхностей) или пневматические Сандерс (Для прекрасной работы) - Необязательно, но настоятельно рекомендуется для эффективности.
- Чистящие принадлежности: Нейтральное моющее средство (Чтобы избежать кормового листового металла), теплая вода, Без ворновых тканей, и сжатый воздух (взорвать пыль).
- Инструменты проверки: 10x увеличительное стекло или цифровой суппорт (Чтобы проверить крошечные заусенцы или неравномерность).
- Защитное снаряжение: Защитные очки (чтобы защитить глаза от металлической пыли) и перчатки (Чтобы предотвратить резкие края).
Для чаевого: Для небольших или сложных прототипов (НАПРИМЕР., те, у кого плотные углы), Добавить набор блоков ручной шлифования-они помогают применить даже давление и достичь труднодоступных областей.
2. Выбор наждачной бумаги: Выберите правильный песок для каждого этапа
Ключ к гладкой отделке - использование наждачной бумаги в Постепенно более тонкие крупы- Начало с грубой бумагой, чтобы удалить заусенцы, Затем перейти к мелкой бумаге для полированного вида. Использование неправильной песчи.
Ниже приведен разбивка наждачных кругов, их использование, и шероховатость поверхности (Раствор) Они достигают - критические данные для обеспечения вашего прототипа соответствуют стандартам качества:
| Наигранная бумага | Тип | Ключевая цель | Шероховатость поверхности (Раствор) Достигнуто | Лучше всего для |
| 80–120 | Грубый | Удалите большие заусенцы, Сварки сварки, или глубокие царапины | 5–10 мкм | Начальное сглаживание (НАПРИМЕР., После резки или изгиба листового металла) |
| 240–400 | Середина | Сгладить царапины из грубой наждачной бумаги | 2–5 мкм | Шаг перехода (готовит поверхность для тонкой полировки) |
| 600–1000 | Отлично | Создать плавное, почти окончательная поверхность | 0.8–2 мкм | Окончательное сглаживание (Идеально подходит для прототипов, которые нуждаются в чистоте, Профессиональный вид) |
| 1200–2000 | Экстра-свежие | Достичь полированного, Почти зеркальное покрытие | 0.2–0,8 мкм | Высококачественные прототипы (НАПРИМЕР., потребительская электроника или модели отображения) |
Пример: Если ваш алюминиевый прототип имеет острые заусенцы от резки ЧПУ, Начните с 100-грита (грубый) наждачная бумага, чтобы удалить их, затем переключитесь на 320-grit (середина) Стереть грубые царапины, и закончить с 800-грибкой (отлично) Для гладкой поверхности.
3. Выбор & Использование инструментов шлифования: Повышение эффективности
В то время как шлифование рук работает для небольших прототипов, инструменты шлифования сократить время полировки на 50–70% и обеспечить более последовательные результаты. Вот как выбрать правильный инструмент для вашего проекта:
Общие инструменты шлифования для прототипов листовых металлов
| Тип инструмента | Ключевые преимущества | Лучше всего для | Потенциальные ограничения |
| Электрический орбитальный шлифовальный станок | Быстрый, простой в использовании, Отлично подходит для плоских поверхностей | Большой, Плоские прототипы (НАПРИМЕР., панели листового металла) | Не могу добраться до узких углов; может оставить круговые оценки, если используется неправильно |
| Пневматическая шлифовальная мешка | Легкий вес, Низкая вибрация, Точный контроль | Маленькие или сложные прототипы (НАПРИМЕР., части с отверстиями или слотами) | Требуется воздушный компрессор; менее мощный для тяжелых заусенцев |
| Лента шлифовальная шлифовальная машина | Мощный, быстро удаляет материал | Толстый листовой металл (НАПРИМЕР., стальные прототипы) | Не идеально для тонкого металла (может вызвать деформацию); громоздкий для небольших деталей |
Советы по использованию инструментов шлифования
- Всегда начинайте с низкой скорости (1,500–2000 об / мин) Чтобы не царапать металл - увеличить скорость, только если вам нужно удалить жесткие заусенцы.
- Удерживать инструмент под углом 15–30 ° к поверхности (не плоский) - Это снижает давление и предотвращает вмятины.
- Для пневматических инструментов, Используйте 5–8 CFM (кубические футы в минуту) Воздушный компрессор для поддержания постоянной мощности.
4. Ключевые методы полировки: Избегайте ошибок & Обеспечить качество
Даже с правильными инструментами, Плохая техника может разрушить ваш прототип. Следуйте этим правилам, чтобы стать гладким, даже результаты:
1. Придерживаться одного направления шлифования
Всегда отшлифовать в единственное направление (НАПРИМЕР., слева направо или сверху вниз), не в кругах. Круглое шлифование создает поперечные расстояния, которые трудно удалить позже. Например, Если вы полируете прямоугольную панель, Песел по всей длине панели - это сохраняет царапины равномерные и легко сглаживание с более тонкой крутой.
2. Контролировать свое давление
Применение слишком большого давления - это #1 причина помятенных или деформированных прототипов листового металла. Стремиться к 10–15 Newtons (Не) силы - о весе небольшого пакета сахара. Для справки:
- Слишком мало давления (<5 Не): Требуется слишком много времени, чтобы удалить царапины.
- Слишком большое давление (>20 N): Риски изгибая тонкий листовой металл (НАПРИМЕР., 0.5мм алюминий) или создание глубоких канавков.
Специальное примечание: При шлифовании рядом паяные соединения или соединения, уменьшить давление до 5–8 н.. Эти области часто слабее и более подвержены повреждениям.
3. Сделать перерывы, чтобы избежать усталости
Ручное шлифование или использование инструментов для более чем 30 минуты могут привести к усталости, что вызывает неравномерное давление. Сделайте 5-минутный перерыв каждые 20–30 минут-это поддерживает вашу технику и предотвращает ошибки.
5. Проверка прогресса & Чистка поверхности: Убедитесь, что недостатки не пропущены
Регулярные проверки и тщательная очистка имеют решающее значение во избежание «скрытых» недостатков (Как крошечные заусенцы) что разрушает последний вид вашего прототипа.
Как проверить прогресс полировки
- Используйте 10x увеличительное стекло Чтобы осмотреть на оставшиеся заусенцы или царапины - то, что выглядит гладко для обнаженного глаза, может иметь небольшие недостатки.
- Нежно запустите пальцем по поверхности (с перчатками на) - Вы не должны чувствовать неровных краев или ударов.
- Для прототипов, которые должны соответствовать другим деталям, Используйте цифровой суппорт Подтвердить толщину последовательно (НАПРИМЕР., Панель 2 мм должна измерять 2 мм ± 0,05 мм везде).
Постполирующие шаги очистки
- Взорвать свободную пыль с помощью сжатого воздуха (Удерживайте сопло в 6–12 дюймах от прототипа, чтобы не царапать).
- Протрите поверхность тканью без ворса, окунутой в теплой воде + нейтральное моющее средство (Избегайте резкого мыла - они могут испачкать алюминий или сталь).
- Помыть чистой водой и немедленно высохнуть новой тканью (Влажность, оставленная на листовом металле, может вызвать ржавчину, Особенно для стальных прототипов).
- Сделайте последнюю проверку - если вы видите пыль или пятна, Повторите процесс очистки.
6. После полировки защиты: Расширить прототип жизни
После полировки, Добавление защитного слоя продолжает ваш прототип выглядеть новым и предотвращает коррозию - вариант, если вы тестируете его на открытом воздухе или в течение длительных периодов времени.
Рекомендуемые защитные покрытия
| Тип покрытия | Ключевые преимущества | Время сушки | Лучше всего для |
| Чистый акриловый спрей | Доступный, легко нанести, сопротивляется царапинам | 2–4 часа (прикоснуться сухой); 24 часы (полное лекарство) | Большинство прототипов листового металла (алюминий, сталь, медь) |
| Ультрафиолетовый прозрачный слой | Быстро сухая, Высокий глянец, Отличная долговечность | 10–15 минут (Ультрафиолетовое лечение); 1 час (Полный закат) | Прототипы, которые нуждаются в быстром повороте (НАПРИМЕР., модели выставки) |
| Нефтяное масло | Предотвращает коррозию (Для стальных прототипов) | 1-2 часа (Поглощает полностью) | Стальные прототипы, хранящиеся для более чем, чем 1 месяц |
Прожектор данных: Чистый акриловый спрей может увеличить сопротивление царапин 30% и продлить с 1 до 2 месяцев до 1 до 2 месяцев 6+ месяцы-критические для долгосрочных испытаний.
Перспектива Yigu Technology
В Yigu Technology, Мы видим полировку Прототипы изготовления листового металла Как шаг для успеха продукта. Мы всегда рекомендуем начать с грубой наждачной бумаги, чтобы устранить заусенцы (а #1 Причина подходящих проблем) и постепенно переход к прекрасной крупе - приводит к переработке этого шага к переделке. Для клиентов с ограниченными сроками, Мы используем пневматические шлифовальные машины для сложных деталей, чтобы сэкономить время, не жертвуя качеством. Мы также подчеркиваем защиту после полировки: Даже простой акриловый спрей предотвращает коррозию, который может разрушить месяцы дизайнерских работ. Сочетая терпение с правильными инструментами, Мы помогаем клиентам создавать прототипы, которые точно отражают качество их конечного продукта.
Часто задаваемые вопросы
- Нужны ли мне разные шаги полировки для алюминия против. прототипы стального листового металла?
Да, алюминий более мягкий, чем сталь, Так что начните с более тонкой первоначальной песчи (120-Грит против. 80-Грит для стали) и использовать меньше давления (8–12 N VS. 12–15 н) Чтобы избежать царапин. Также, Сталь нуждается в противоречивом покрытии после полировки, В то время как алюминий нуждается только.
- У моего прототипа все еще есть небольшие царапины после тонкого шлифования - что мне делать?
Используйте 1200–1500 зернистого наждачной бумаги с легким давлением (5–8 н) Чтобы сгладить царапины, Затем нанесите небольшое количество металлической полировки (НАПРИМЕР., хромированный лак) с мягкой тканью. Бафф в круговых движениях в течение 1-2 минут, затем очистите и нанесите защитное пальто.
- Могу ли я пропустить полировку, если мой прототип просто для внутреннего тестирования?
Нет - неполированные прототипы имеют заусеницы, которые могут повредить другие испытательные части (НАПРИМЕР., грубый край может поцарапать пластиковый компонент, с которым вы тестируете). Даже внутренние прототипы нуждаются в базовой полировке (80–400 Грит) Для обеспечения точного тестирования функциональности.