Ever struggled to find a metal prototype that fits your unique product design? When standard parts can’t meet your specific dimensions, формы, or features, non-standard prototype sheet metal forming process comes to the rescue. This customized manufacturing method tailors metal prototypes to your exact needs, making it a game-changer for product development, Низкое объем производства, and special part creation. В этом руководстве, we’ll break down everything you need to know to leverage this process effectively.
1. What Exactly Is Non-standard Prototype Sheet Metal Forming?
Let’s start with the basics.Non-standard prototype sheet metal forming is a specialized metalworking process that creates custom prototypes by shaping sheet metal according to clients’ unique requirements—no more sticking to one-size-fits-all industry standards.
Key Traits vs. Standard Sheet Metal Forming
To better understand its value, let’s compare it with standard sheet metal forming using a simple table:
| Аспект | Non-standard Prototype Sheet Metal Forming | Standard Sheet Metal Forming |
|---|---|---|
| Design Basis | Client’s specific needs (custom dimensions/shapes) | Fixed industry standards |
| Объем производства | Низкий (прототипирование, small-batch special parts) | Высокий (массовое производство) |
| Гибкость | Высокий (adjustable for unique designs) | Низкий (fixed for standard parts) |
| Вариант использования | Product design validation, special-purpose parts | Routine, high-volume components |
Пример реального мира
Imagine you’re developing a compact medical device that needs a custom sheet metal housing to fit tiny internal components. Standard sheet metal housings are too big or have the wrong cutouts—this is where non-standard prototype sheet metal forming shines. It creates a housing that’s perfectly tailored to your device’s size and feature needs, helping you test the design quickly.
2. The Step-by-Step Non-standard Prototype Sheet Metal Forming Process
Процесс следует четкому, linear flow to ensure precision and meet your requirements. Let’s walk through each step:
Шаг 1: Design Phase – Lay the Groundwork
This phase is all about turning your ideas into a workable plan.
- 3D Моделирование: Используйте CAD (Компьютерный дизайн) программное обеспечение (НАПРИМЕР., Солидворкс, Autocad) Чтобы построить подробную 3D -модель прототипа. Every curve, дыра, and dimension is designed to match your exact needs—no guesswork here.
- Обзор дизайна: A critical check to avoid costly mistakes. Engineers and designers assess two key points:
- Manufacturability: Can we actually make this prototype with existing tools? Например, is a super-tight bend angle feasible with our press brakes?
- Функциональность: Will the prototype do what it’s supposed to? If it’s a bracket for a machine, will it hold the required weight?
Шаг 2: Выбор материала & Pretreatment – Pick the Right “Building Block”
The material makes or breaks the prototype’s performance.
- Выберите правильный материал: Select based on how the prototype will be used:
- Нержавеющая сталь: Great for parts exposed to moisture (НАПРИМЕР., food processing equipment prototypes) – it resists rust and corrosion.
- Алюминий: Lightweight and affordable, perfect for aerospace or automotive prototypes where weight matters.
- Медь: Ideal for parts needing good electrical conductivity (НАПРИМЕР., custom electrical enclosures).
- Material Pretreatment: Get the sheet metal ready for processing:
- Выслушивание: Remove sharp edges from the sheet to prevent injuries during handling and ensure smooth assembly.
- Уборка: Wipe off oil, пыль, or rust—this helps later steps like painting or plating stick better.
Шаг 3: Резка & Shaping – Turn Flat Sheets into 3D Shapes
Now it’s time to transform the flat sheet metal into the prototype’s basic form.
- CNC Cutting: Use computer-controlled machines for precision:
- Лазерная резка с ЧПУ: Best for intricate shapes (НАПРИМЕР., маленькие дыры, complex curves) with accuracy up to ±0.1mm.
- Штамповка с ЧПУ: Faster for simple shapes (НАПРИМЕР., square or circular cutouts) in low-volume runs.
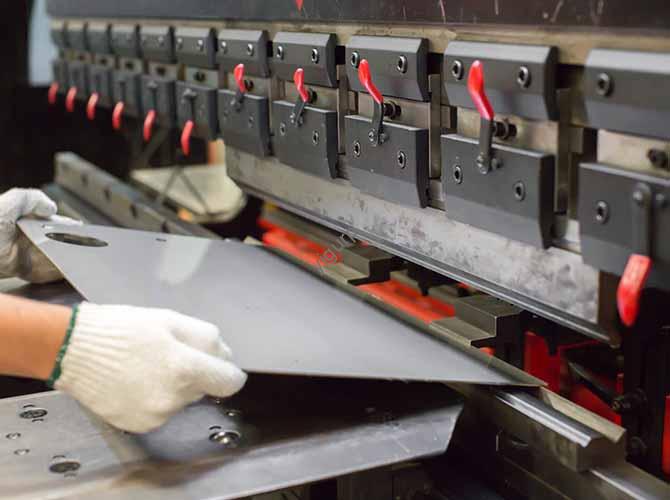
- Изгиб & Формирование: Use a CNC press brake to bend the cut sheet to your desired angle (НАПРИМЕР., 90 degrees for a box-shaped prototype). The machine’s computer control ensures every bend is consistent—no lopsided parts here.
Шаг 4: Сварка & Assembly – Put It All Together (При необходимости)
If your prototype has multiple parts (НАПРИМЕР., a frame with a base and sides), this step combines them.
- Сварка: Join components using methods like MIG (для алюминия) или тиг (Для нержавеющей стали) сварка. The goal is strong, seamless joints that hold up under use.
- Сборка: Fit the welded parts together per the design. This might include adding screws or hinges so you can take the prototype apart for testing or adjustments.
Шаг 5: Surface Treatment – Boost Durability & Внешний вид
A prototype isn’t just functional—it should also look professional.
- Шлифование & Полировка: Smooth out weld lines and cut edges. Например, if the prototype is for a consumer product (like a kitchen gadget), a polished finish makes it look market-ready.
- Painting or Plating: Add protection and style:
- Рисование: Используйте распылительную краску (НАПРИМЕР., эпоксидная смола) to resist scratches and add color.
- Покрытие: Apply a thin metal layer (НАПРИМЕР., zinc for rust resistance, chrome for shine).
Шаг 6: Инспекция качества - обеспечить совершенство
The final check to make sure the prototype meets your standards.
- Проверка размеров: Use tools like calipers or CMMs (Координировать измерительные машины) to verify every dimension matches the 3D model. If the design calls for a 150mm length, the prototype should be spot-on (within ±0.5mm).
- Функциональное тестирование: Test the prototype in real-world conditions. For a custom hinge, does it open and close smoothly 1,000 раз? For a bracket, does it hold the weight it’s supposed to?
3. Why Choose Non-standard Prototype Sheet Metal Forming?
Вы можете задаться вопросом: “Why not just use standard parts to save time and money?” Here are three key reasons:
- Faster Product Development: Instead of waiting for standard parts that don’t fit, you get a prototype tailored to your design in weeks—not months. This lets you test and tweak your idea faster.
- Reduced Risk: By testing a custom prototype, you catch flaws (НАПРИМЕР., a weak weld, wrong dimension) early. Fixing these before mass production saves you thousands in rework costs.
- Perfect for Unique Needs: Whether you need a heat-resistant prototype for a furnace or a tiny one for a wearable device, this process adapts to your needs—standard parts can’t do that.
Yigu Technology’s View on Non-standard Prototype Sheet Metal Forming
В Yigu Technology, Мы видимnon-standard prototype sheet metal forming as the backbone of innovation. Many clients—startups to big firms—use it to turn bold ideas into tangible prototypes. Our team blends advanced CAD design, high-precision CNC tools, and strict quality checks to deliver prototypes that meet even complex needs. We prioritize flexibility: whether it’s a single prototype or small-batch parts, we adjust to your timeline and budget. Для нас, every custom prototype helps clients solve problems and stay ahead in competitive markets.
Часто задаваемые вопросы
1 квартал: How long does it take to make a non-standard sheet metal prototype?
Это зависит от сложности. Простой прототип (НАПРИМЕР., плоский кронштейн) занимает 3–5 дней. A complex one with welding and plating takes 1–2 weeks.
2 квартал: Is non-standard prototype sheet metal forming expensive?
While unit costs are higher than standard parts, it’s cost-effective. Spending $500 on a prototype to fix design flaws saves tens of thousands in mass production rework.
Q3: What materials work best for this process?
Это зависит от использования: Stainless steel for corrosion resistance, aluminum for light weight, copper for conductivity. Our team can help you pick the right one for your project.