If you’re wondering how to machine plastic parts successfully—whether for prototyping, Маленькая партийная производство, or large-scale manufacturing—the answer lies in understanding plastic’s unique properties, choosing the right tools, and following material-specific best practices. В отличие от металлов, plastics are softer, more prone to melting, and can deform under heat or pressure, so traditional machining techniques need adjustments. В этом руководстве, Мы сломаем все, что вам нужно знать, from selecting the right plastic material to troubleshooting common issues, with real-world examples and actionable steps to ensure your parts meet quality standards.
Key Differences Between Machining Plastics and Metals
Перед погружением в процесс, it’s critical to grasp why machining plastic parts isn’t the same as machining metals. Plastics have distinct physical and chemical properties that demand specialized approaches, and ignoring these differences often leads to failed parts, Потраченный впустую материал, or damaged equipment.
Первый, теплопроводность is a major factor. Most plastics conduct heat 100–1,000 times slower than metals like aluminum or steel. This means heat generated during cutting (from friction between the tool and material) doesn’t dissipate quickly—it builds up in the plastic, leading to melting, деформация, or “galling” (where plastic sticks to the tool). Например, when machining acetal (a common engineering plastic), if you use the same cutting speed as aluminum, you’ll likely see melted edges or a rough surface finish.
Второй, material hardness and flexibility vary widely. While some plastics (нравиться Заглядывать) are rigid and strong, others (нравиться полиэтилен) are soft and flexible. Soft plastics can “push” away from the tool instead of being cut cleanly, resulting in imprecise dimensions. Металлы, напротив, have more consistent hardness, making them easier to machine with standard parameters.
Третий, chip formation differs. Metals produce continuous, manageable chips, but plastics often create stringy, sticky chips that can clog the tool or wrap around the workpiece. This not only slows down production but also scratches the part’s surface. Например, обработка ПВХ (поливинилхлорид) without proper chip control can lead to chips that adhere to the cutting tool, requiring frequent stops to clean and reducing tool life by up to 30% (per data from the Plastics Industry Association).
To highlight these differences, here’s a quick comparison table:
| Свойство | Металлы | Пластмассы | Impact on Machining |
| Теплопроводность | Высокий (dissipates heat quickly) | Низкий (ловушки тепла) | Risk of melting; need slower speeds/coolant |
| Твердость | Последовательный, often high | Переменная (soft to rigid) | Soft plastics need sharp tools to avoid pushing |
| Формирование чипа | Непрерывный, brittle chips | Stringy, sticky chips | Requires chip breakers or air blasts |
| Химическая устойчивость | Варьируется (some react to coolants) | Высокий (but some soften with oils) | Need compatible coolants (НАПРИМЕР., на водной основе) |
Choosing the Right Plastic Material for Machining
Not all plastics are suitable for machining. Some are too brittle, while others are too soft to hold precise dimensions. The key is to match the material to your part’s intended use—whether it needs to withstand high temperatures, сопротивляться химическим веществам, or be lightweight. Below are the most common machinable plastics, их свойства, и идеальные приложения, with a real-world case study to illustrate decision-making.
1. Ацеталь (Полиоксиметилен, Пома)
- Характеристики: Жесткий, низкое трение, Хорошая стабильность, and resistant to moisture and most chemicals. It machines cleanly with minimal melting.
- Лучше всего для: Передачи, подшипники, втулки, and food-contact parts (it’s FDA-approved).
- Machining Tip: Use high cutting speeds (1,500–3,000 RPM for routers) and sharp tools to avoid chipping.
2. Заглядывать (Полиэфирный эфирный кетон)
- Характеристики: Высокотемпературное сопротивление (can withstand up to 250°C / 482° F.), сильный, and chemical-resistant. It’s a “high-performance” plastic often used as a metal replacement.
- Лучше всего для: Аэрокосмические компоненты, медицинские устройства (НАПРИМЕР., Хирургические инструменты), and oil and gas parts.
- Machining Tip: PEEK is dense, so use carbide tools (not high-speed steel) and coolants to prevent heat buildup. Cutting speeds should be 500–1,000 RPM slower than for acetal.
3. Нейлон (Полиамид)
- Характеристики: Гибкий, воздействие, and good for parts that need to absorb vibration. Однако, it absorbs moisture, which can cause warping during machining.
- Лучше всего для: Крепеж, spacers, и потребительские товары (НАПРИМЕР., справиться с ручками).
- Machining Tip: Dry the nylon in an oven (80–100 ° C. / 176–212°F for 4–6 hours) before machining to remove moisture. Use a coolant to reduce friction.
4. ПВХ (Поливинилхлорид)
- Характеристики: Бюджетный, жесткий (unless plasticized), and fire-resistant. It’s easy to machine but releases toxic fumes when heated, so ventilation is critical.
- Лучше всего для: Трубные фитинги, электрические корпуса, and construction parts.
- Machining Tip: Use a HEPA-filtered ventilation system. Avoid high speeds—keep RPM under 2,000 to prevent fuming.
5. Поликарбонат (ПК)
- Характеристики: Прозрачный, воздействие (often called “bulletproof plastic”), and heat-resistant up to 135°C / 275° F.. It’s prone to scratching, so care is needed.
- Лучше всего для: Windows, линзы, and safety shields.
- Machining Tip: Use a sharp, polished tool to avoid surface scratches. Cut at moderate speeds (1,000–2000 об / мин) and use air blasts to remove chips.
Тематическое исследование: Choosing Plastic for a Medical Device Component
A client once approached our shop needing a small, precise part for a portable blood glucose monitor. The part needed to be lightweight, химический устойчивый (to withstand alcohol swabs), and compatible with skin contact. We evaluated three options: acetal, Заглядывать, и нейлон.
- Acetal was affordable and easy to machine but lacked the chemical resistance needed for repeated alcohol exposure.
- PEEK had excellent chemical resistance but was expensive (3x the cost of acetal) and overkill for a low-stress part.
- Нейлон, when dried properly, offered good chemical resistance and was cost-effective. We dried the nylon for 5 часы, used a carbide tool with a 1,200 RPM speed, and added a light water-based coolant. The final parts met all specifications and passed biocompatibility tests.
Essential Tools and Equipment for Machining Plastic Parts
Using the right tools is non-negotiable for machining plastic parts well. The wrong tool can cause melting, плохая поверхность, or tool breakage. Below is a breakdown of the essential equipment, from cutting tools to machines, with tips on what to look for and avoid.
1. Режущие инструменты
The most important factor in cutting tools for plastics is sharpness. Dull tools create more friction, generating heat that melts plastic. They also tear the material instead of cutting it, leading to rough edges.
- Высокоскоростная сталь (HSS) Инструменты: Suitable for soft plastics like polyethylene or nylon. They’re affordable but need frequent sharpening (every 2–3 hours of use for soft plastics).
- Карбид инструментов: Ideal for rigid or high-performance plastics like PEEK or acetal. They stay sharp 5–10 times longer than HSS tools and can handle higher speeds. Look for tools with a high rake angle (15–20 degrees)—this helps lift chips away from the workpiece, reducing heat buildup.
- Diamond-Coated Tools: Used for very hard plastics or parts that need an ultra-smooth finish (НАПРИМЕР., Оптические компоненты). They’re expensive but last the longest (до 50 hours of continuous use for PEEK).
2. Machining Machines
The type of machine you use depends on the complexity and size of your part. Вот наиболее распространенные варианты:
- CNC Mills: Best for 3D parts with complex shapes (НАПРИМЕР., gears or housings). CNC mills offer precision (до ± 0,001 дюйма) и последовательность, making them ideal for small-batch or large-scale production. When machining plastics, use a mill with variable speed control—most plastics require 1,000–3,000 RPM, в зависимости от материала.
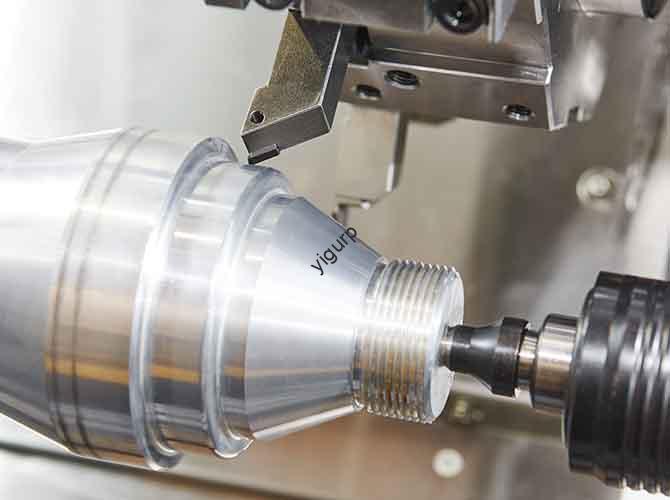
- Lathes: Used for cylindrical parts like rods or bushings. Lathes spin the plastic while a tool cuts it, so chip control is key. Use a lathe with a chip breaker or air blast to prevent stringy chips from wrapping around the workpiece.
- Routers: Good for flat parts or edge profiling (НАПРИМЕР., cutting plastic sheets into panels). Routers are portable and cost-effective for small projects but are less precise than CNC mills (± 0,005 дюйма). Для пластмасс, use a router with a plunge base to start cuts cleanly without melting the surface.
3. Coolants and Lubricants
Coolants are critical for preventing heat buildup, but not all coolants work with plastics. Some oil-based coolants can soften or swell plastics like nylon or PVC, разрушая часть.
- Water-Based Coolants: The safest choice for most plastics. They dissipate heat well and don’t react with common materials. Look for coolants labeled “plastic-compatible” (check the manufacturer’s specs—some contain additives that can harm certain plastics).
- Air Blasts: For plastics that are sensitive to moisture (НАПРИМЕР., PEEK or acetal), use compressed air (80–100 PSI) to cool the tool and blow away chips. This avoids adding moisture to the material, which can cause warping later.
- Avoid Oil-Based Coolants: Unless the plastic is specifically rated for oil (НАПРИМЕР., some types of PTFE), oil-based coolants can cause dimensional changes. Например, nylon soaked in oil-based coolant can expand by 2–3% in 24 часы, per tests by the American Society for Testing and Materials (Астм).
Step-by-Step Process for Machining Plastic Parts
Now that you understand the basics, let’s walk through a step-by-step process for machining a plastic part—we’ll use a simple acetal gear (a common project) as an example. This process works for most machinable plastics, with adjustments for material-specific properties.
Шаг 1: Prepare the Plastic Material
- Cut the Blank: Start with a plastic sheet or rod slightly larger than your final part (add 0.1–0.2 inches for machining). For acetal, use a bandsaw with a fine-tooth blade (18–24 teeth per inch) Чтобы избежать скольжения.
- Dry the Material: If the plastic absorbs moisture (как нейлон или поликарбонат), dry it in an oven. For acetal, drying isn’t necessary, but for nylon, heat to 80°C / 176°F for 4 часы. Moisture causes bubbles or warping during machining—we once had a nylon part warp 0.003 inches because we skipped this step, forcing us to rework it.
- Secure the Blank: Mount the blank to the machine’s worktable using clamps or a vice. Используйте мягкие челюсти (made of aluminum or plastic) Чтобы не царапать пластик. For the acetal gear, we used a CNC mill’s vice with plastic jaws, tightening it just enough to hold the blank (over-tightening can deform soft plastics).
Шаг 2: Set Up the Machine and Tools
- Выберите правильный инструмент: For acetal, a carbide end mill with a 15-degree rake angle works best. We used a 0.25-inch diameter end mill (the size of the gear’s teeth).
- Set Cutting Speeds and Feeds: Refer to the material’s machining guide. For acetal, the recommended speed is 2,500 Rpm, and the feed rate is 5 inches per minute (IPM). Если вы не уверены, start with slower speeds—you can increase them if the cut is clean.
- Install Coolant or Air Blast: For acetal, we used a water-based coolant to keep the tool cool. We positioned the coolant nozzle directly at the cutting area to maximize heat dissipation.
Шаг 3: Perform the Machining Operations
- Roughing Cut: Первый, remove most of the excess material. For the gear, we cut the outer diameter to 2.1 дюймы (0.1 inches larger than the final 2-inch diameter) and created the basic tooth shape. Use a deeper cut (0.1 inches per pass) for roughing—this speeds up the process.
- Finishing Cut: Следующий, make a shallow cut (0.05 inches per pass) to achieve the final dimensions and surface finish. For the gear, we cut the outer diameter to 2 inches and refined the tooth edges. The finishing cut should be slow and steady—rushing can cause melting or imprecision.
- Check Dimensions: After each cut, use calipers or a micrometer to measure the part. For the gear, we checked the tooth spacing (which needed to be 0.5 дюймы) and the overall diameter. If the part is too big, adjust the feed rate or speed; if it’s too small, you may need to start over with a new blank.
Шаг 4: Post-Machining Finishing
- Remove Chips: Используйте мягкую кисть (not a metal brush) to wipe away chips—metal brushes can scratch the plastic. Для труднодоступных мест (like the gear’s teeth), use compressed air.
- Deburr the Part: Plastics often have sharp edges (нормы) После обработки. Use a deburring tool or sandpaper (400–600 Грит) to smooth the edges. For the acetal gear, we used a deburring knife to remove burrs from the tooth tips—this prevents the gear from catching on other parts during use.
- Очистите часть: Wipe the part with a lint-free cloth and a mild cleaner (как изопропиловый спирт) to remove coolant or oil. Avoid harsh chemicals—they can damage the plastic’s surface.
Шаг 5: Inspect the Final Part
- Check Surface Finish: The part should be smooth with no melting, царапины, or burrs. For the acetal gear, we checked for melted edges (a sign of too much heat) and ensured the teeth were sharp but not jagged.
- Тестирование функциональности: If the part is for a specific use (like the gear), test it in the assembly. We mounted the gear to a motor and checked if it rotated smoothly without noise—this confirmed the tooth spacing was correct.
- Document the Process: Record the cutting speeds, feeds, and tool type you used. This helps you replicate the results for future projects. For the acetal gear, we noted that 2,500 RPM and 5 IPM produced the best finish, so we’ll use those parameters for similar parts.
Common Challenges in Machining Plastic Parts and How to Fix Them
Even with the right tools and process, you may run into issues when machining plastic parts. Below are the most common problems, their causes, and step-by-step solutions, based on our 10+ years of experience in plastic machining.
1. Melting or Burning Edges
- Причина: Too much heat from high cutting speeds, dull tools, or insufficient coolant. Например, if you machine acetal at 4,000 Rpm (well above the recommended 2,500 Rpm), the tool will generate excess heat, melting the edges.
- Решение:
- Reduce the cutting speed by 20–30%. For acetal, lower it from 4,000 RPM to 2,800–3,200 RPM.
- Sharpen or replace the tool—dull tools create more friction. If you’re using an HSS tool, sharpen it every 2 часы; carbide tools can go 5–10 hours.
- Increase coolant flow or switch to an air blast (for moisture-sensitive plastics). Make sure the coolant nozzle is aimed directly at the cutting area.
2. Poor Surface Finish (Rough or Scratched)
- Причина: Dull tools, improper chip control, or using the wrong tool material. Soft plastics like nylon are especially prone to scratches if chips aren’t removed quickly.
- Решение:
- Use a sharp, polished tool—diamond-coated tools are best for ultra-smooth finishes.
- Increase the feed rate slightly (by 10–15%)—this helps lift chips away from the surface.
- Use an air blast to remove chips immediately—don’t let them sit on the part. Например, when machining nylon, we use an air blast every 30 seconds to keep chips off the surface.
3. Dimensional Inaccuracy (Part Too Big or Too Small)
- Причина: Material warping (from moisture or heat), over-tightening the blank, или неверные скорости корма. Nylon is a common culprit—if it’s not dried properly, it can shrink by 1–2% after machining.
- Решение:
- Dry the material thoroughly before machining. Для нейлона, follow the ASTM standard: 80° C. / 176°F for 4–6 hours.
- Loosen the clamps or vice—over-tightening can deform the blank. Use soft jaws to distribute pressure evenly.
- Adjust the feed rate: if the part is too big, increase the feed rate (this removes more material); if it’s too small, decrease it. Например, if an acetal part is 0.002 inches too big, increase the feed rate from 5 IPM to 5.5 IPM. This small adjustment ensures the tool removes the right amount of material.
4. Tool Chipping or Breakage
- Причина: Using a tool that’s too soft for the plastic (НАПРИМЕР., HSS tools on rigid PEEK), or cutting too deeply in one pass. Например, trying to cut 0.2 inches of PEEK in a single pass with an HSS tool will likely cause the tool to chip—PEEK’s density puts too much stress on the soft metal.
- Решение:
- Use a harder tool material: switch from HSS to carbide for rigid plastics like PEEK or acetal. Carbide tools can withstand the stress of dense plastics without chipping.
- Reduce the depth of cut: for hard plastics, limit each pass to 0.05–0.1 inches. Для PEEK, we use 0.05-inch passes—this reduces tool stress and extends tool life.
- Check tool alignment: a misaligned tool (НАПРИМЕР., a mill bit that’s not straight) puts uneven pressure on the plastic, causing chipping. Use a tool setter to align the tool before machining.
Yigu Technology’s Perspective on Machining Plastic Parts
В Yigu Technology, we’ve worked with hundreds of clients across industries—from medical device manufacturers to consumer electronics brands—to optimize their plastic part machining processes. Our key insight? Success in machining plastic parts lies in material-specific precision и proactive problem-solving, not one-size-fits-all approaches.
We often see clients waste time and material by using metal-machining parameters for plastics—for example, a client once tried to machine PEEK at 3,000 Rpm (the same speed they used for aluminum), leading to melted parts and broken tools. By adjusting their speed to 1,800 Rpm, switching to carbide tools, and adding a water-based coolant, we helped them reduce scrap rates by 40% in just one week.
We also emphasize the importance of pre-machining material preparation. For clients working with moisture-sensitive plastics like nylon, we recommend on-site drying stations to ensure consistent results—this simple step can eliminate 70% of warping issues. Окончательно, we believe in documenting every process: keeping a log of cutting speeds, feeds, and tool types for each plastic helps clients replicate success and quickly troubleshoot issues, saving time and money long-term.
Часто задаваемые вопросы: Common Questions About Machining Plastic Parts
1. Can I use the same tools for machining all types of plastics?
Нет. Soft plastics (НАПРИМЕР., полиэтилен) work well with HSS tools, while rigid or high-performance plastics (НАПРИМЕР., Заглядывать) require carbide or diamond-coated tools. Using the wrong tool will lead to poor finish, повреждение инструмента, or melted parts. Always match the tool material to the plastic’s hardness—refer to the plastic manufacturer’s guidelines for recommendations.
2. Do I need to use coolant for machining plastic parts?
It depends on the plastic. For heat-sensitive plastics (НАПРИМЕР., acetal, Заглядывать) or when machining at high speeds, охлаждающая жидкость (preferably water-based) is critical to prevent melting. For moisture-sensitive plastics (НАПРИМЕР., some types of PTFE) or low-speed machining, an air blast (80–100 PSI) works better—it cools the tool without adding moisture that could cause warping. Avoid oil-based coolants unless the plastic is explicitly rated for them.
3. How do I know if a plastic is suitable for machining?
Look for plastics labeled “machinable” by the manufacturer—these plastics have consistent density, низкая усадка, and minimal brittleness. Avoid plastics that are too soft (НАПРИМЕР., some flexible PVC variants) или слишком хрупкий (НАПРИМЕР., unmodified polystyrene)—soft plastics won’t hold dimensions, while brittle plastics will crack during cutting. Если вы не уверены, test a small sample first: machine a 1×1-inch piece with standard parameters and check for melting, скольжение, or warping.
4. What’s the maximum precision I can achieve when machining plastic parts?
With a CNC mill and the right setup, you can achieve precision down to ±0.001 inches for rigid plastics like acetal or PEEK. Soft plastics (НАПРИМЕР., нейлон) have slightly lower precision (±0.002–0.003 inches) due to their flexibility. To maximize precision: Используйте Sharp Carbide Tools, dry moisture-sensitive plastics thoroughly, avoid over-tightening the blank, and make shallow finishing cuts (0.05 inches or less per pass).
5. How can I reduce scrap rates when machining plastic parts?
Start with small test runs: machine 2–3 parts first to fine-tune speeds, feeds, and tool alignment—this avoids wasting large batches of material. Dry moisture-sensitive plastics properly (follow ASTM standards) Чтобы предотвратить деформацию. Use chip control (air blasts or chip breakers) to avoid scratches that ruin parts. Окончательно, document every step: if a process works for a specific plastic, save the parameters to replicate success and reduce trial-and-error.
6. Is it safe to machine PVC?
PVC can be machined safely, but it requires extra precautions. When heated (even from cutting friction), PVC releases toxic chlorine fumes that can irritate the lungs. Always use a HEPA-filtered ventilation system to remove fumes—position the vent directly above the cutting area. Wear a respirator rated for organic vapors (N95 or higher) and safety glasses to protect against flying chips. Также, keep cutting speeds low (под 2,000 Rpm) to minimize heat and fuming.