If you’re diving into milling design, you probably want to create parts that are accurate, cost-effective to produce, и работать так, как задумано — будь то прототип, промышленный компонент, или индивидуальный проект. Основной вопрос, который у вас на уме, вероятно,: Что мне нужно знать, чтобы проектировать детали, которые плавно фрезеруются?, избегать ошибок, и достичь целей моего проекта? Короткий ответ: сосредоточить внимание на дизайн для технологичности (ДФМ), понимание возможностей/ограничений фрезерования, и согласование выбора дизайна с вашим материалом и инструментами. Но чтобы превратить это в практические шаги, давайте разберем все важные аспекты проектирования фрезерования — от основ до профессиональных советов.
What Is Milling Design, И почему это имеет значение?
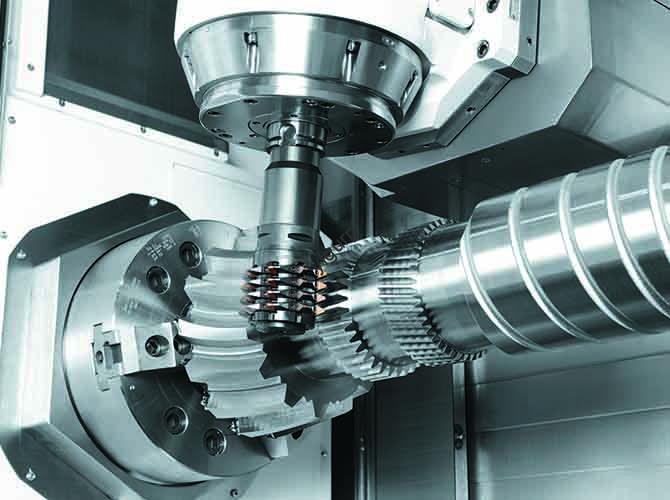
Milling design is the process of creating 2D or 3D designs for parts that will be manufactured using фрезерные машины—tools that remove material (via rotating cutters) to shape raw materials like metal, пластик, or wood into precise forms. В отличие от 3D -печати (который добавляет материал), milling is a “subtractive” process, so your design must account for how cutters move, what shapes they can (and can’t) create, and how material removal affects part strength.
Why does good milling design matter? Poorly designed parts lead to:
- Higher costs: Reworking parts that fail (НАПРИМЕР., due to thin walls that break during milling) or require custom tooling adds expenses.
- Задержки: Designs that don’t fit milling capabilities force shops to adjust, pushing back timelines.
- Performance issues: Parts with sharp internal corners (which are hard to mill smoothly) or uneven material distribution may wear out faster or fail under stress.
Пример реального мира: A startup I worked with once designed a plastic housing for a sensor with a 0.5mm-thin wall. When the shop tried to mill it, the wall kept bending or breaking—because the cutter’s diameter (1мм) was larger than the wall width, making precise cuts impossible. We revised the design to thicken the wall to 1.2mm (matching the cutter size), and the part was produced perfectly on the first try. This small design change saved them 3 weeks of rework and $1,200 в материалах затрат.
Key Milling Design Principles (That Prevent Common Mistakes)
Whether you’re designing a simple bracket or a complex aerospace component, these four principles will keep your milling design on track. They’re based on decades of combined experience from machinists and design engineers I’ve collaborated with.
1. Дизайн для производства (ДФМ): Prioritize “Milling-Friendly” Shapes
DFM means creating designs that work with, not against, фрезерные машины. The biggest mistake new designers make is creating shapes that are technically possible but impractical to mill. Here’s what to avoid:
- Internal corners tighter than your cutter radius: Milling cutters have rounded tips (measured by radius), so you can’t mill a sharp 90° internal corner. If your design needs a tight corner, match the corner radius to the cutter radius (НАПРИМЕР., a 2mm cutter needs a ≥2mm internal corner radius).
- Подписаны: These are recesses that the cutter can’t reach without special tooling (НАПРИМЕР., канавка, прорезанная на стороне детали, которая находится глубже, чем досягаемость фрезы). Для подрезов часто требуются дорогие специальные инструменты — вместо этого выбирайте прямые стенки или фаски..
- Тонкие стены или особенности: Как и в предыдущем примере, стенки тоньше диаметра фрезы склонны к разрушению. Для большинства материалов, сохранить хотя бы стены 1.5х диаметр фрезы (НАПРИМЕР., 1.5Толщина мм для фрезы 1 мм.).
Для чаевого: Используйте «библиотеку резаков» (они есть в большинстве программ САПР) чтобы увидеть доступные стандартные размеры фрез. Проектируйте свои детали в соответствии с этими размерами, чтобы избежать использования нестандартных инструментов..
2. Допуски: Be Realistic About What Milling Can Achieve
Допуски (допустимые изменения в измерениях частично) are critical in milling design—but setting them too tight (more precise than needed) wastes time and money. Most CNC mills can achieve tolerances of ±0.005 inches (0.127мм) for standard parts, but tighter tolerances (НАПРИМЕР., ± 0,001 дюйма) требовать:
- More expensive machines (НАПРИМЕР., high-precision CNC mills with better calibration).
- Slower cutting speeds (Чтобы уменьшить вибрацию, что вызывает ошибки).
- Additional quality checks (НАПРИМЕР., using a CMM to verify dimensions).
Точка данных: Согласно 2024 study by the American Machinists Society, tightening tolerances from ±0.005 inches to ±0.001 inches increases production costs by 40–60% в среднем. Only set tight tolerances for critical features (НАПРИМЕР., a hole that needs to fit a bolt precisely)—leave non-critical features with looser tolerances.
3. Материал выбор: Align Design with Material Properties
Your material dictates key design choices—like wall thickness, вырезать глубину, and even part shape. Например:
- Алюминий (6061): Soft and easy to mill, so you can design thinner walls (down to 1mm for small parts) and complex shapes. It’s ideal for prototypes or low-stress parts.
- Нержавеющая сталь (304): Harder and more brittle, so you need thicker walls (Минимальный 2 мм) and larger internal radii (to avoid cracking during cutting). It’s great for high-stress or corrosion-resistant parts.
- Пластмассы (АБС): Prone to melting if cut too fast, so designs should avoid deep, узкие слоты (which trap heat). Opt for wider slots and thicker walls (1.5ММ минимум) Чтобы предотвратить деформацию.
Пример: A client designing a marine component initially chose aluminum for its low cost. But since the part would be exposed to saltwater, we switched to stainless steel—and adjusted the design: thickening walls from 1mm to 2.5mm and increasing internal radii from 1mm to 3mm. The part now resists corrosion and doesn’t crack during milling.
4. Tool Path Considerations: Design for Efficient Cutting
Путь инструмента (the route the cutter takes to remove material) affects production time and part quality. Good milling design minimizes unnecessary cutter movements. Вот как:
- Avoid “islands”: These are small, isolated features (НАПРИМЕР., a tiny boss in the middle of a large flat surface) that force the cutter to make extra passes. Если возможно, integrate islands into larger features.
- Use uniform depths: Milling at a consistent depth (instead of varying depths) speeds up cutting—since the machine doesn’t have to adjust its Z-axis constantly.
- Add lead-in/lead-out paths: These are small, curved paths that let the cutter enter/exit the material smoothly (instead of hitting it straight on). They reduce tool wear and prevent “chatter” (vibration that leaves rough surfaces).
Step-by-Step Milling Design Process (From Idea to Final File)
Designing a milled part isn’t just about drawing—it’s a structured process that ensures your design is both functional and manufacturable. Следуйте этим 5 steps to avoid missteps:
Шаг 1: Define Your Part’s Purpose and Requirements
Before opening CAD software, answer these questions:
- Что будет делать часть? (НАПРИМЕР., hold a sensor, connect two components)
- What are the critical features? (НАПРИМЕР., a hole that must align with another part)
- What environment will it be used in? (НАПРИМЕР., высокая температура, соленая вода)
- What’s your budget and timeline? (Tighter budgets/timelines mean simpler designs)
Write down these answers—they’ll guide every design choice. Например, если вашей детали нужно удерживать датчик в двигателе автомобиля (высокая температура), вы отдаете предпочтение термостойким материалам (как титан) и избегайте тонких стен (которые деформируются при высоких температурах).
Шаг 2: Choose Your Material and Cutter Size
На основе ваших требований, Выберите материал (воспользуйтесь советами из предыдущего раздела) и стандартный размер фрезы. Помнить:
- Размер фрезы определяет минимальные размеры элементов (НАПРИМЕР., фреза диаметром 3 мм не может фрезеровать паз шириной 2 мм.).
- Стандартные фрезы (НАПРИМЕР., 1мм, 2мм, 3мм, 0.125 дюймы, 0.25 дюймы) дешевле и их легче найти, чем нестандартные размеры.
Пример: Для пластикового кронштейна прототипа (низкий стресс, быстрый график), Я бы выбрал АБС-пластик и фрезу 2 мм.. Это позволяет мне проектировать стены толщиной до 3 мм. (1.5х размер фрезы) and internal radii of 2mm—simple to mill and cost-effective.
Шаг 3: Draft the Design in CAD (With DFM in Mind)
Используйте программное обеспечение CAD (НАПРИМЕР., Слияние 360, Солидворкс, or FreeCAD for beginners) Чтобы создать свою 3D -модель. As you draft, apply the DFM principles we covered:
- Add internal radii matching your cutter size (no sharp corners!).
- Keep walls thick enough for your material (1.5x cutter size minimum).
- Avoid undercuts or islands.
- Label critical features with tolerances (НАПРИМЕР., "Дыра: 10мм ±0,005 мм”).
Для чаевого: Use CAD’s “DFM check” tools (many programs have them) to flag issues like tight corners or thin walls. Например, Fusion 360’s “Manufacturability Check” will highlight features that are hard to mill and suggest fixes.
Шаг 4: Simulate the Milling Process (Optional but Powerful)
If you’re using advanced CAD/CAM software (НАПРИМЕР., Мастеркам, Слияние 360), simulate the milling process to see how the cutter will interact with your design. Simulation helps you:
- Catch collisions (НАПРИМЕР., the cutter hitting a part of the design it shouldn’t).
- Identify areas where the cutter can’t reach (НАПРИМЕР., deep recesses).
- Estimate production time (so you can adjust the design if it’s too slow).
Пример реального мира: A client designing a complex aluminum gear used Fusion 360’s simulation tool. The simulation showed that a small recess in the gear was too deep for the 3mm cutter—so we shallow the recess by 1mm, eliminating the need for a custom 5mm cutter and cutting production time by 2 дни.
Шаг 5: Export the Right File Format (And Add Notes for the Shop)
Once your design is final, export it in a format the machining shop can use. The most common formats are:
- ШАГ: A universal 3D format that works with all CAD/CAM software (preferred for most shops).
- Iges: Another universal format, good for older software.
- 2D DWG/DXF: Для простых частей, but 3D formats are better for complex designs (they reduce misinterpretation).
Add a “design notes” document to explain:
- Critical tolerances (label which features need precision).
- Material type and grade (НАПРИМЕР., “Aluminum 6061-T6”).
- Any special requirements (НАПРИМЕР., “Surface finish: 1.6μm Ra”).
Common Milling Design Mistakes (И как их исправить)
Even experienced designers make errors—here are the most frequent ones, plus solutions based on real projects I’ve worked on:
| Общая ошибка | Почему это проблема | Исправить | Пример |
| Sharp internal corners | Cutters can’t mill sharp corners—they leave a rounded edge, making the part non-compliant. | Сопоставьте внутренний угловой радиус с радиусом фрезы. (НАПРИМЕР., 2Радиус мм для фрезы 2 мм). | Конструкция брекета клиента имела внутренние углы под углом 90°.. Мы добавили радиусы 2 мм., и магазин фрезеровал его отлично. |
| Тонкие стены (слишком мал для резака) | Стенки гнутся или ломаются при фрезеровании; они также слабее в использовании. | Сделайте стенки размером как минимум в 1,5 раза больше диаметра фрезы. (НАПРИМЕР., 3стенки мм для фрезы 2 мм). | Пластиковый корпус датчика имел стенки толщиной 1 мм. (2мм резак). Утолщили стенки до 3 мм — больше никаких поломок. |
| Слишком жесткие допуски | Увеличивает стоимость и время производства.; часто не требуется для некритических функций. | Используйте только плотные допуски (±0,001–0,003 дюйма) Для критических функций; для других используйте ±0,005–0,01 дюйма.. | Клиентский набор ±0,001 дюйма для всех характеристик кронштейна.. Мы ослабили некритические допуски до ±0,005 дюйма., сокращение расходов 35%. |
| Подписаны | Требуются специальные инструменты (дорогой) или ручная отделка (кропотливый). | Перепроектируйте, чтобы удалить подрезы — используйте фаски, прямые стены, или вместо них внешние канавки. | Конструкция шестерни имела подрез под уплотнитель.. Мы поменяли его на внешний паз, устраняет необходимость в специальном резаке. |
| Игнорирование усадки материала (для пластмасс) | Plastic parts shrink after milling—so the final part is smaller than designed. | Add a “shrink factor” to your design (НАПРИМЕР., 1.5% for ABS plastic). | A client’s ABS housing was 2% Слишком маленький. We scaled the design up by 2%—the final part fit perfectly. |
Yigu Technology’s Perspective on Milling Design
В Yigu Technology, we’ve supported hundreds of clients with milling design—from startups to industrial manufacturers—and one lesson stands out: great milling design balances function and manufacturability. Слишком часто, teams focus solely on what the part needs to do, ignoring how it will be made. This leads to costly rework and delays. We recommend three core practices: первый, involve a machinist early—even a 30-minute call with a shop can reveal design tweaks that save time (НАПРИМЕР., adjusting a corner radius to use a standard cutter). Второй, prioritize standardization—design around common cutter sizes and materials to avoid custom tooling. Третий, test with a prototype—milling a single prototype lets you catch issues (like thin walls or tight tolerances) Перед полным производством. Milling design isn’t just about drawing—it’s about collaborating with the manufacturing process to create parts that work и are easy to make.
FAQ About Milling Design
1. What’s the minimum wall thickness for a milled part?
It depends on the material and cutter size. Для большинства материалов, aim for walls that are 1.5х диаметр фрезы (НАПРИМЕР., 3стенки мм для фрезы 2 мм). Для мягких материалов (алюминий), you can go as low as 1x the cutter diameter (2стенки мм для фрезы 2 мм) for small parts—but thicker walls are more durable.
2. Can I mill a sharp 90° internal corner?
Нет. Milling cutters have rounded tips (radius), so the smallest internal corner you can mill is equal to the cutter’s radius. If you need a “sharp” corner, you can use a smaller cutter (НАПРИМЕР., a 1mm cutter for a 1mm radius) or add a chamfer (a angled edge) вместо.
3. What file format should I send to a machining shop for my milling design?
ШАГ is the best choice—it’s universal and works with all CAD/CAM software. If the shop uses older software, send an IGES file. Avoid sending only 2D drawings for complex parts (3D files reduce misinterpretation).
4. How do I choose tolerances for my milling design?
Используйте плотные допуски (±0,001–0,003 дюйма / ±0.025–0.076mm) only for critical features (НАПРИМЕР., holes that need to fit bolts). For non-critical features (НАПРИМЕР., a flat surface with no connections), Используйте более свободные допуски (±0.005–0.01 inches / ±0.127–0.254mm) to save cost and time.
5. Do I need to know how to use CAM software for milling design?
No—most machining shops have CAM experts who will program the tool paths from your CAD file. Однако, understanding basic CAM principles (НАПРИМЕР., cutter paths, cut depths) helps you design more manufacturable parts. Если ты новенький, ask the shop to review your design for CAM compatibility.