When developing a new lamp design, а processing of lamp prototypes is a critical link that directly determines whether the final product meets design expectations. A well-executed prototype not only verifies functionality and aesthetics but also lays the groundwork for mass production. This article breaks down the core steps, ключевые соображения, and solutions to common challenges in lamp prototype processing, helping you avoid pitfalls and achieve optimal results.
1. Выбор материала: The Foundation of Prototype Quality
Choosing the right material is the first step to success—different materials vary in transparency, теплостойкость, и обрабатываемость, directly impacting the prototype’s performance and appearance.
| Тип материала | Ключевые характеристики | Ideal Lamp Applications |
| ABS Пластик | Легко в машине, Хорошее воздействие сопротивления, dyeable | Desk lamps, floor lamps (non-heat-intensive parts) |
| Акрил | Высокая прозрачность, excellent gloss, moderate heat resistance | Lampshades, light diffusers |
| ПК Пластик | Высокая теплостойкость, Пламя-возобновляющий, сильный | LED downlights, high-temperature lamp housings |
| Алюминиевый сплав | Легкий вес, Хорошая теплопроводность, Высокая сила | LED lamp heat sinks, структурные рамки |
| Смола | Excellent for complex shapes, customizable transparency | Artistic lamps, prototypes with intricate details |
Key Question: How to prioritize material properties?
For light-transmitting parts (НАПРИМЕР., абажуры), prioritize прозрачность и глянец (НАПРИМЕР., акрил). For heat-generating parts (НАПРИМЕР., LED bases), prioritize теплопроводность (НАПРИМЕР., алюминиевый сплав).
2. Processing Technology: Matching Methods to Needs
The choice of processing technology depends on prototype complexity, Размер партии, и точные требования. Below is a comparison of the most common methods:
| Технология | Преимущества | Недостатки | Лучше всего для |
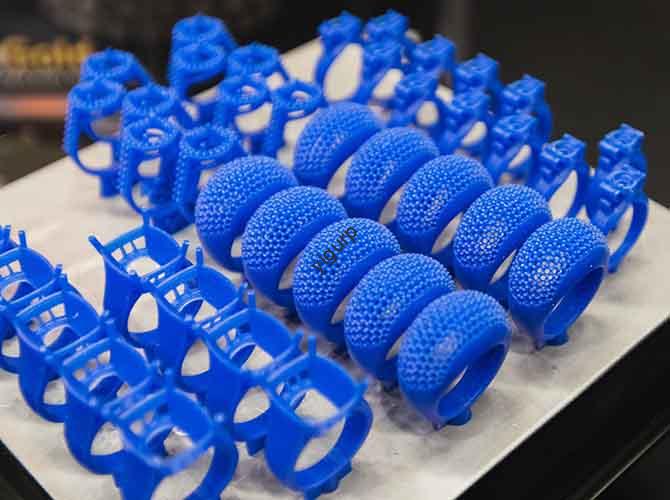
| 3D Печать | Fast for complex shapes, low cost for small batches | Surface may have layering, limited material options | Intricate prototypes (НАПРИМЕР., artistic lamp bases), Маленькие партии (<10 единицы) |
| Обработка с ЧПУ | Высокая точность (± 0,01 мм), гладкая поверхность, suitable for hard materials | Slow for complex designs, high cost for small batches | Высокие детали (НАПРИМЕР., metal heat sinks), большие партии (>20 единицы) |
| Силиконовый литья | Low cost for multiple copies, Постоянное качество | Requires a master prototype (made via 3D printing/CNC) | Duplicating prototypes (НАПРИМЕР., 50+ identical lampshades) |
| Ручной работы | Flexible for unique details, suitable for special materials | Кропотливый, inconsistent quality | Custom touches (НАПРИМЕР., hand-sanded resin details, small-scale art lamps) |
Для чаевого: For complex components, combine technologies—e.g., use 3D printing to create a master prototype, then use silicone molding to produce multiple copies. This balances speed and cost.
3. Структурный дизайн: Avoiding Common Failures
Poor structural design can lead to assembly issues, деформация, or functional failures. Focus on these three areas:
3.1 Assembly Compatibility
Design with assembly methods in mind to ensure components fit securely and easily. Common assembly methods include:
- Снимки: Ideal for plastic parts; ensure snaps have enough flexibility to avoid breaking.
- Винты: Suitable for metal/plastic connections; use standard sizes (НАПРИМЕР., M3, М4) for easy sourcing.
- Glue: Лучше всего для не нагрузочных деталей (НАПРИМЕР., lampshade attachments); choose heat-resistant glue for LED lamps.
Избегать: Tight fits (cause assembly difficulty) or loose fits (lead to instability).
3.2 Thin-Wall Treatment
Lampshades and light diffusers often use thin-wall structures. To prevent deformation or cracking:
- Поддерживать uniform wall thickness (1.5–3mm for plastic; 0.8–2mm for aluminum).
- Добавлять stiffeners (НАПРИМЕР., small ribs) to ultra-thin sections (≤1 мм) for extra support.
3.3 Thermal Design (Critical for LED Lamps)
LED lamps generate heat, which can warp prototypes or reduce lifespan. Solutions include:
- Integrate heat dissipation holes (диаметр: 2–5 мм) in the lamp housing.
- Использовать metal bases (алюминиевый сплав) to transfer heat away from the LED chip.
- Avoid covering heat-generating parts with thick plastic (blocks heat escape).
4. Поверхностная обработка: Улучшение эстетики и долговечности
Surface treatment improves the prototype’s appearance and protects it from wear. Ниже приведены наиболее эффективные методы:
| Метод лечения | Цель | Ключевые соображения |
| Шлифование & Полировка | Удалить следы обработки (НАПРИМЕР., CNC knife marks, 3D print layers) | Используйте наждачную бумагу с зернистостью 400–2000. (грубо, чтобы хорошо); polish acrylic to a high gloss with a buffing wheel. |
| Распыление | Add color or texture (матовый, глянцевый, металлик) | Use UV-resistant paint for outdoor lamps; ensure no bubbles or flow marks. |
| Гальванизация | Create a metallic finish (хром, никель) | Suitable for metal parts; avoid plating on plastic (low adhesion). |
| Шелковая печать | Add text or patterns (НАПРИМЕР., логотипы бренда) | Use durable inks; test for wear resistance (НАПРИМЕР., rub with a cloth). |
5. Сборка & Тестирование: Verifying Prototype Reliability
Skipping testing can lead to costly mistakes in mass production. Follow this step-by-step process:
Шаг 1: Функциональная проверка
Test core lamp functions to ensure usability:
- Освещение: Check if the light turns on/off smoothly; verify brightness (НАПРИМЕР., 500–800 lumens for desk lamps).
- Switches/Dimming: Test switch responsiveness and dimming range (Если применимо).
- Heat Dissipation: Run the lamp for 2–4 hours; measure surface temperature (should not exceed 60°C for touchable parts).
Шаг 2: Визуальный осмотр
Compare the prototype to design requirements:
- Проверять цветовая консистенция (use a Pantone color chart for reference).
- Осмотрите на дефекты: царапины, blemishes, or uneven gaps (gaps should be <0.5мм).
- Проверять прозрачность (для акриловых деталей: ensure no cloudiness).
Шаг 3: Структурная стабильность
Simulate real-world use to test durability:
- Load-Bearing: Place a small weight (НАПРИМЕР., 500глин) on the lamp base (should not tip over).
- Шоковое сопротивление: Drop the prototype from 30cm (no cracks or loose parts).
- Долговечность: Open/close the lamp shade 50 раз (no damage to hinges).
6. Yigu Technology’s Perspective on Lamp Prototype Processing
В Yigu Technology, we believe that precision and adaptability are key to successful lamp prototype processing. Many clients initially prioritize speed over material selection, leading to rework (НАПРИМЕР., using low-heat-resistance plastic for LED lamps). Our approach is to first align materials with functional needs—e.g., recommending PC plastic for high-temperature LED parts or aluminum alloy for heat sinks—then optimize processes to balance speed and cost. We also emphasize data management: saving 3D models, параметры обработки, and test reports ensures consistency if modifications or mass production are needed. By combining technical expertise with client feedback, we help turn lamp designs into reliable prototypes that accelerate product launch.
7. Часто задаваемые вопросы: Solving Common Lamp Prototype Issues
1 квартал: My prototype has dimensional deviations—what causes this?
А1: Dimensional deviations usually stem from two issues: insufficient processing accuracy (НАПРИМЕР., CNC toolpath errors) или материальная усадка (common with plastic). Решения: Optimize CNC toolpaths (use high-precision tools) and reserve 1–2% shrinkage allowance for plastic materials (НАПРИМЕР., ABS shrinks ~1.5%).
2 квартал: The lamp shade has poor light transmittance—how to fix it?
А2: Poor transmittance is often due to wrong material selection (НАПРИМЕР., using opaque plastic instead of acrylic) или inadequate polishing (machining marks block light). Исправляет: Switch to high-transparency acrylic and polish the surface with 1500–2000 grit sandpaper followed by a buffing wheel.
Q3: Assembled parts are loose—what’s the solution?
А3: Loose parts usually result from unreasonable design (НАПРИМЕР., snaps that are too thin) или processing errors (НАПРИМЕР., CNC parts are too small). Решения: Adjust the design (thicken snaps by 0.2–0.3mm) or improve machining accuracy (use a CNC machine with ±0.005mm precision).