В сегодняшнем быстро развивающемся производственном мире, how can businesses cut production time, сократить расходы, and still meet high customization demands? The answer lies in 3D printing fixtures—specialized tools made via 3D printing to support, держать, and position workpieces during industrial processes. Unlike traditional fixtures, these tools combine precision, Гибкость, и эффективность, making them indispensable in key sectors like aerospace and medical manufacturing. Below is a comprehensive guide to understanding, designing, and leveraging 3D printing fixtures.
1. What Are 3D Printing Fixtures, and Why Do You Need Them?
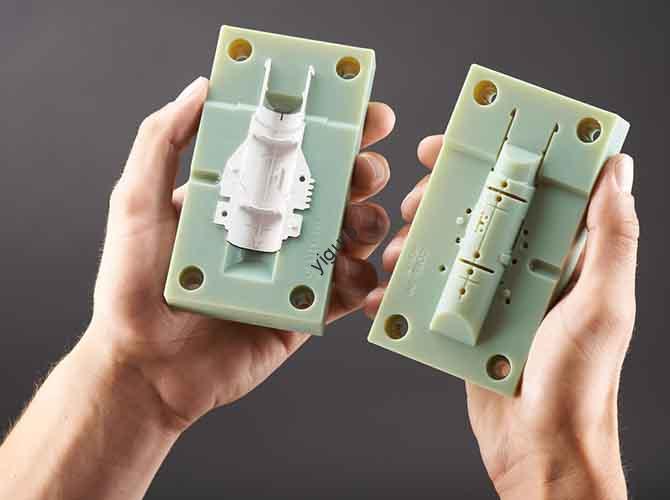
По их сути, 3D printing fixtures are custom-manufactured tools created using 3D printing technology for specific industrial operations (НАПРИМЕР., спекание, сборка, or inspection). They solve three critical pain points of traditional fixtures:
| Pain Point of Traditional Fixtures | Solution from 3D Printing Fixtures |
| Длинные производственные циклы (4–8 недель) | Shortened lead time (3–7 дней) |
| High cost for small-batch orders | 30–50% lower manufacturing costs |
| Rigid design (hard to modify) | Fully customizable for unique workpieces |
Например, a medical device manufacturer once struggled to produce small-batch fixtures for orthopedic implant sintering. Переключившись на 3D -печать, they reduced fixture production time from 6 недели до 5 days and cut costs by 40%—all while ensuring the fixtures matched the implants’ exact shapes.
2. Пошаговый рабочий процесс: From Design to Deployment
Creating effective 3D printing fixtures follows a linear, four-stage process. Each step is critical to ensuring the final fixture meets performance and precision requirements.
Этап 1: Пользовательский дизайн & Оптимизация
- Needs Analysis: Первый, define the fixture’s purpose (НАПРИМЕР., high-temperature sintering or delicate electronic assembly) and the workpiece’s specs (размер, материал, масса).
- Моделирование CAD: Use software like SolidWorks or AutoCAD to build a 3D model tailored to the workpiece. Например, a fixture for a titanium aerospace part would include grooves to match the part’s curved surface.
- Оптимизация модели: Adjust the design to fit 3D printing constraints—add fillets to reduce stress, optimize wall thickness (usually 2–5mm for durability), and avoid overhangs that require extra support.
Этап 2: Выбор материала (The Make-or-Break Choice)
Choosing the right material ensures the fixture performs in its intended environment. Key factors include thermal stability, износостойкость, and compatibility with the workpiece.
| Тип материала | Ключевые свойства | Идеальные приложения |
| Керамика | Высокотемпературное сопротивление (до 1600 ° C.), Низкое тепловое расширение | Powder metallurgy sintering |
| Металл (НАПРИМЕР., алюминий, нержавеющая сталь) | Высокая сила, износостойкость | Aerospace part assembly, heavy-load holding |
| Graphite | Отличная теплопроводность, химическая инертность | High-precision electronic component processing |
Для чаевого: Always match the fixture’s thermal expansion coefficient to the workpiece. Например, if the workpiece is made of stainless steel (Коэффициент термического расширения: 17.3 × 10⁻⁶/° C.), choose a stainless steel fixture to avoid warping during heating.
Этап 3: 3D Printing Execution
- Приготовление печати: Import the optimized CAD model into slicing software (НАПРИМЕР., Уход). Установите параметры:
- Высота слоя: 0.1–0,2 мм (для высокой точности)
- Плотность заполнения: 50–80% (balances weight and strength)
- Printing speed: 30–60 мм/с (avoids layer separation)
- Печать: Start the 3D printer (FDM for plastics, SLS for metals). The printer builds the fixture layer by layer—no molds or tooling needed.
Этап 4: Пост-обработка & Проверка качества
| Шаг | Цель | Как это сделать |
| Удалить структуры опор | Eliminate extra material used during printing | Use pliers for FDM parts; sandblasting for SLS parts |
| Поверхностная обработка | Improve smoothness and durability | Sand with 200–400 grit sandpaper; polish with a buffer for metal parts |
| Качественная проверка | Ensure compliance with design specs | Use a caliper to check dimensions; Используйте координату измерительную машину (ШМ) Для высоких частей |
3. Ключевые приложения: Where 3D Printing Fixtures Shine
3D printing fixtures are not one-size-fits-all—they excel in sectors where customization and performance are non-negotiable. Here are four major use cases:
- Аэрокосмическая: Hold lightweight, сложные части (НАПРИМЕР., турбинные лезвия) during drilling. Fixtures are made of aluminum for strength and low weight.
- Медицинский: Support custom orthopedic implants (НАПРИМЕР., замены бедра) during sintering. Ceramic fixtures withstand high temperatures without contaminating the implant.
- Электроника: Position tiny circuit boards during soldering. Plastic fixtures (НАПРИМЕР., Плата) are non-conductive and protect sensitive components.
- Powder Metallurgy: Shape metal powders into finished parts. Graphite fixtures ensure even heat distribution during sintering.
4. Yigu Technology’s Perspective on 3D Printing Fixtures
В Yigu Technology, Мы воочию видели, как 3D printing fixtures transform manufacturing. Many clients initially hesitate to switch from traditional fixtures, worried about cost or performance—but after testing, they’re amazed by the 30–50% cost reduction and 70% faster lead times. Мы рекомендуем начать с малого: use 3D printing for low-volume, high-customization fixtures (НАПРИМЕР., Прототипы медицинского устройства) before scaling up. Our team also helps optimize designs and select materials, ensuring fixtures meet even the strictest industry standards (НАПРИМЕР., aerospace AS9100).
Часто задаваемые вопросы: Your Top 3D Printing Fixture Questions Answered
1 квартал: Can 3D printing fixtures replace all traditional fixtures?
No—for high-volume production (10,000+ единицы), traditional fixtures (НАПРИМЕР., CNC-machined metal) может быть все еще дешевле. Но для небольших партий, прототипы, or custom parts, 3D printing fixtures are far more cost-effective.
2 квартал: How long does a 3D printing fixture last?
It depends on the material and usage. Metal fixtures can last 2–5 years (для регулярного использования), while ceramic fixtures last 3–7 years in high-temperature environments. Plastic fixtures (НАПРИМЕР., Плата) are best for short-term projects (6–12 месяцев).
Q3: Do I need special software to design 3D printing fixtures?
Basic CAD software (НАПРИМЕР., Слияние 360) works for simple fixtures. Для сложных дизайнов (НАПРИМЕР., аэрокосмические части), use specialized software like ANSYS to simulate stress and thermal performance before printing.