Electroplating prototypes are physical models that replicate the appearance, textura, e desempenho superficial de produtos produzidos em massa, depositando uma fina película metálica (por exemplo, cromo, níquel, ouro, prata) em um protótipo básico (feito via impressão 3D ou usinagem CNC). Ao contrário dos protótipos básicos, eles preenchem a lacuna entre os conceitos de design e a produção final, making them critical for verifying surface treatments, ajuste de montagem, e apelo de mercado. This article breaks down their definition, produção passo a passo, key precautions, aplicações, and alternatives to guide teams through successful prototype creation.
1. What Exactly Are Electroplating Prototypes?
To understand their value, let’s start with core definitions, purposes, and key traits that set them apart from ordinary prototypes.
| Aspect | Detalhes |
| Core Definition | A prototype where a metal coating is applied to a base model (3D printed resin/CNC machined plastic/metal) via electroplating processes to mimic mass-produced product aesthetics and surface properties. |
| Primary Purposes | 1. Verificar CMF (Color, Material, Terminar) alignment with design requirements.2. Test assembly compatibility between electroplated parts and other components (por exemplo, dobradiças, parafusos).3. Evaluate functional performance (resistência ao desgaste, resistência à corrosão, condutividade) of the metal coating.4. Serve as marketing tools (exhibition displays, customer demos) without costly mold opening. |
| Key Traits | – Aesthetic Realism: Replicates metallic textures (por exemplo, stainless steel shine, gold plating luxury) of final products.- Surface Durability: The metal coating adds scratch and corrosion resistance (unlike painted prototypes).- Versatilidade de materiais: Works with base materials like resin (3D impresso), ABS, PC, and even some metals. |
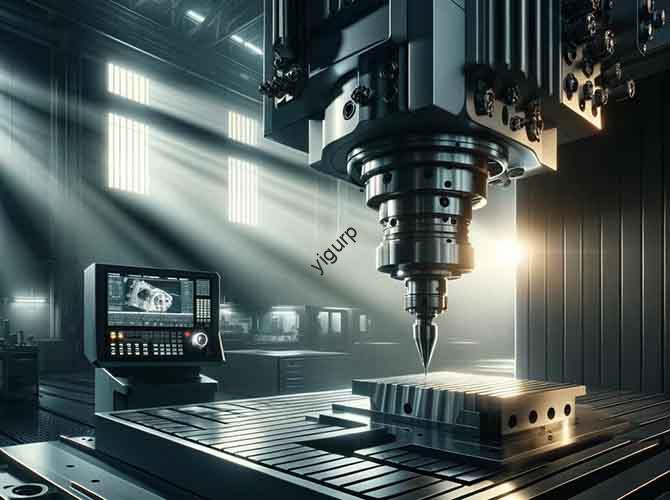
2. What Is the Step-by-Step Production Process?
Creating electroplating prototypes follows a linear, detail-driven workflow—each step directly impacts the final quality. Skipping or rushing any stage leads to defects like uneven plating or poor adhesion.
2.1 Etapa 1: Base Prototype Fabrication
Primeiro, create a high-quality base model using 3D printing or CNC machining—surface smoothness here determines plating results.
| Fabrication Method | Melhor para | Material Recommendations | Key Tips |
| 3Impressão D | Formas complexas, pequenos lotes (1–5 units). | High-precision photoresist resins (por exemplo, SLA/DLP resins like Formlabs Castable Resin) — they offer smoother surfaces (Ra ≤3.2μm) and are easy to sand. | Avoid resins with amino groups (por exemplo, some biodegradable resins) — they react with plating solutions and cause defects. |
| Usinagem CNC | Peças de alta precisão, rigid structures (por exemplo, consumer electronics housings). | Engineering plastics (ABS, PC, nylon) ou metais (liga de alumínio, latão) — CNC ensures no laminations or surface marks. | Depois da usinagem, sand the surface with 400→800→1200 grit sandpaper (coarse to fine) to remove tool marks. |
2.2 Etapa 2: Base Prototype Surface Preparation
This stage ensures the base is clean, rough enough for coating adhesion, and ready for electroplating.
- Lixar: Use lixa (gradually increasing grit) to eliminate surface imperfections (laminations, marcas de usinagem). For resin prototypes, comece com 400 grit and finish with 1200 grit for a smooth base.
- Cleaning: Wipe the prototype with isopropyl alcohol or a specialized industrial cleaner to remove dust, óleo, and sanding residue—any contamination causes plating bubbles.
- Degreasing: For oily materials (por exemplo, CNC-machined ABS), use an alkaline cleaner or ultrasonic cleaner (40–60ºC, 10–15 minutos) to fully remove surface grease.
- Roughening: Increase surface roughness to improve coating adhesion:
- For plastics/resins: Use mild chemical corrosion (por exemplo, 5% sulfuric acid solution, 5–8 minutes) ou jato de areia (fine alumina powder).
- For metals: Skip sandblasting—chemical etching (por exemplo, 10% ácido clorídrico, 3–5 minutos) works better.
- Activation: Treat the surface with an activator (por exemplo, 10% hydrochloric acid or specialized electroplating activator) to create a conductive layer—critical for non-conductive materials like resin.
2.3 Etapa 3: Electroplating Process
This is the core stage—choose the right plating type and control parameters to achieve the desired finish.
2.3.1 Conductive Layer Deposition (For Non-Conductive Bases)
Materiais não condutores (resina, some plastics) need a conductive base first:
- Opção 1: Conductive Paint Spraying: Apply 2–3 thin coats of silver-based conductive paint (drying time: 30 minutes per coat) — cost-effective for small prototypes.
- Opção 2: Vacuum Coating: Use physical vapor deposition (PVD) to deposit a thin nickel/chromium layer (0.005–0.01mm thick) — offers better conductivity and adhesion than paint.
2.3.2 Plating Execution
Choose a plating type based on your prototype’s purpose, then control key parameters for consistency.
| Plating Type | Ideal para | Key Parameters |
| Bright Chrome Plating | Peças decorativas (home appliance buttons, car interior trims) — offers a mirror-like finish. | Current density: 15–25 A/dm²; Temperature: 40–50°C; Tempo: 20–30 minutes; Plating solution: Chromic acid (250–300 g/L). |
| Imitation Gold Plating | Bens de luxo (watch casings, protótipos de joias) — mimics 18K/24K gold. | Current density: 5–10 A/dm²; Temperature: 25–35°C; Tempo: 10–15 minutos; Plating solution: Cyanide-free gold salt (1–3 g/L). |
| Pearl Nickel Plating | Matte-finish parts (electronics shells, furniture handles) — anti-fingerprint and scratch-resistant. | Current density: 8–12 A/dm²; Temperature: 50–60ºC; Tempo: 15–20 minutes; Plating solution: Nickel sulfate (200–250 g/L) + pearl agent (5–10 g/L). |
2.4 Etapa 4: Post-Treatment & Inspeção de Qualidade
Post-treatment enhances durability, while inspection ensures the prototype meets standards.
2.4.1 Post-Treatment Steps
- Passivação: Immerse the plated prototype in a passivation solution (por exemplo, 5% sodium dichromate solution, 5–10 minutes) to improve corrosion resistance (critical for chrome/nickel plating).
- Polimento: For high-gloss requirements (por exemplo, mirror chrome), use mechanical polishing (cotton wheel + polishing paste) or chemical polishing (10% nitric acid solution, 3–5 minutos).
- Coating Protection: Spray a thin layer of clear UV-cured paint (drying time: 1–2 hours under UV light) to prevent oxidation and wear.
2.4.2 Quality Inspection Checklist
| Inspection Type | Method | Acceptance Standard |
| Inspeção Visual | Naked eye or 10x magnifying glass | Uniform plating, sem defeitos (leakage, arranhões, bolhas, color spots). |
| Adhesion Test | Cross-cut test (ASTM D3359 standard) | No coating peeling in the cross-cut area (rating ≥4B). |
| Thickness Test | Magnetic thickness gauge (for ferromagnetic coatings like nickel) or eddy current gauge (for non-ferromagnetic coatings like chrome). | Decorative plating: 0.02–0,1 mm; Functional plating (conductivity/corrosion resistance): 0.1-0,3mm. |
| Corrosion Resistance Test | Salt spray test (5% NaCl solution, 24 horas) | No rust, blistering, or color change on the plating surface. |
3. What Are the Key Precautions to Avoid Defects?
Electroplating prototypes are prone to issues like bubbles, má adesão, or color inconsistency. Below are critical precautions to mitigate risks.
3.1 Seleção de Materiais
- 3D Printing Bases: Use photoresist resins (SLA/DLP) — avoid PLA or resins with fillers (por exemplo, fibra de carbono) as they create uneven surfaces.
- CNC Machining Bases: Prioritize ABS or PC plastics — they are easy to electroless plate and have good adhesion with metal coatings.
- Avoid: Resins containing amino groups or plastics with low heat resistance (por exemplo, PP) — they degrade in plating solutions.
3.2 Structural Design
- Avoid Deep Holes/Complex Cavities: Plating solutions cannot penetrate deep (>5mm) or narrow (<2milímetros) spaces, leading to unplated areas or bubbles. If holes are necessary, design them with a 15°+ draft angle for solution flow.
- Reserve Coating Thickness Space: Add 0.1–0.2mm to the prototype’s dimensions — the metal coating increases size (por exemplo, a 10mm ABS part becomes 10.02–10.1mm after 0.02–0.1mm chrome plating), which affects assembly fit.
3.3 Controle de Processo
- Bubble Prevention: Thoroughly clean the prototype before plating (ultrasonic cleaning is recommended) and stir the plating solution continuously during processing to release trapped air.
- Consistência de cores: For multi-batch prototypes, use the same plating solution (replenish chemicals regularly) and control parameters (temperatura, current density) within ±2% variation.
- Conductive Layer Quality: For resin prototypes, ensure conductive paint is evenly sprayed (no thick edges) — uneven conductivity causes uneven plating.
4. What Are the Typical Application Scenarios?
Electroplating prototypes solve specific problems across industries where aesthetics, conjunto, or functionality are critical.
4.1 Design Verification
- Use Case: Validating the CMF of a smartphone’s stainless steel frame. An electroplated prototype (chrome or brushed nickel finish) lets designers check if the texture matches brand guidelines and user expectations before mass production.
- Industry Examples: Eletrônicos de consumo (invólucros de laptop, smartwatch bands), home appliances (refrigerator door handles, washing machine control knobs).
4.2 Assembly Compatibility Testing
- Use Case: Testing how an electroplated car interior trim fits with a plastic dashboard. The prototype’s metal coating adds thickness (0.05milímetros), so engineers can verify if the trim snaps into place without gaps or interference.
- Industry Examples: Automotivo (acabamentos interiores, maçanetas), mobília (metal-plated cabinet hinges).
4.3 Marketing & Exhibition
- Use Case: A startup uses electroplated prototypes of its new smart speaker (gold-plated grille, chrome base) for trade shows — they look like final products but cost 70% less than mold-based samples.
- Industry Examples: Todas as indústrias (product launches, customer demos, promotional photography).
4.4 Teste Funcional
- Use Case: Testing the wear resistance of an electroplated brass USB-C connector. The prototype is cycled 10,000 times (simulating plug/unplug use) — the nickel-chrome coating must remain intact (sem descascar) to ensure durability.
- Industry Examples: Eletrônica (conectores, charging ports), dispositivos médicos (stainless steel tool handles).
5. What Are the Alternatives to Electroplating Prototypes?
If budget is tight (<$100 per prototype) or lead time is short (<5 dias), consider these alternatives—though they trade off some realism or durability.
| Alternative | Como funciona | Vantagens | Limitações | Ideal para |
| Vacuum Coating (PVD) | Physical vapor deposition of a thin metal layer (alumínio, nitreto de titânio) onto the prototype surface. | – Rápido (3–5 dias), lower cost than electroplating (\(50–\)150 por unidade).- No toxic chemicals (environmentally friendly). | – Poor adhesion (peels easily with friction).- Limited color options (mostly silver, ouro). | Short-term exhibition prototypes (toy casings, promotional models). |
| Metallic Paint Spraying | Spray a mixture of metal flakes (alumínio, cobre) and acrylic paint onto the prototype. | – Very low cost (\(20–\)50 por unidade), rápido (1–2 dias).- Easy to touch up if damaged. | – No metallic texture (flat appearance).- Poor durability (scratch easily, fades in sunlight). | Temporary display models (concept sketches turned into physical samples). |
| Metal Foil/Simulated Film | Paste self-adhesive metal foil (alumínio, cromo) or simulated film onto the prototype surface. | – Instant (30 minutes–1 hour), cheapest option (\(5–\)20 por unidade). | – No adhesion to curved surfaces (bubbles easily).- Not durable (peels off with handling). | Urgent customer demos or internal design reviews. |
Yigu Technology’s Perspective
Na tecnologia Yigu, we see electroplating prototypes as a “design validator” that saves teams from costly post-mold reworks. Too many clients rush to mold opening without testing electroplated surfaces—only to find the chrome finish has bubbles or the gold plating fades. Our approach: We work with clients to select the right base material (por exemplo, SLA resin for complex shapes, ABS for high precision) and optimize plating parameters (por exemplo, current density for uniform chrome). Por exemplo, we helped a consumer electronics client fix adhesion issues in their smartphone frame prototype by adjusting the roughening step (switching from sandblasting to chemical etching), cutting rework time by 50%. While electroplating costs more (\(200–\)500 por unidade) and takes longer (7–15 days) than alternatives, it’s worth it for accurate, production-ready results.
Perguntas frequentes
- Can electroplating prototypes be used for functional testing (por exemplo, conductivity or corrosion resistance)?
Yes—for functional needs, use thicker plating (0.1-0,3mm) and choose appropriate metals (por exemplo, copper for conductivity, 316 aço inoxidável para resistência à corrosão). Conduct tests like salt spray (24 horas) or current flow measurements to validate performance.
- How long does it take to make an electroplating prototype, and what is the cost?
Tempo de espera: 7–15 days (including base prototype fabrication, chapeamento, and post-treatment). Custo: \(200–\)500 por unidade (varia de acordo com o tamanho, plating type—gold is more expensive than chrome—and base material).
- What should I look for when choosing an electroplating prototype supplier?
Prioritize three factors: 1) Experience with your base material (por exemplo, resin or ABS); 2) Ability to provide proofing (ask for a small sample to check adhesion and color); 3) Compliance with environmental standards (RoHS for heavy metals like lead/cadmium in plating solutions).