O desenvolvimento de um modelo de protótipo de misturador requer um processo de usinagem CNC preciso para validar a racionalidade do projeto, test component fit (por exemplo, blade assembly, transmission structures), and evaluate user-centric details (por exemplo, non-slip base, button responsiveness). Unlike simple appliances, mixers have compact, high-functionality structures—from curved stirring 刀组 (knife sets) to transparent mixing cups—that demand tailored machining strategies. Este guia detalha todo o fluxo de trabalho, from preliminary design to final assembly, with key parameters, seleções de materiais, and practical tips to ensure prototype success.
1. Preparação Preliminar: Lay the Foundation for Machining
The success of CNC machining starts with thorough preparation, including 3D modeling, seleção de materiais, and equipment/tool readiness. This stage avoids rework and ensures alignment with design goals.
(1) 3D Modeling: Define Mixer Structure with Precision
Use professional CAD software (por exemplo, SolidWorks, UG, ProE) to create a detailed 3D model covering all critical components. The model must balance aesthetic design, functional logic, and machining feasibility.
| Component Category | Key Design Details | Precision Requirements | Purpose |
| Main Body (Shell) | Streamlined contour, non-slip base (groove depth 2mm), button mounting holes (Φ8mm) | Shell dimensional error ±0.2mm; hole position tolerance ±0.1mm | Ensure structural stability; fit control buttons and motor components |
| Mixing Cup (Transparente) | Inner cavity volume (por exemplo, 600mL), feeding port (Φ60mm), discharge outlet (Φ20mm) | Cavity roundness error ≤0.1mm; wall thickness uniformity ±0.05mm | Ensure smooth material mixing; avoid leakage at connections |
| Knife Set & Tool Holder | Blade curve (radius 5mm), mounting slot (depth 6mm), gear cavity (for POM gears) | Slot depth tolerance ±0.05mm; gear cavity clearance 0.1mm | Fit rotating components; ensure smooth blade operation |
Model Optimization Tips:
- Component Splitting: Split integrated structures (por exemplo, cup body + lid) into independent parts to avoid tool interference. Por exemplo, machine the mixing cup and its lid separately, then assemble with a sealing ring.
- Process Marking: Label critical features (por exemplo, “polish inner wall of mixing cup”) and reference datums (por exemplo, base bottom as origin) to guide CNC programming.
- Interference Check: Use software to simulate blade rotation—ensure 0.5mm clearance between blade and cup wall to prevent friction and material jamming.
(2) Material Selection: Match Performance to Component Roles
Mixer components have distinct functional needs (transparência, resistência ao desgaste, força), so material selection is critical. Below is a detailed comparison of suitable options:
| Tipo de material | Applicable Components | Propriedades principais | Machinability Advantages |
| Plástico ABS | Main shell, base, lid | Alta resistência ao impacto (Izod strength 20 kJ/m²), fácil de colorir, baixo custo | Low tool wear; machinable at 8,000–12,000 rpm (fast and efficient) |
| PC Plastic | Transparent mixing cup, observation window | High transparency (light transmittance ≥88%), impact-resistant (10x stronger than glass) | Precision cutting achievable; minimal edge chipping (≤0.1mm) |
| POM (Polyoxymethylene) | Gears, tool holder (wear-resistant parts) | Low friction coefficient (0.15), high wear resistance, good dimensional stability | No deformation during machining; suitable for small transmission parts |
| Liga de alumínio (6061) | Motor brackets, metal decorative parts | High rigidity (resistência à tracção 276 MPa), resistente à corrosão | Fast cutting speed; surface can be anodized for enhanced texture |
| Aço inoxidável (304) | Simulation knife shafts (optional) | Alta resistência, resistente à corrosão, resistente ao desgaste | Suitable for high-precision cutting; maintains shape under stress |
Material Blank Preparation:
- Cut blanks with 5–10mm machining allowance on all sides to accommodate roughing and finishing:
- A PC mixing cup (final size: Φ90mm×150mm) needs a Φ100mm×160mm blank.
- An ABS main shell (220mm×160mm×90mm) requires a 230mm×170mm×100mm blank.
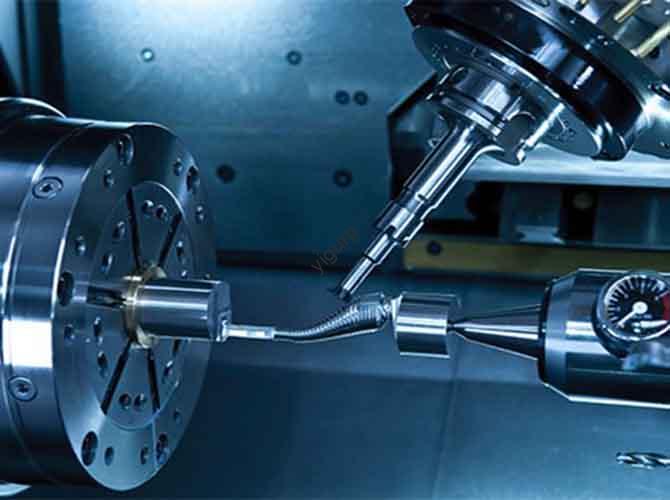
(3) Equipamento & Tool Preparation: Ensure Machining Accuracy
Select CNC equipment and tools based on component complexity and material properties to avoid defects like tool marks or dimensional deviations.
| Equipment/Tool Type | Selection Criteria | Recommended Specifications |
| CNC Machining Center | 3-axis for flat parts; 5-axis for curved surfaces (por exemplo, blade curves) | Positioning accuracy ±0.005mm; spindle speed range 8,000–24,000 rpm |
| Milling Cutters | Solid carbide for plastics; aço rápido (HSS) for metal | – Roughing: Φ8–Φ12mm flat-bottom mills (fast material removal)- Acabamento: Φ2–Φ6mm ball-head mills (superfícies curvas); Φ0.5–2mm small mills (logo/buttons) |
| Special Tools | Taper cutters (chamfering cup edges); diamond polishers (PC transparency) | Taper angle 45°; diamond polisher grit 1,200# (for PC surface refinement) |
| Fixtures | Vacuum suction cups (flat ABS/PC parts); precision vises (metal components) | Vacuum pressure ≥0.8 MPa; vise clamping force ≥3 kN (prevents workpiece displacement) |
2. CNC Machining Execution: From Blank to Prototype Components
This stage divides machining into roughing and finishing to balance efficiency and precision—critical for mixer components with diverse structures.
(1) Rough Machining: Shape the Foundation
Roughing removes most excess material to bring the blank close to the final shape, prioritizing speed while avoiding tool damage.
| Component Type | Roughing Focus | Key Operations & Parameters |
| ABS Main Shell | Machine outer contour, base grooves, button holes | Use Φ10mm flat-bottom mill; velocidade de corte 10,000 rpm, taxa de alimentação 1,200 mm/min; layer depth 3mm |
| PC Mixing Cup | Mill outer wall and inner cavity; pre-drill feeding/discharge outlets | Use Φ8mm end mill; velocidade de corte 9,000 rpm, taxa de alimentação 800 mm/min; retain 0.5mm finishing allowance |
| POM Gear Cavity | Machine cavity outline and mounting holes | Use Φ6mm end mill; velocidade de corte 8,000 rpm, taxa de alimentação 600 mm/min; avoid overheating (POM melts at 160°C) |
Post-Roughing Inspection:
- Use a digital caliper to check key dimensions (por exemplo, mixing cup diameter, shell height) and ensure they are within ±0.5mm of the design value.
- Clean chips with compressed air—especially critical for PC parts (chips left on surfaces cause scratches during finishing).
(2) Acabamento: Achieve Precision & Qualidade de Superfície
Finishing refines components to meet final design requirements, focusing on transparency (PC), smoothness (ABS), and dimensional accuracy (POM/metal).
| Component Type | Finishing Focus | Key Operations & Parameters |
| PC Mixing Cup | Polish inner/outer walls (transparência); chamfer edges (prevent sharpness) | Use Φ4mm ball-head mill (inner wall); velocidade de corte 15,000 rpm, taxa de alimentação 500 mm/min; then diamond polish (light transmittance ≥85%) |
| ABS Main Shell | Smooth shell surface; engrave logo/button labels (depth 0.3mm) | Use Φ2mm ball-head mill; velocidade de corte 12,000 rpm, taxa de alimentação 700 mm/min; surface roughness Ra ≤0.8μm |
| POM Gear Cavity | Refine cavity walls; ensure gear clearance (0.1milímetros) | Use Φ3mm end mill; velocidade de corte 9,000 rpm, taxa de alimentação 500 mm/min; dimensional tolerance ±0.05mm |
| Aluminum Motor Bracket | Smooth mounting surfaces; drill precision holes (Φ5mm) | Use Φ5mm twist drill; velocidade de corte 18,000 rpm, taxa de alimentação 1,000 mm/min; hole roundness error ≤0.02mm |
Finishing Quality Checks:
- For PC parts: Use a spectrophotometer to verify transparency (≥85%) and a surface roughness tester to confirm Ra ≤0.4μm.
- For POM gear cavities: Use a feeler gauge to check clearance (0.1milímetros) and ensure gears rotate smoothly without jamming.
3. Pós-processamento: Enhance Aesthetics & Funcionalidade
Post-processing bridges the gap between machined components and a realistic mixer prototype, focusing on surface refinement and assembly readiness.
(1) Tratamento de superfície: Tailor to Material & Component Role
| Material/Component | Surface Treatment Steps | Expected Outcome |
| ABS Main Shell | 1. Sand with 400#→800#→1200# sandpaper (remove tool marks)2. Degrease with isopropyl alcohol3. Spray matte/gloss paint (50μm thickness) | Paint adhesion ≥4B (no peeling); surface gloss 30–70 GU (per design) |
| PC Mixing Cup | 1. Diamond polishing (1,200#→2,000# grit)2. Clean with lens cleaner3. Apply anti-scratch coating | No visible scratches; anti-scratch level ≥3H (pencil test) |
| Aluminum Brackets | 1. Degrease with alkaline cleaner2. Anodize (silver-gray, 8–10μm film)3. Sandblast (matte finish) | Resistência à corrosão: No rust after 48-hour salt spray test; friction coefficient ≤0.15 |
| POM Gear Parts | No additional treatment (naturally smooth surface) | Friction coefficient remains 0.15; no wear after 1,000 rotation tests |
(2) Assembly & Functional Debugging
Proper assembly ensures components work together seamlessly, while functional tests validate the prototype’s usability.
Assembly Steps:
- Pre-Assembly Check: Verify all parts meet dimensional requirements (por exemplo, mixing cup fits shell with 0.5mm clearance).
- Component Fixing:
- Bond PC mixing cup to ABS shell with food-grade adhesive (ensure no leakage).
- Screw aluminum motor brackets to the base (torque 5 N·m, avoid thread damage).
- Install POM gears and 3D-printed resin simulation blades (replace real metal blades for safety).
- Sealing Test: Pour 300mL water into the mixing cup—check for leakage at connections (no water seepage within 10 minutos).
Functional Debugging:
- Button Operation: Test switch/pulse buttons 100 times—stroke 2mm ±0.2mm, feedback force 5–8N (comfortable for users).
- Blade Rotation: Simulate mixing with a motor (600 rpm)—ensure blade rotates smoothly, no friction with cup wall.
- Material Flow: Pour simulated ingredients (por exemplo, água + flour mixture) through the feeding port—check flow rate (≥80mL/min) and no residue in the cup.
4. Controle de qualidade & Process Optimization
Strict quality control ensures the prototype meets design standards, while optimization reduces costs for future iterations.
(1) Key Quality Control Standards
| Control Item | Acceptance Criteria | Inspection Method |
| Precisão Dimensional | – Mixing cup: ±0,1 mm- Shell: ±0,2 mm- Gear cavity: ±0,05 mm | CMM (critical components); digital caliper (general parts) |
| Qualidade de Superfície | – PC: Ra ≤0.4μm, transparency ≥85%- ABS: Ra ≤0.8μm, no tool marks | Surface roughness tester; spectrophotometer; visual inspection (500lux light) |
| Functional Performance | – No leakage (10-minute water test)- Blade rotation: 600 rpm ±50 rpm | Water leakage test; tachometer (blade speed) |
(2) Process Optimization Tips
- Material Saving: Design hollow structures for ABS parts (por exemplo, base with 3mm thick walls) to reduce blank size—saves 20–30% material cost.
- Machining Efficiency: Combine roughing and semi-finishing for simple parts (por exemplo, decorative strips) to cut tool change time by 15%.
- Post-Processing Simplification: For hidden parts (por exemplo, motor brackets), skip anodizing—use natural aluminum finish to save 10–15% of treatment cost.
Yigu Technology’s Perspective on CNC Machining Mixer Prototype Models
Na tecnologia Yigu, we believe functional precision and cost balance are the core of mixer prototype machining. Many clients overcomplicate processes—for example, using 5-axis machines for flat ABS shells when 3-axis works, or over-polishing hidden POM parts. Our team optimizes for both quality and efficiency: We use PC with diamond polishing for mixing cups (ensuring transparency ≥85%) and 3-axis machines for most components to cut 20% of machining time. We also simplify blade simulation (3D-printed resin instead of metal) for safety and cost. For batch prototypes, we use multi-cavity fixtures to machine 2–3 mixing cups at once, reducing production time by 30%. Our goal is to deliver prototypes that validate design and user needs at the lowest cost.
Perguntas frequentes
- Why is POM preferred for mixer gear components instead of ABS?
POM has a lower friction coefficient (0.15 contra. 0.3 for ABS) and higher wear resistance, making it ideal for transmission gears that require smooth rotation and long-term use. ABS is prone to wear and deformation under repeated friction, which would cause gear jamming in mixers.
- How to prevent PC mixing cups from scratching during CNC machining?
We take three key steps: 1) Use sharp, high-quality solid carbide tools to minimize cutting force; 2) Apply a protective film to the cup surface before machining; 3) Clean chips with compressed air (not cloth) to avoid abrasive scratches. These measures keep the PC surface scratch-free.
- What is the total time required to machine a single mixer prototype?
Total time is ~4–7 days: 1 day for 3D modeling/material prep, 1–2 days for CNC machining (roughing + acabamento), 1–2 days for post-processing (polishing/painting), and 1–2 days for assembly/debugging. Batch production (10+ protótipos) can be shortened to 3–5 days with parallel processing.