Na jornada do conceito de design ao produto final, a prova de protótipo desempenha um papel crítico na validação de ideias, funcionalidade de teste, e refinando designs. Mas com vários métodos disponíveis, como você sabe qual é o certo para o seu projeto? Este guia completo irá detalhar os métodos mais populares de prova de protótipos, suas vantagens, ideal applications, and key considerations to help you make informed decisions.
Understanding Prototype Proofing: The Foundation of Product Development
Before diving into specific methods, let’s clarify what prototype proofing entails. Simplificando, it’s the process of creating physical models of a design to verify its feasibility, funcionalidade, and appearance before moving to mass production. Think of it as a trial run for your product—an opportunity to catch issues early when they’re easier and cheaper to fix.
Prototype proofing methods have evolved significantly with technological advancements, offering more options than ever before. Hoje, you can choose from computer-controlled machining processes, técnicas de fabricação aditiva, mold-based methods, and rapid tooling solutions, each with its own set of strengths and limitations.
The right method for your project depends on factors like part complexity, requisitos de materiais, volume de produção, orçamento, e linha do tempo. By understanding each method’s capabilities, you can select the one that aligns best with your specific needs and avoid wasting resources on unsuitable approaches.
Usinagem CNC: Precision Engineering for Complex Prototypes
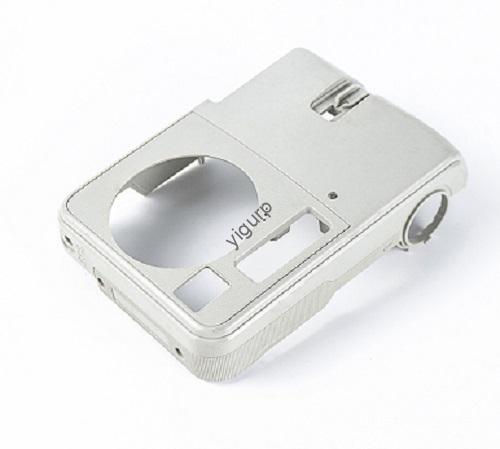
One of the most widely used methods in prototype proofing is Usinagem CNC—a subtractive manufacturing process that uses computer numerical control to shape materials with exceptional accuracy. This method operates by removing material from a solid block using pre-programmed toolpaths, creating precise components that match your design specifications.
How CNC Machining Works for Prototype Proofing
CNC machining starts with a digital 3D model created in CAD software. This model is converted into machine-readable code (Código G) that guides the CNC machine’s cutting tools. The machine then uses various tools—such as drills, moinhos, and lathes—to remove material from the workpiece, gradually transforming it into the desired shape.
Modern CNC machines can achieve tolerances as tight as ±0.0005 inches (0.0127 milímetros), making them ideal for prototypes that require high precision. This level of accuracy ensures that parts fit together perfectly, which is crucial for functional testing and design validation.
Key Advantages of CNC Machining for Prototypes
- Versatilidade de materiais: CNC machining can handle a wide range of materials, incluindo metais (alumínio, aço, titânio), plásticos (ABS, nylon, ESPIAR), and even wood and composites. This makes it suitable for prototypes that need to mimic the final product’s material properties.
- Complex Geometry Capability: It excels at producing parts with intricate details, internal features, and complex shapes that might be challenging for other methods.
- Hard Material Processing: Unlike some prototype methods that struggle with tough materials, CNC machining can easily handle hardened metals and high-performance plastics.
- Fine Surface Finish: With the right tools and settings, CNC machining can achieve smooth surface finishes (Ra values as low as 0.8 μm), reducing the need for additional post-processing.
Ideal Applications for CNC Machining Prototypes
CNC machining shines when working with large or irregularly shaped workpieces that demand precision. It’s particularly valuable in industries like aerospace, automotivo, e dispositivos médicos, where component accuracy is critical. Por exemplo, a prototype of a turbine blade or a surgical instrument would benefit greatly from CNC machining’s precision and material capabilities.
No entanto, CNC machining may not be the most cost-effective option for very complex geometries with internal cavities or for projects with extremely tight deadlines, as setup times can be longer than some additive methods.
3Impressão D: Additive Manufacturing for Rapid Prototyping
3Impressão D—also known as additive manufacturing—has revolutionized prototype proofing with its ability to create complex three-dimensional objects layer by layer from digital models. This method builds parts by depositing material (usually plastic, resina, ou metálico) one thin layer at a time, offering unique advantages for certain prototype applications.
The 3D Printing Process for Prototypes
The 3D printing workflow begins with a detailed 3D CAD model, which is sliced into hundreds or thousands of thin layers by specialized software. The 3D printer then reads these slices and deposits material accordingly, fusing each layer to the previous one until the entire object is complete.
Several 3D printing technologies are commonly used for prototype proofing, including Fused Deposition Modeling (FDM), Estereolitografia (SLA), e Sinterização Seletiva a Laser (SLS), each with its own material options and precision levels.
Why 3D Printing Stands Out in Prototype Proofing
- Complex Internal Structures: 3D printing truly excels at creating parts with complex internal geometries that would be impossible or extremely difficult to produce with traditional machining methods. Hollow sections, estruturas treliçadas, and intricate cavities can be printed without the need for specialized tooling.
- Retorno rápido: Once the digital model is ready, 3D printers can produce prototypes in a matter of hours, significantly shortening the time from design to physical part. This makes it ideal for fast-paced development cycles.
- Nenhuma ferramenta necessária: Unlike mold-based methods, 3D printing doesn’t require expensive tools or molds, reducing upfront costs—especially for single prototypes or small batches.
- Flexibilidade de projeto: Making changes to a 3D printed prototype is as simple as modifying the digital model, allowing for quick iterations and design improvements.
Best Uses for 3D Printed Prototypes
3D printing is particularly valuable for concept models, visual prototypes, and early-stage functional testing where speed and design complexity are priorities. It’s widely used in industries like consumer electronics, design de produto, and healthcare for creating everything from smartphone casings to anatomical models.
No entanto, 3D printed prototypes may have limitations in terms of material strength and surface finish compared to CNC machined parts, making them less suitable for high-stress functional testing or prototypes that require a premium appearance.
Silicone Replica Mold: Cost-Effective Small-Batch Prototyping
For projects requiring small quantities of prototypes, silicone replica mold (also known as silicone molding or RTV molding) offers an efficient and economical solution. This method involves creating a mold from a master pattern (often 3D printed or CNC machined) and then using that mold to cast multiple copies of the prototype.
How Silicone Replica Molding Works
The process starts with creating a master model of your design using another prototyping method. A liquid silicone rubber is then poured over or around this master, capturing every detail of its surface and shape. Once the silicone cures (geralmente dentro 24 horas), the master is removed, leaving a precise mold cavity. This mold is then used to cast resin, plástico, or even low-melting-point metals to create prototype copies.
Advantages of Silicone Replica Mold for Prototyping
- Custo-benefício: Silicone molds are relatively inexpensive to produce compared to metal tooling, making this method ideal for small-batch production (tipicamente 10-50 unidades).
- Short Production Cycle: From master model to finished prototypes, the entire process can often be completed in a week or less, much faster than traditional injection molding setup.
- High Detail Replication: Silicone rubber captures even the finest details of the master model, ensuring that prototypes have accurate dimensions and surface textures.
- Versatilidade de materiais: A wide range of casting materials are available, including rigid plastics, flexible rubbers, and even materials that mimic the properties of metal or glass.
- Good High-Temperature Resistance: Many silicone molds can withstand temperatures up to 200°C (392°F), allowing for casting with heat-curing materials.
Limitations to Consider
While highly useful, silicone replica molds do have limitations. Their lifespan is relatively short, typically producing only 15-20 high-quality copies before degradation affects detail replication. They’re also not resistant to strong acids, álcalis, or prolonged exposure to UV light, which can cause aging and breakdown. For these reasons, silicone molding is best suited for functional testing and market validation rather than long-term production.
Ferramentas Rápidas: Accelerating Early-Stage Product Development
Ferramentas rápidas bridges the gap between prototype proofing and mass production, offering a faster, more cost-effective alternative to traditional production tooling for early-stage product development. This method focuses on creating functional tooling that can produce prototype parts using production-like processes, but with shorter lead times and lower costs.
The Role of Rapid Tooling in Prototype Proofing
Unlike traditional tooling, which can take months to produce and cost tens of thousands of dollars, rapid tooling methods can create functional molds or dies in a matter of weeks at a fraction of the cost. These tools aren’t intended for mass production runs (usually limited to a few hundred or thousand parts), but they allow engineers to test how designs perform when produced using manufacturing processes similar to those intended for final production.
Common rapid tooling techniques include CNC-machined aluminum molds for injection molding, 3D printed molds, and cast metal tooling using sacrificial patterns.
Benefits of Rapid Tooling for Prototyping
- Lower Cost Than Production Tooling: Rapid tooling typically costs 30-70% less than traditional hardened steel tooling, making it accessible for early-stage testing.
- Faster Turnaround: Production tooling can take 8-12 semanas, while rapid tooling can often be completed in 2-4 semanas, accelerating the product development cycle.
- Production-Like Parts: By using similar materials and processes to final production, rapid tooling produces prototypes that closely match the mechanical properties and appearance of the intended final product.
- Design Validation: These prototypes are ideal for testing assembly fit, functional performance, and even market response before committing to expensive production tooling.
When to Choose Rapid Tooling
Rapid tooling is particularly valuable when you need to test how your design will perform in production-like conditions or when you need multiple identical prototypes for testing or market research. It’s commonly used in industries like automotive, bens de consumo, and medical devices where production processes like injection molding are standard.
Choosing the Right Prototype Proofing Method: A Decision Framework
With several effective methods available, selecting the right one for your project requires careful consideration of your specific needs. Here’s a framework to guide your decision:
Key Factors to Evaluate
- Part Complexity: Highly complex geometries with internal features often favor 3D printing, while simpler, high-precision parts may be better suited for CNC machining.
- Requisitos de materiais: If your prototype needs to match the strength, resistência ao calor, or other properties of your final material, CNC machining or rapid tooling may be better choices than 3D printing.
- Quantity Needed: For single prototypes, 3D printing or CNC machining is usually best. Para pequenos lotes (10-50 unidades), silicone replica molding shines. For larger pre-production runs, rapid tooling may be appropriate.
- Budget Constraints: 3D printing and silicone molding generally offer lower upfront costs, while CNC machining and rapid tooling may have higher initial costs but produce more durable prototypes.
- Timeframe: 3D printing typically offers the fastest turnaround, followed by silicone molding, Usinagem CNC, e ferramentas rápidas.
- Accuracy Requirements: For tight tolerances (±0.001 inches or better), CNC machining is usually the best option.
Comparison Table: Prototype Proofing Methods at a Glance
| Method | Melhor para | Typical Lead Time | Tolerance Capability | Batch Size Suitability | Opções de materiais | Cost Per Unit (Baixo volume) |
| Usinagem CNC | High-precision metal/plastic parts | 3-7 dias | ±0,0005 polegadas | 1-10 unidades | Metais, plásticos, compósitos | \(50-\)500+ |
| 3Impressão D | Geometrias complexas, modelos conceituais | 1-3 dias | ±0,005 polegadas | 1-5 unidades | Plásticos, resinas, some metals | \(20-\)200+ |
| Silicone Replica Mold | Small-batch functional parts | 5-10 dias | ±0.002 inches | 10-50 unidades | Resinas, plásticos, borrachas | \(10-\)100+ |
| Ferramentas Rápidas | Production-like prototypes | 2-4 semanas | ±0,001 polegadas | 50-500 unidades | Production plastics/metals | \(5-\)50+ |
Yigu Technology’s View on Prototype Proofing Methods
Yigu Technology believes selecting the right prototype proofing method is critical for development success. Each method—CNC machining, 3Impressão D, moldagem de silicone, rapid tooling—has unique strengths. By matching project needs (complexidade, quantidade, orçamento) to method capabilities, teams accelerate validation, reduce risks, and bring better products to market faster.
Frequently Asked Questions (Perguntas frequentes)
- Which prototype proofing method is best for complex internal structures?
3D printing is ideal for complex internal structures, as it can create almost any shape without needing complex tools or molds, making it perfect for intricate designs.
- How many prototypes can I make with silicone replica molds?
Silicone replica molds typically produce 15-20 high-quality prototypes before showing signs of wear. They’re best for small-batch production and functional testing.
- Is CNC machining more accurate than 3D printing for prototypes?
Sim, CNC machining generally offers higher accuracy with tolerances as tight as ±0.0005 inches, compared to 3D printing’s typical ±0.005 inches, making it better for precision parts.